1. Вовед и повеќеview
The Avision AV 320D2+ is a high-performance A3 document scanner designed for efficient and reliable document digitization. Featuring a 600 dpi optical resolution and USB connectivity, it is capable of handling a wide range of document sizes up to A3, making it suitable for various professional environments. This manual provides essential information for setting up, operating, maintaining, and troubleshooting your scanner.
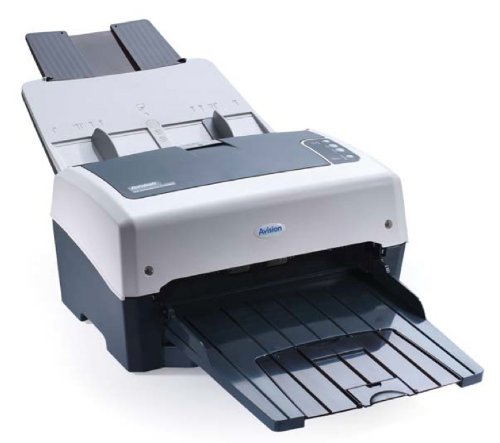
Figure 1: Avision AV 320D2+ A3 Document Scanner. This image displays the Avision AV 320D2+ A3 Document Scanner from a front-right perspective. The scanner is light grey and dark grey, featuring an automatic document feeder (ADF) at the top with paper guides visible, and an extended output tray at the front. The Avision logo is visible on the front panel.
2. Поставување
2.1 Отпакување
- Внимателно извадете го скенерот и сите додатоци од пакувањето.
- Проверете дали се присутни сите компоненти наведени во списокот за пакување.
- Remove all protective tapes and packing materials from the scanner, including any inside the document feeder and output tray.
2.2 Поврзување на скенерот
- Поставете го скенерот на стабилна, рамна површина во близина на вашиот компјутер.
- Connect the power adapter to the scanner's power input and then plug it into an electrical outlet.
- Connect one end of the supplied USB cable to the USB port on the scanner and the other end to an available USB port on your computer.
- Power on the scanner using the power button, typically located on the side or rear panel.
2.3 Инсталација на софтвер
Before using the scanner, you must install the necessary drivers and scanning software. Refer to the included software CD or visit the official Avision website for the latest drivers and utilities.
- Insert the software installation CD into your computer's CD/DVD drive, or download the software package from the Avision support webсајт.
- Follow the on-screen instructions to install the scanner drivers and bundled scanning applications. It is recommended to install all provided software for full functionality.
- Рестартирајте го компјутерот ако се побара откако ќе заврши инсталацијата.
3. Ракување со скенерот
3.1 Вчитување документи
- Автоматски внесувач на документи (ADF): Open the ADF input tray. Adjust the paper guides to fit the width of your documents. Place the documents face-down with the top edge first into the ADF. The standard sheet capacity is 50 sheets.
- Ensure documents are free of staples, paper clips, or any foreign objects that could damage the scanner.
- For mixed-size documents, ensure they are aligned properly to prevent skewing.
3.2 Basic Scanning Procedures
- Load your documents into the ADF as described above.
- Open your preferred scanning application (e.g., Avision Button Manager, TWAIN/ISIS compatible software).
- Select the Avision AV 320D2+ as your scanner.
- Choose your desired scanning settings (e.g., color mode, resolution, destination folder).
- Започнете го скенирањето од софтверскиот интерфејс. Скенерот автоматски ќе ги внесе и скенира документите.
- Review скенираните слики и зачувајте ги на саканата локација.
3.3 Поставки за скенирање
The scanner supports various settings to optimize scan quality and file големина:
- Резолуција: Adjustable up to 600 dpi. Higher resolution provides better image quality but results in larger file големини.
- Режим на боја: Options typically include Color, Grayscale, and Black & White (Binary).
- Дуплекс скенирање: The AV 320D2+ supports duplex (two-sided) scanning, allowing you to capture both sides of a document in a single pass.
- Излезен формат: Common output formats include PDF, JPEG, TIFF, and searchable PDF.
4. Одржување
4.1 Чистење на скенерот
Редовното чистење обезбедува оптимални перформанси и го продолжува животниот век на вашиот скенер.
- Надворешност: Избришете ги надворешните површини со мека, гamp, крпа без влакненца. Не користете абразивни средства за чистење или растворувачи.
- Стаклени површини: Користете мека крпа гampened with a non-abrasive glass cleaner to clean the scanner's glass surfaces (if applicable).
- Ролки: Периодично чистете ги ролерите за внесување со крпа без влакненца лесноampсо изопропил алкохол за отстранување на прашина и остатоци од хартија.
- Секогаш исклучувајте го скенерот од струја и извадете го од струја пред чистење.
5 Смена на проблеми
This section addresses common issues you might encounter with your Avision AV 320D2+ scanner.
| Проблем | Можна причина | Решение |
|---|---|---|
| Скенерот не е откриен од компјутерот | Лабав USB кабел, исклучено напојување, проблем со драјверот | Проверете ја USB-врската, проверете дали скенерот е вклучен и повторно инсталирајте ги драјверите. |
| Заглавување на хартија | Misaligned documents, worn rollers, foreign objects | Remove jammed paper carefully, align documents properly, clean rollers. |
| Лош квалитет на скенирање (ленти, заматени слики) | Dirty glass, incorrect settings, worn rollers | Clean scanner glass and rollers, adjust resolution/color settings. |
| Документите не се вчитуваат | Incorrectly loaded, worn feed rollers | Ensure documents are loaded correctly, clean or replace feed rollers if worn. |
6. Спецификации
Key technical specifications for the Avision AV 320D2+ scanner:
- Тип на производ: Скенер за документи
- Формат на хартија: A3
- Резолуција: 600 dpi (оптички)
- Поврзување: USB
- Боја: Црно/Бело
- Тежина: Приближно 26.46 фунти (12 кг)
- Потрошувачка на енергија: 38.4 вати
- Стандарден капацитет на листови (ADF): 50 листови
- Технологија на оптички сензор: CMOS
- Име на модел: AV320D2+
- Број на модел на ставка: FT-0807H
7. Гаранција и поддршка
7.1 Гаранција на производителот
The Avision AV 320D2+ scanner typically comes with a 2-годишна гаранција од производителот. This warranty covers defects in materials and workmanship under normal use. Please retain your proof of purchase for warranty claims. For specific terms and conditions, refer to the warranty card included with your product or visit the official Avision webсајт.
7.2 Техничка поддршка
For technical assistance, driver updates, or further troubleshooting not covered in this manual, please contact Avision customer support. Support contact information can usually be found on the Avision official webстраницата или во документацијата што е испорачана со вашиот скенер.
Note: Availability of spare parts and software updates may vary. Please check the manufacturer's official channels for the most current information.