
1. Вовед
This manual provides detailed instructions for setting up, operating, and maintaining your Epson L485 Wi-Fi Inktank Printer. Please read this manual thoroughly to ensure proper use and to maximize the performance and longevity of your device.
Производот завршиview
The Epson L485 is a versatile all-in-one printer offering print, scan, and copy functionalities with the added convenience of Wi-Fi Direct. It features an innovative ink tank system designed for high-volume printing with impressive page yields and a high print resolution for quality output.

Слика 1: Предна страна view of the Epson L485 Wi-Fi Inktank Printer.
Што има во кутијата
- Epson L485 Printer Unit
- Софтвер CD
- Кабел за напојување
- Гарантна картичка
- Set of Original Epson Ink Bottles (Black, Cyan, Magenta, Yellow)
Видео 1: Оверview of the Epson L485 Wi-Fi Inktank Printer's features and design.
2. Водич за поставување
Follow these steps to set up your Epson L485 printer for the first time.
Video 2: Step-by-step guide on how to set up your Epson InkTank Printer.
2.1 Initial Printer Preparation
- Распакувајте го печатачот: Внимателно извадете го печатачот од пакувањето. Отстранете ги сите заштитни ленти и материјали.
- Check Valve Position: Locate the ink tank valve on the side of the printer. Ensure it is in the upright (printing) position.
- Open Ink Tank Unit: Gently unhook the ink tank unit from the side of the printer and open its lid to access the ink tanks.
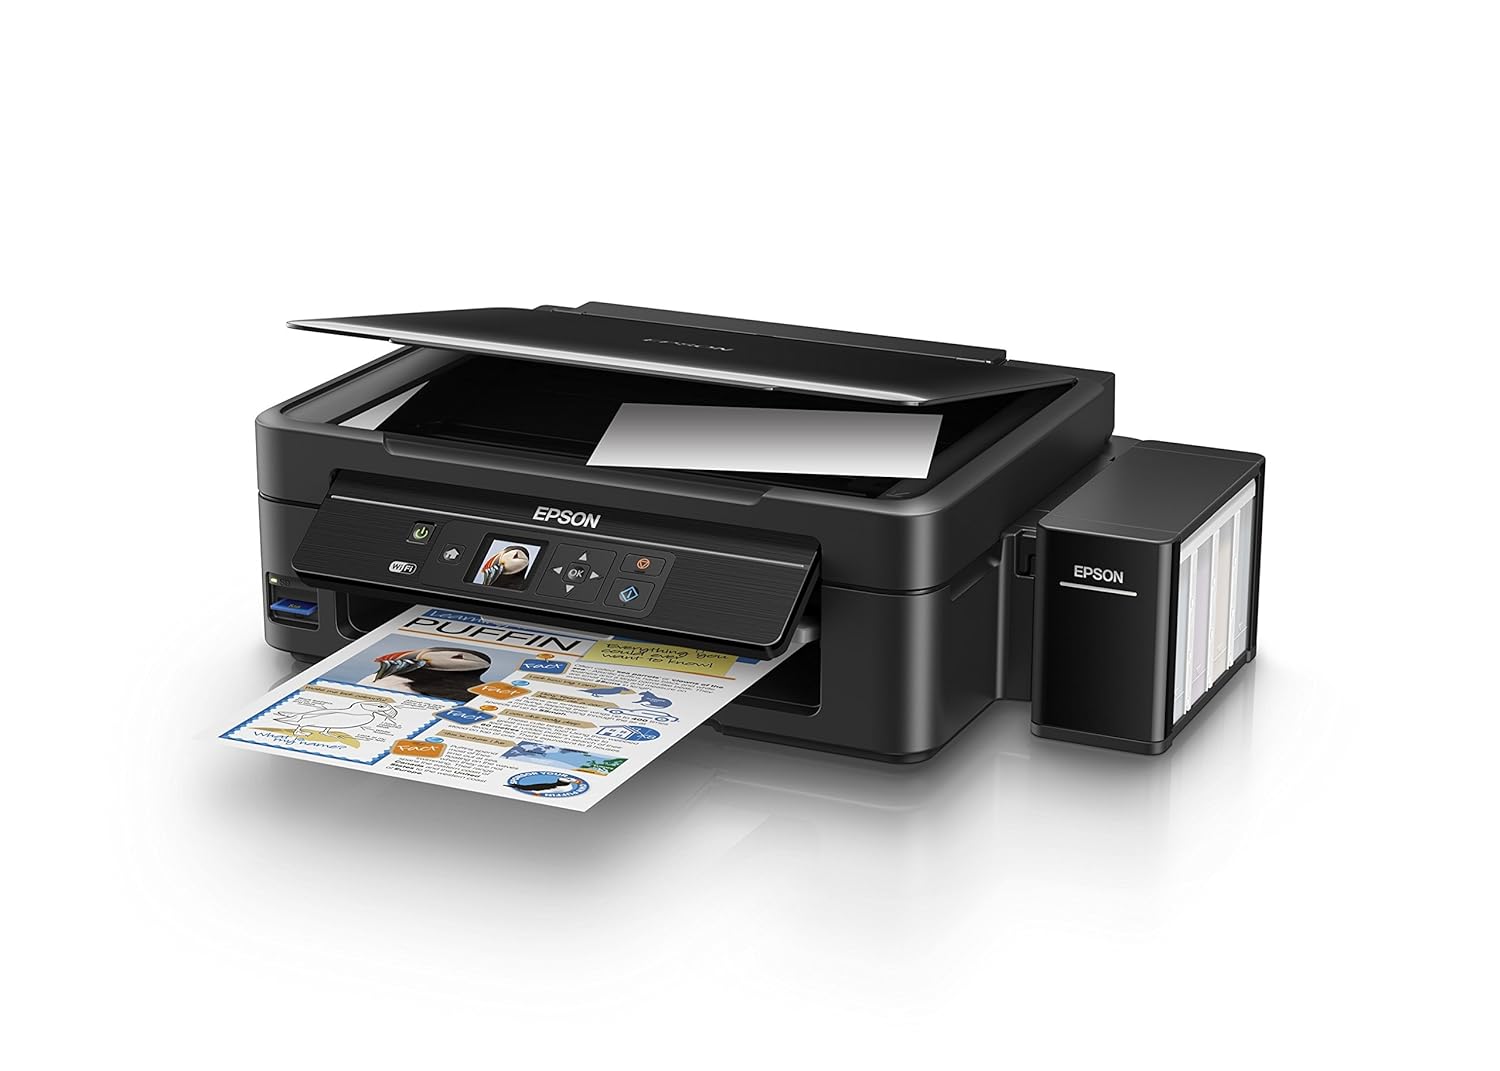
Figure 2: The ink tank unit unhooked and open, showing the ink reservoirs.
2.2 Полнење на резервоарите за мастило
- Prepare Ink Bottles: Snap off the tip of each ink bottle and remove the cap.
- Fill Ink Tanks: Match the color of the ink bottle with the corresponding ink tank. Carefully pour the entire contents of each ink bottle into its respective tank. Do not overfill.
- Безбедносни капачиња: Once all tanks are filled, replace the caps securely on the ink tanks.
- Close Ink Tank Unit: Close the lid of the ink tank unit and re-hook it to the printer.

Figure 3: Demonstrating the process of filling an ink tank with a yellow ink bottle.

Figure 4: The four color ink bottles used for the Epson L485 printer.
2.3 Power On and Ink Charging
- Поврзете напојување: Plug the power cable into the printer and then into a wall outlet.
- Turn On Printer: Притиснете го копчето за вклучување за да го вклучите печатачот.
- Initiate Ink Charge: Press and hold the 'Ink Charge' button (usually indicated by a droplet icon) for 3 seconds until the lights start blinking. The initial ink charging process takes approximately 20 minutes. Do not turn off or unplug the printer during this process.
- Завршување: The lights will stop blinking when ink charging is complete.
2.4 Инсталација на драјвери
- Insert Software CD: Insert the provided Software CD into your computer's CD/DVD drive. If your computer does not have a CD drive, download the latest drivers from the official Epson support webсајт.
- Следете ги упатствата на екранот: Follow the prompts on your computer screen to install the printer drivers and utilities. Agree to the license agreement and select 'Start & Connection' for setup.
- Connect USB Cable (if prompted): If setting up via USB, connect the USB cable between the printer and your computer when prompted by the installation software.
2.5 Connectivity Setup
The Epson L485 supports both USB and Wi-Fi connectivity.
USB конекција
Connect the USB cable from the printer to an available USB port on your computer. The printer should be recognized automatically after driver installation.
Поставување Wi-Fi
The printer features an LCD screen for easy Wi-Fi setup without needing a PC.
- Access Wi-Fi Setup: On the printer's control panel, navigate to the 'Wi-Fi Setup' option using the arrow keys and press 'OK'.
- Изберете мрежа: Choose your desired wireless network from the list and enter the password if required.
- Потврдете ја врската: Once connected, the Wi-Fi indicator light will be solid, and the LCD screen will confirm the setup is complete.

Figure 5: Demonstrating wireless printing from a smartphone to the Epson L485 printer.
3. Ракување со печатачот
3.1 Печатење
The Epson L485 delivers high-quality prints with a resolution of 5760 dpi. It offers print speeds of up to 33 ppm for black and 15 ppm for color documents.
- Ставете хартија: Load paper into the rear paper feeder. Adjust the paper guides to fit the paper size.
- Изберете задача за печатење: Од вашиот компјутер или мобилен уред, изберете го документот или сликата што сакате да ја испечатите.
- Прилагодете ги поставките: Choose your print settings (e.g., paper size, print quality, color/black & white) in the print dialog box.
- Печати: Кликнете на „Печати“ за да ја испратите задачата до печатачот.

Figure 6: The Epson L485 printer in action, producing a vibrant print.
3.2 Скенирање
The printer features a sheetfed scanner with an optical resolution of 1200 dpi x 2400 dpi for clear and detailed scans.
- Документ за место: Lift the scanner lid and place your document face-down on the scanner glass, aligning it with the corner mark.
- Започни скенирање: From your computer, open the Epson Scan software or use the scan function on the printer's control panel.
- Прилагодете ги поставките: Изберете поставки за скенирање, како што се резолуција, режим на бои и одредишна папка.
- Започнете со скенирање: Begin the scanning process.

Figure 7: The scanner bed of the Epson L485 printer with the lid open.
3.3 Копирање
Направете копии директно од контролната табла на печатачот.
- Документ за место: Place the document you wish to copy on the scanner glass.
- Select Copy Function: On the printer's LCD screen, navigate to the 'Copy' option.
- Прилагодете ги поставките: Select the number of copies, color or black & white, and other copy settings.
- Започни копирање: Притиснете го копчето „Старт“ за да започнете со копирање.
3.4 Wi-Fi Direct
Wi-Fi Direct allows you to connect your mobile devices directly to the printer without a router, enabling convenient wireless printing.
- Enable Wi-Fi Direct: On the printer's control panel, go to 'Wi-Fi Setup' and select 'Wi-Fi Direct'. Follow the on-screen instructions to enable it and view името и лозинката на мрежата.
- Поврзете мобилен уред: On your mobile device, go to Wi-Fi settings, find the printer's Wi-Fi Direct network, and connect using the provided password.
- Печати: Use an Epson printing app (e.g., Epson iPrint) or your device's native print function to print directly to the printer.
4. Одржување
4.1 Дополнување мастило
When ink levels are low, refill the tanks using genuine Epson ink bottles. Refer to section 2.2 for detailed ink filling instructions. Always use the correct color ink for each tank.
4.2 Чистење
Редовното чистење помага во одржувањето на квалитетот на печатењето и го продолжува животниот век на вашиот печатач.
- Надворешно чистење: Избришете ја надворешноста на печатачот со мека, дamp крпа. Избегнувајте употреба на абразивни средства за чистење.
- Чистење на главата за печатење: If print quality declines (e.g., missing lines, incorrect colors), perform a print head cleaning using the printer's utility software on your computer or through the printer's control panel menu.
- Проверка на млазницата: Run a nozzle check pattern to diagnose print quality issues before performing a head cleaning.
5 Смена на проблеми
Овој дел се однесува на вообичаени проблеми со кои може да се соочите со вашиот печатач Epson L485.
5.1 Печатачот не реагира
- Проверете дали печатачот е вклучен и безбедно поврзан со штекерот.
- Check the USB cable connection to both the printer and computer, or verify the Wi-Fi connection status.
- Рестартирајте го и печатачот и вашиот компјутер/мобилен уред.
5.2 Лош квалитет на печатење
- Perform a nozzle check to identify clogged nozzles. If necessary, run a print head cleaning cycle.
- Проверете ги нивоата на мастило и наполнете ги сите резервоари со ниско ниво.
- Ensure you are using genuine Epson ink and appropriate paper types for your print job.
5.3 Заглавување на хартија
- Turn off the printer and carefully remove any jammed paper from the paper tray, output tray, or inside the printer.
- Проверете дали хартијата е правилно вчитана и не е изгужвана или закржлавена.urlед.
6. Спецификации
| Бренд | Епсон |
| Име на моделот | L485 |
| Технологија за поврзување | Wi-Fi |
| Технологија на печатење | Инкџет |
| Специјална карактеристика | Слот за мемориска картичка |
| Боја | Црното |
| Излез на печатач | Боја |
| Максимална брзина на печатење (во боја) | 15 ppm |
| Максимална брзина на печатење (монохроматски) | 33 ppm |
| Тежина на ставката | 6001 грама |
| Тип на печатач | Инкџет |
| Тип на скенер | Лиснати |
| Maximum Copy Speed (Black and White) | 33 ppm |
| Тип на дисплеј | LCD екран |
| Компатибилни уреди | Паметни телефони |
| Боја на мастило | Црна, Цијан, Магента, Жолта |
| Резолуција | 5760 x 5760 DPI |
| Дополнителни функции на печатачот | All In One (Print, Scan, Copy) |
| Максимална големина на медиум | A4 |
| Големина на хартија | A4 |
| Двострано печатење | бр |
7. Гаранција и поддршка
Your Epson L485 Wi-Fi Inktank Printer comes with a free installation service and an onsite warranty.
7.1 Free Installation and Onsite Warranty
To avail free installation for your printer, please contact Epson support after receiving your product. The onsite warranty covers manufacturing defects and ensures professional assistance at your location.
7.2 Контактирајте ја поддршката
For installation, support, or any technical assistance, please contact Epson customer service:
- Телефон: 1860 3000 1600 (Timings: 9 am - 6 pm)