1. Вовед
This manual provides detailed instructions for the installation, operation, and maintenance of your Akozon Digital Programmable Timer. Please read this manual carefully before use to ensure proper function and safety.

Figure 1: Akozon Digital Programmable Timer 12V
2. Производот завршиview и Карактеристики
The Akozon Digital Programmable Timer is a weekly programmable electronic timer designed for precise control of various electrical equipment. Its robust design and advanced features ensure reliable operation.
- Автоматска контрола: Automatically turns electrical equipment on and off according to preset schedules.
- Висока прецизност: Equipped with a high-precision chip for accurate timing.
- Неделно програмирање: Supports advanced programming for up to one week in advance.
- Повеќе програми: Features 16 ON/OFF settings (programs) for daily or weekly scheduling.
- Резервна моќност: Integrated high-performance rechargeable battery maintains time display and stores data for over 12 months during power outagес.
- Издржлива конструкција: Housing made of hard, durable plastic for extended lifespan.
- LCD дисплеј: Clear LCD for easy viewing of time and program status.
- Инсталација на DIN шина: Designed for convenient installation on a DIN rail.
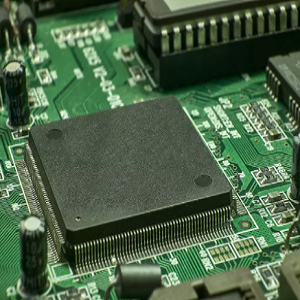
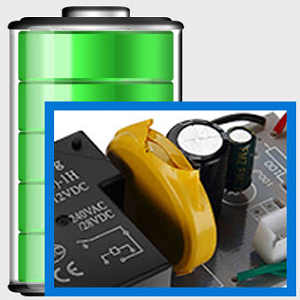
Figure 2: Internal components showing the high-precision chip and rechargeable backup battery.
3. Спецификации
| Број на модел | Akozonqegcgmk04u-01 |
| Влез волуменtage | 12V DC/AC |
| Излезен капацитет | 25(16)A, 240VAC |
| Потрошувачка на енергија | <1 W |
| Временски опсег | 1 минута до 168 часа |
| Програми | 16 ON/OFF settings (daily/weekly) |
| Грешка во тајмингот | <±2 seconds/day |
| Меморија за прекин на напојување | >12 months (with internal rechargeable battery) |
| Работна температура | -20°C до 55°C |
| Начин на инсталација | ДИН шина |
| Димензии (прибл.) | 36мм (Ш) x 86мм (В) x 65мм (Д) |
| Тежина (приближно) | 120 гр |
| Приказ | LCD екран |

Слика 3: Детални димензии на производот и клучни спецификации.
4. Информации за безбедност
- Секогаш исклучувајте го напојувањето пред инсталација или одржување.
- Инсталацијата треба да ја изврши квалификуван електричар за да се спречи електричен удар или оштетување на уредот.
- Обезбедете ја влезната јачинаtage matches the timer's specifications (12V DC/AC). Connecting to incorrect voltage може да го оштети уредот.
- Do not expose the device to excessive moisture or extreme temperatures outside the specified operating range.
- Do not disassemble the timer; refer servicing to qualified personnel.
5. Поставување и инсталација
5.1 DIN Rail Installation
The timer is designed for easy installation on a standard 35mm DIN rail. Simply clip the timer onto the rail in your distribution box.

Слика 4: Прample of the timer installed on a DIN rail within a distribution box.
5.2 Инструкции за поврзување
Refer to the wiring diagram below for correct connection. Ensure all connections are secure and comply with local electrical codes.
- Терминали 1 и 2: Power input (12V DC/AC).
- Терминали 3, 4, 5: Output contacts.
- 3: Нормално затворено (NC)
- 4: Заеднички (COM)
- 5: Нормално отворено (НЕ)

Figure 5: Detailed wiring diagram showing connections for power input and output contacts.

Слика 6: Прamples of wiring methods, including direct load connection and connection via a contactor.
6. Упатства за работа
6.1 Initial Setup and Unlocking
- Upon first use, connect the timer to power (12V DC/AC).
- Притиснете го РЕСЕТИРАЈ button to clear all previous settings and initialize the timer.
- The timer display may be locked. To unlock, press the C/R button four times. The lock icon will disappear from the display. If no operation occurs for 15 seconds, the timer will automatically lock again.
6.2 Поставување на тековното време и ден
After unlocking, set the current time and day:
- Притиснете го P button (Program button) once.
- Притиснете го D+ button to set the current day of the week (MO, TU, WE, TH, FR, SA, SU).
- Притиснете го H+ копче за да го поставите тековниот час.
- Притиснете го M+ копче за да ја поставите тековната минута.
- Притиснете го P button again to exit time setting mode.

Слика 7: Одблиску view of the timer's control buttons.

Figure 8: Explanation of button functions and display elements, including day, hour, minute, and reset.
6.3 Рачна контрола
Притиснете го ПРИРАЧНИК C/R button to cycle through manual control modes:
- НА: Output is continuously ON.
- АВТОМАТ: Timer operates according to programmed schedules.
- ИСКЛУЧЕНО: Output is continuously OFF.
Изберете АВТОМАТСКИ for the timer to follow your programmed settings.
7. Програмирање на распореди за вклучување/исклучување
Тајмерот поддржува до 16 програми за ВКЛУЧУВАЊЕ/ИСКЛУЧУВАЊЕ. Следете ги овие чекори за да ги поставите посакуваните распореди:
- Притиснете го P копче за да влезете во режим на програмирање. На екранот ќе се прикаже „1 ВКЛУЧЕНО“.
- Притиснете D+ за да го изберете денот/деновите за оваа програма. Можете да изберете еден ден, денови во недела, викенди или сите денови.
- Притиснете H+ за да го поставите часот на вклучување.
- Притиснете M+ за да ја поставите минутата за ВКЛУЧЕНО.
- Притиснете P повторно. На екранот ќе се прикаже „1 OFF“.
- Притиснете D+ to select the day(s) for this OFF program (usually the same as ON, but can be different).
- Притиснете H+ to set the OFF hour.
- Притиснете M+ to set the OFF minute.
- Repeat steps 1-8 for additional ON/OFF programs (up to 16). Press P to advance to the next program number.
- За да излезете од режимот на програмирање, притиснете го ПРИРАЧНИК C/R button. Ensure the timer is set to АВТОМАТСКИ режим за извршување на програмите.
Note: If you need to cancel a program, press the C/R копче додека viewing the specific ON or OFF program. This will clear the settings for that program.
8. Апликации
The Akozon Digital Programmable Timer is versatile and can be used in various applications, including:
- Controlling lamps and lighting systems (e.g., streetlights, garden lights, neon signs).
- Managing water heaters and preheaters.
- Automating agricultural facilities (e.g., irrigation systems).
- Controlling broadcasting equipment.
- Scheduling household appliances.
- Operating sprayers and bottling equipment.

Слика 9: Прamples of environments where the timer can be used, such as controlling outdoor lighting and industrial equipment.
9. Одржување
- Keep the timer clean and free from dust. Use a soft, dry cloth for cleaning.
- Не користете абразивни средства за чистење или растворувачи.
- Обезбедете соодветна вентилација околу уредот за да спречите прегревање.
- The internal battery is designed for long-term backup. If the timer consistently loses time or program settings after a power outage, the internal battery may need professional inspection.
10 Смена на проблеми
| Проблем | Можна причина | Решение |
|---|---|---|
| Екранот е празен. | No power supply or internal battery depleted. | Check power connections. Allow time for the internal battery to charge (connect to power for several hours). |
| Timer does not respond to button presses. | Timer is locked. | Притиснете го C/R button four times to unlock. |
| Програмите не се извршуваат. | Тајмерот не е во АВТОМАТСКИ режим. Неточни поставки на програмата. | Притиснете ПРИРАЧНИК C/R додека не се прикаже „AUTO“. Повторноview и точни поставки на програмата. |
| Времето или поставките се губат по исклучувањето на струјатаtage. | Internal backup battery is not charging or is depleted. | Ensure the timer is connected to power for sufficient time to charge the internal battery. If the issue persists, contact customer support. |
| Output is always ON or OFF, ignoring programs. | Timer is in manual ON or OFF mode. | Притиснете ПРИРАЧНИК C/R додека не се прикаже „AUTO“. |
11. Гаранција и поддршка
Akozon products are manufactured to high-quality standards. For warranty information or technical support, please refer to the contact details provided with your purchase or visit the official Akozon webсајт.
Ве молиме чувајте го вашиот доказ за купување за барањата за гаранција.