1. Вовед
Ви благодарам за купувањетоasing the Gravity Audio G12BD1 12-inch 1000W Powered Subwoofer Enclosure. This manual provides essential information for the proper installation, operation, and maintenance of your new subwoofer. To ensure optimal performance and safety, please read this manual thoroughly before attempting to install or use the product. Keep this manual for future reference.
2. Информации за безбедност
Внимавајте на следниве безбедносни мерки за да спречите повреда или оштетување на производот и возилото:
- Електрична безбедност: Always disconnect the vehicle's negative battery terminal before beginning any electrical work. Ensure all wiring is correctly routed and secured to prevent pinching or damage. Use appropriate gauge wiring for power and ground connections.
- Околина за инсталација: Install the subwoofer in a dry, well-ventilated area, away from direct sunlight, heat sources, and moisture. Ensure the enclosure is securely mounted to prevent movement during vehicle operation.
- Заштита на слухот: Prolonged exposure to high sound pressure levels can cause permanent hearing damage. Operate the subwoofer at comfortable listening levels.
- Професионална инсталација: If you are unsure about any aspect of the installation, it is recommended to seek assistance from a qualified professional car audio installer.
3. Содржина на пакетот
Проверете дали сите артикли се присутни во пакувањето:
- 1 x Gravity Audio G12BD1 Powered Subwoofer Enclosure
4. Поставување и инсталација
Proper installation is crucial for the performance and longevity of your subwoofer. The G12BD1 is designed for universal fit in vehicles, typically in the trunk or a large cargo area.
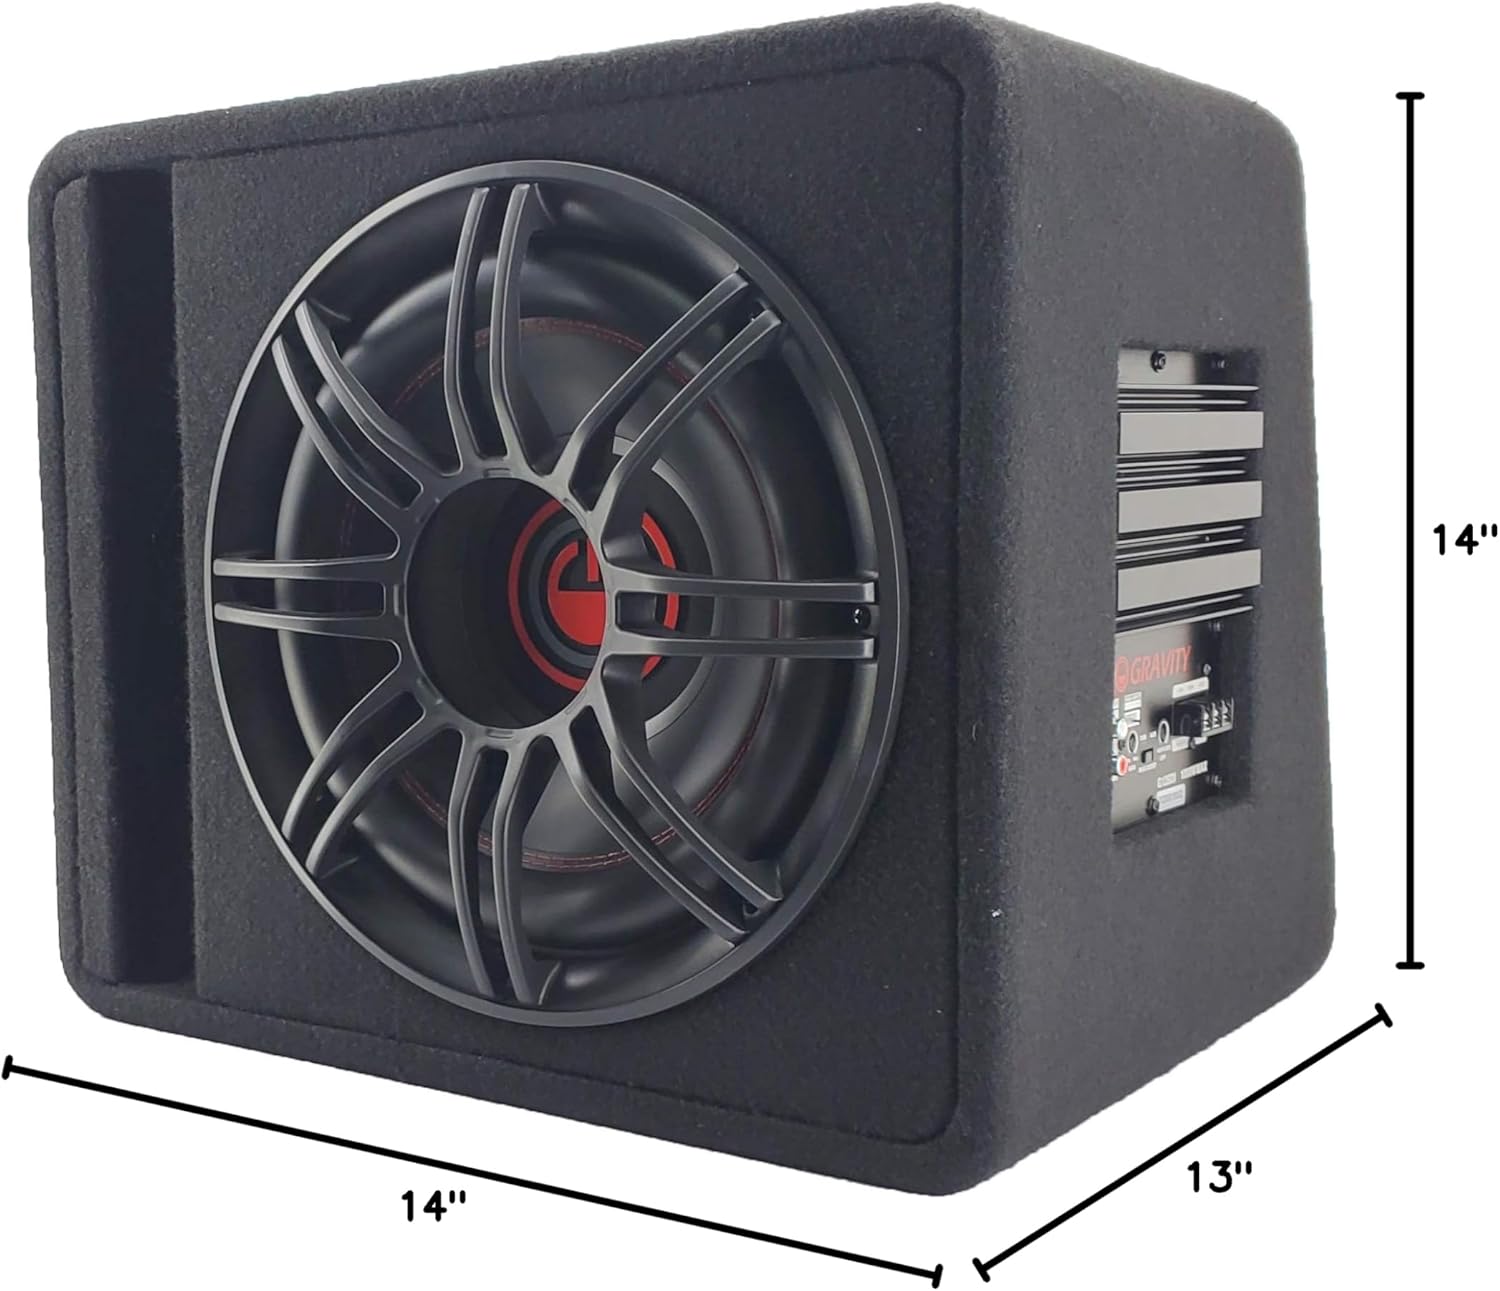
4.1. Размислувања за сместување
Consider the available space in your vehicle. The dimensions of the enclosure are approximately 13"D x 14"W x 14"H. Ensure there is adequate clearance for air circulation around the ampпоживотен дел.
4.2. Приклучоци за жици
The G12BD1 features an integrated amplifier, simplifying the wiring process. You will need to connect power, ground, a remote turn-on signal, and an audio input signal.

- Приклучок за напојување (+12V): Connect a heavy-gauge power cable (e.g., 8-gauge or 4-gauge, depending on total system power) directly from the vehicle's positive battery terminal to the +12V terminal on the subwoofer's amplifier. Install an in-line fuse holder (with an appropriately rated fuse) within 18 inches of the battery.
- Приклучок за земја (GND): Поврзете кабел за заземјување со дебел калибар од GND терминалот на ampповрзете го олабавувачот со чиста, необоена метална површина на шасијата на возилото. Обезбедете цврста врска со низок отпор.
- Далечинско вклучување (REM): Connect a remote turn-on wire from your head unit's remote output (typically a blue/white wire) to the REM terminal on the amplifier. This signal turns the ampВклучување и исклучување на ладилникот со вашата главна единица.
- Аудио влез:
- RCA влез за ниско ниво: If your head unit has RCA pre-outs, connect RCA cables from the head unit's subwoofer or rear pre-outs to the RCA input jacks on the G12BD1 ampживописен.
- High-Level Speaker Input: If your head unit does not have RCA pre-outs, use the high-level speaker inputs. Connect the speaker wires from your head unit's rear speaker outputs to the high-level input terminals on the ampживописен.
After all connections are made, double-check them for polarity and security before reconnecting the vehicle's negative battery terminal.

5. Упатства за работа
Once installed, you can adjust the subwoofer's settings for optimal sound performance.
5.1. Control Panel Adjustments
Refer to Figure 2 for the location of these controls:
- ДОБИВКА: This control matches the output level of your head unit to the input sensitivity of the subwoofer amplifier. Start with the gain set to minimum. Gradually increase it until you hear distortion, then back it off slightly. Do not use the gain control as a volume knob.
- БАС ЗДРАВЈЕ: This control allows you to increase the bass output at a specific frequency. Use sparingly to avoid distortion and potential damage to the subwoofer.
- LPF (нископропусен филтер): This control sets the upper frequency limit for the subwoofer. Frequencies above this setting will be filtered out. A common starting point is between 80Hz and 120Hz. Adjust to blend smoothly with your main speakers.
5.2. Првично вклучување
After all connections are secure and settings are initially adjusted:
- Turn on your vehicle's ignition and head unit.
- The power indicator on the subwoofer ampОсветлувачот треба да свети.
- Play some music with a good bass range.
- Carefully adjust the GAIN, BASS BOOST, and LPF controls to achieve balanced and clear bass output without distortion.
6. Одржување
Regular maintenance ensures the longevity and performance of your subwoofer.
- Чистење: Use a soft, dry cloth to wipe down the enclosure and ampИзбегнувајте употреба на јаки хемикалии или абразивни средства за чистење.
- Инспекција: Periodically check all wiring connections for tightness and signs of wear or corrosion. Ensure the enclosure remains securely mounted.
- Вентилација: Обезбедете го amplifier's heat sink is not obstructed to allow for proper cooling.
7 Смена на проблеми
If you experience issues with your G12BD1 subwoofer, consult the following table before contacting support.
| Проблем | Можна причина | Решение |
|---|---|---|
| Нема струја / Ampлајфијачот не се вклучува |
|
|
| Нема звук од сабвуферот |
|
|
| Искривен звук |
|
|
| Звуци од зуење или зуење |
|
|
8. Спецификации
| Карактеристика | Спецификација |
|---|---|
| Име на моделот | Powered Car Subwoofer |
| Тип на звучник | Сабвуфер, вуфер |
| Дијаметар на сабвуфер | 12 инчи |
| Импеданса | 4 Ом |
| Максимална излезна моќност на звучникот | 1000 вати |
| Димензии на производот (Д x Ш x В) | 13" Д x 14" Ш x 14" В |
| Тежина на ставката | 37 фунти |
| Технологија за поврзување | Жичен |
| Вид на гаранција | 1 година |
9. Гаранција и поддршка
The Gravity Audio G12BD1 comes with a 1-year warranty. For warranty claims or technical support, please contact the retailer where the product was purchased or the manufacturer directly. Keep your proof of purchase for warranty validation.