Производот завршиview
This manual provides detailed instructions for the assembly, operation, and maintenance of your PayLessHere Office Computer Gaming Chair. Designed for ergonomic comfort and versatility, this chair features a breathable mesh back, adjustable height, 360-degree swivel, and lumbar support, making it suitable for both office work and gaming.
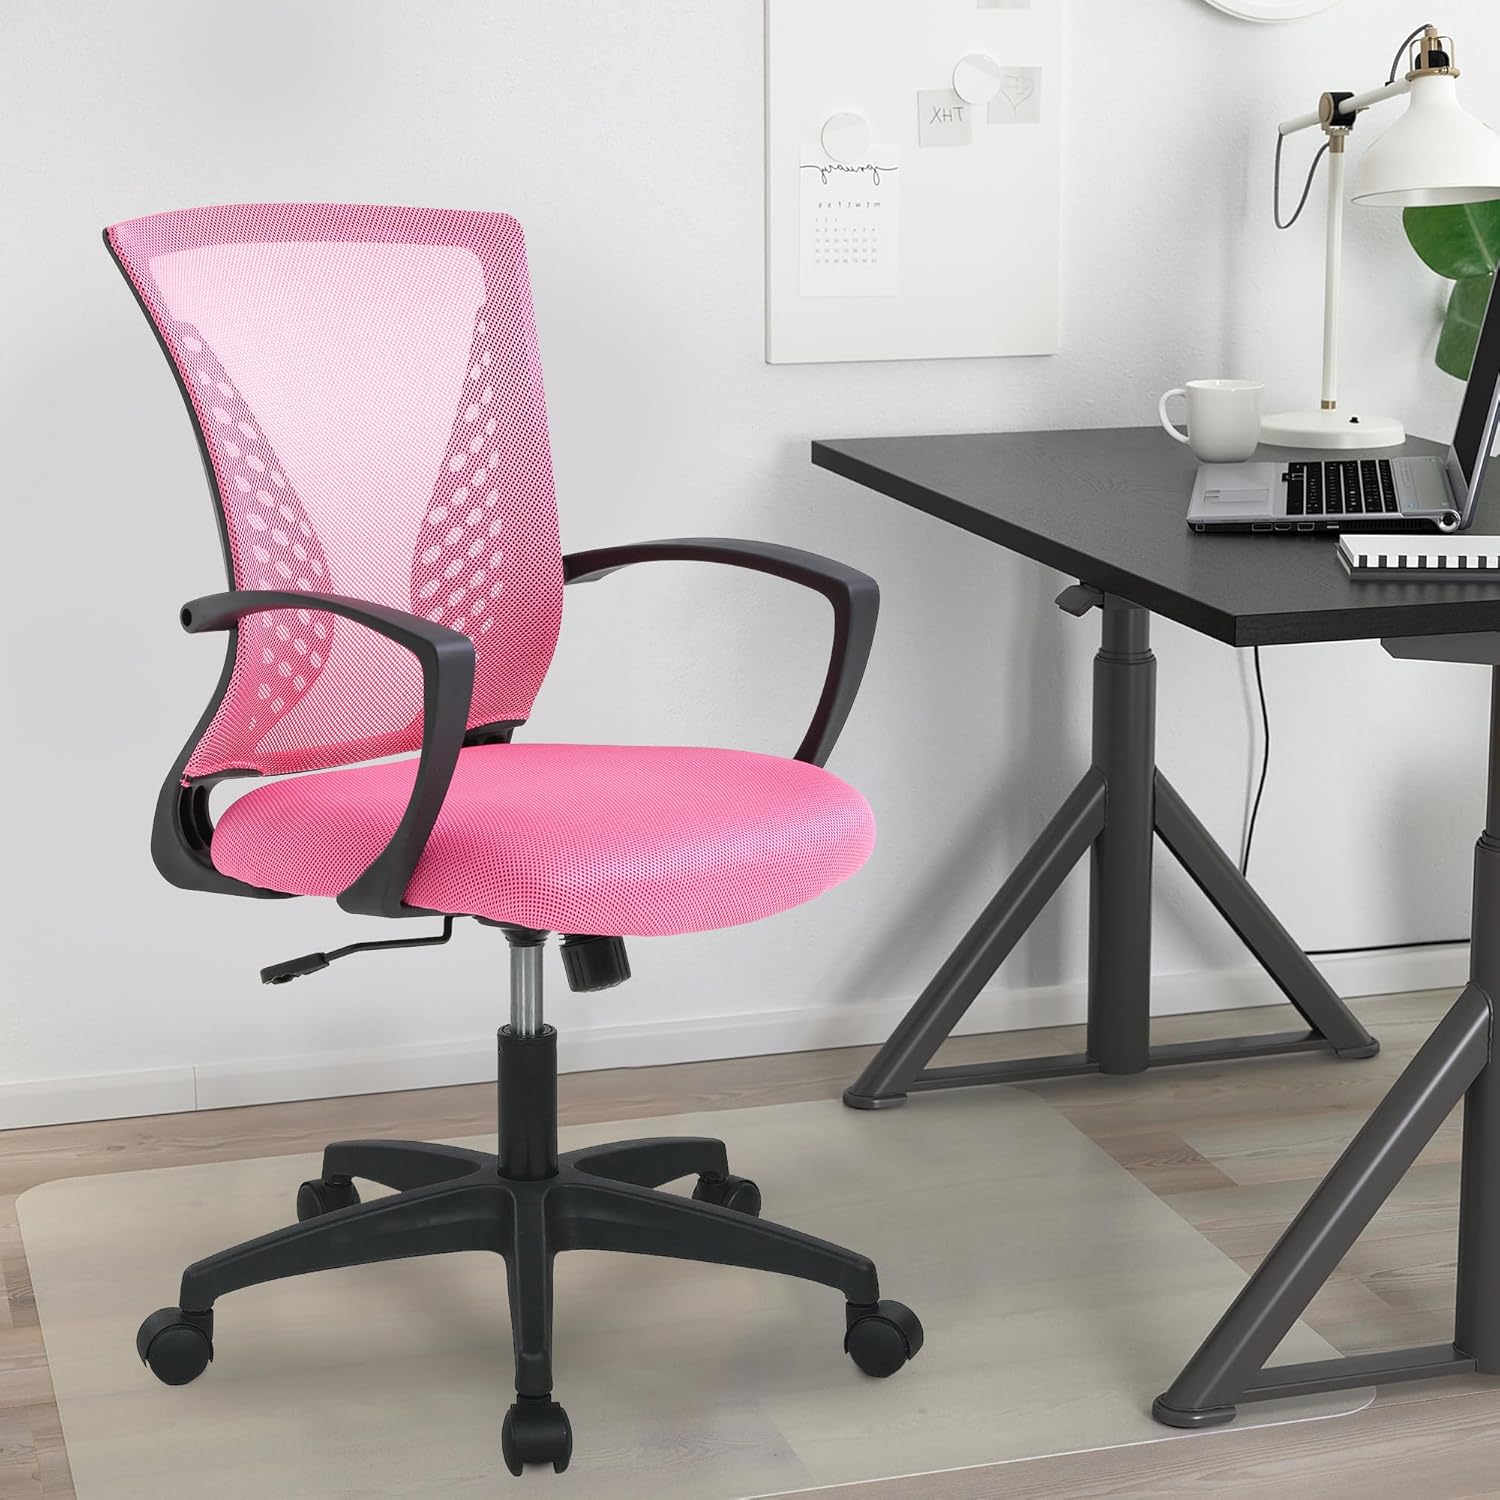
Image: The PayLessHere Office Computer Gaming Chair in pink, set up in a home office environment.
Информации за безбедност
Do not exceed the maximum weight capacity of 250 pounds. Ensure the chair is properly assembled and stable before use.
Always follow assembly instructions carefully. Keep small parts away from children. Regularly inspect the chair for loose screws or damaged components and tighten or replace as necessary.
Содржина на пакетот
Пред да започнете со склопување, проверете дали сите компоненти се присутни:
- Наслон за грб на стол (1)
- Перница за седишта (1)
- Потпирачи за раце (2)
- Цилиндар за подигнување на гас (1)
- Ѕвездена база (1)
- Кастер тркала (5)
- Плоча на механизмот (1)
- Screws and Allen Wrench (1 set)
Инструкции за склопување
Follow these steps to assemble your PayLessHere Office Computer Gaming Chair:
Чекор 1: Прикачете ги тркалата на основата
Вметнете ги петте тркала во дупките на крајот од секоја нога од ѕвездената основа. Притискајте цврсто додека не кликнат на своето место.

Image: Close-up of the chair's star base and caster wheels, highlighting 360-degree rotation and floor protection.
Step 2: Insert Gas Lift Cylinder
Place the gas lift cylinder into the center hole of the assembled star base. Do not remove the red cap from the gas lift until instructed.

Слика: Детална view of the chair's components, including the certified gas rod (lift cylinder).
Step 3: Attach Mechanism Plate to Seat
Порамнете ја плочата на механизмот со дупките за завртки на долната страна од перницата на седиштето. Осигурајте се дека предниот дел од механизмот е свртен кон предниот дел од седиштето. Прицврстете со завртки користејќи го приложениот шестоаголен клуч.
Чекор 4: Прикачете потпирачи за раце
Attach the armrests to the sides of the seat cushion using the designated screws. Pay attention to the 'L' (left) and 'R' (right) markings on the armrests.
Step 5: Connect Backrest to Seat
Align the backrest with the attachment points on the seat cushion or mechanism plate. Secure with screws.
Step 6: Assemble Seat to Base
Carefully place the assembled seat (with mechanism and armrests) onto the gas lift cylinder. The tapered end of the gas lift should fit securely into the mechanism plate.
Видео собрание
Video: A demonstration of the adjustable features of the office chair, including height and swivel, for home comfort.
Упатства за работа
Familiarize yourself with the chair's adjustable features for optimal comfort:
Прилагодување на висината
To adjust the seat height, pull the lever located under the right side of the seat upwards. While seated, lift your weight slightly to raise the chair, or remain seated to lower it. Release the lever to lock the height.

Image: Diagram illustrating the height adjustment lever and 360-degree swivel function of the chair.
Tilt and Recline Function
The chair features a reclining backrest. To activate the tilt, pull the lever (often the same as the height adjustment lever, or a separate one) outwards. To lock the backrest in an upright position, push the lever inwards. The tension of the tilt can be adjusted by rotating the round knob located under the front of the seat.
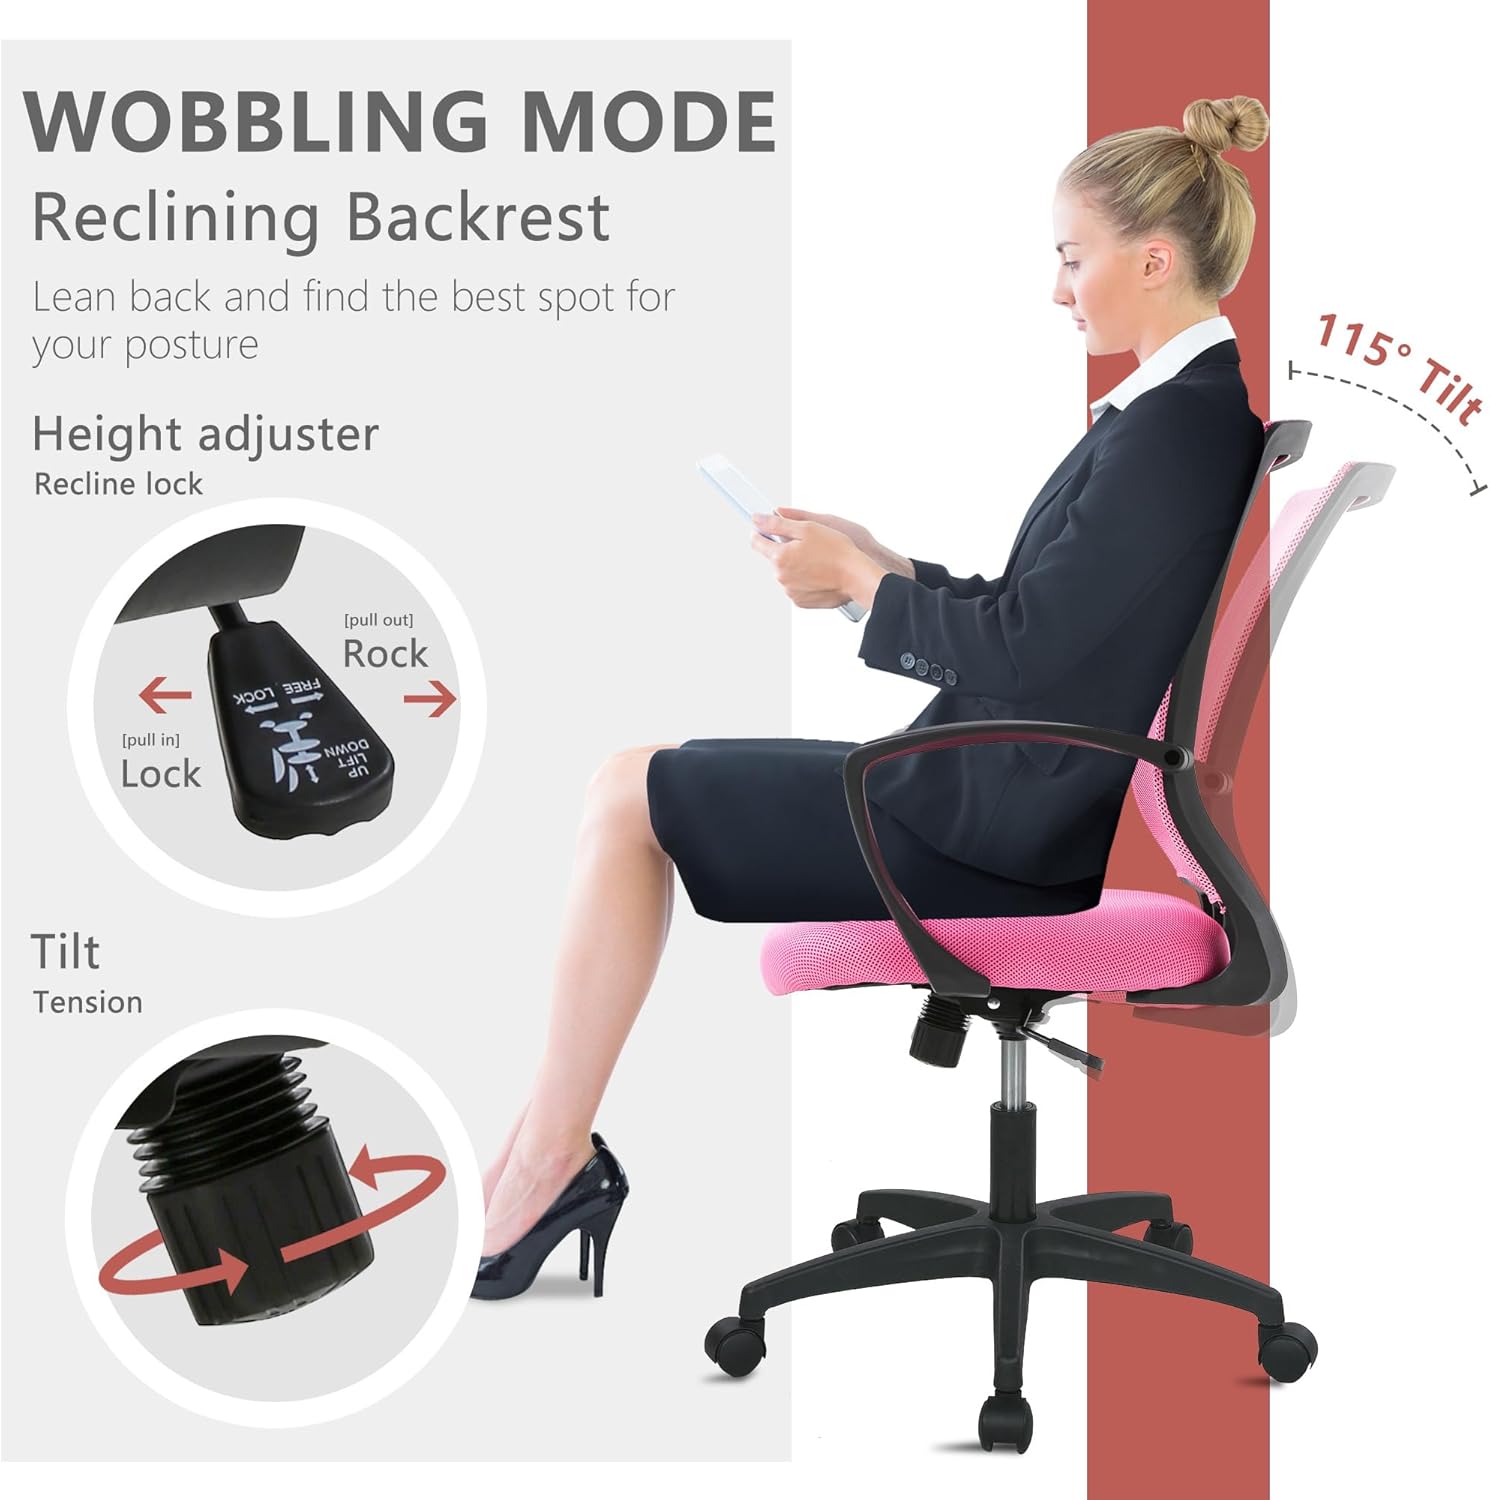
Image: Illustration of the chair's wobbling mode, showing the reclining backrest and the tilt tension adjustment knob.
Функција за вртење
Столот е дизајниран да се врти 360 степени, овозможувајќи лесно движење и пристап до различни делови од вашиот работен простор без потреба од преместување на целата столица.
Одржување
Proper maintenance will extend the life of your chair:
- Чистење: For mesh and fabric surfaces, use a soft cloth with mild soap and water. Avoid harsh chemicals. For the plastic and metal parts, wipe with a damp крпа.
- Инспекција: Периодично проверувајте ги сите завртки и клинови за да се осигурате дека се стегнати. Затегнете ги повторно доколку е потребно за да ја одржите стабилноста и безбедноста.
- Кастери: Keep caster wheels clean from hair and debris to ensure smooth rolling.
Решавање проблеми
Доколку наидете на било какви проблеми со вашиот стол, погледнете ги следните вообичаени проблеми и решенија:
| Проблем | Можна причина | Решение |
|---|---|---|
| Столот не се прилагодува на висината | Gas lift lever not engaged or gas lift faulty. | Ensure the lever is fully pulled up/down. If issue persists, contact customer support for gas lift replacement. |
| Столот се ниша | Лабави завртки или нерамен под. | Проверете ги и затегнете ги сите завртки за склопување. Осигурајте се дека столот е на рамна, рамномерна површина. |
| Тркалцата не се тркалаат непречено | Остатоци во тркалата или оштетени тркала. | Отстранете ги влакната или остатоците од тркалата. Доколку се оштетени, заменете ги тркалата. |
| Наслонот за грб не се спушта или не се заклучува | Механизмот за навалување е заклучен или напнатоста е превисока. | Pull the tilt lever outwards to unlock. Adjust the tilt tension knob to a lower setting. |
Спецификации
| Карактеристика | Детал |
|---|---|
| Бренд | PayLessHere |
| Име на моделот | Office Computer Gaming Chair |
| Боја | Розова |
| Димензии на производот (Д x Ш x В) | 23" Д x 22" Ш x 40" В |
| Длабочина на седиштето | 17 инчи |
| Тежина на ставката | 21 фунти |
| Материјал | Mesh (Back), Foam (Seat) |
| Назад стил | Мрежест грб |
| Посебни карактеристики | Cushion Availability, Ergonomic, Rolling, Adjustable Height, Swivel |
| Движење на база на мебел | Завртување |
| Број на лежечки позиции | 2 до 5 |
| Максимална тежина капацитет | 250 фунти (според безбедносните информации) |
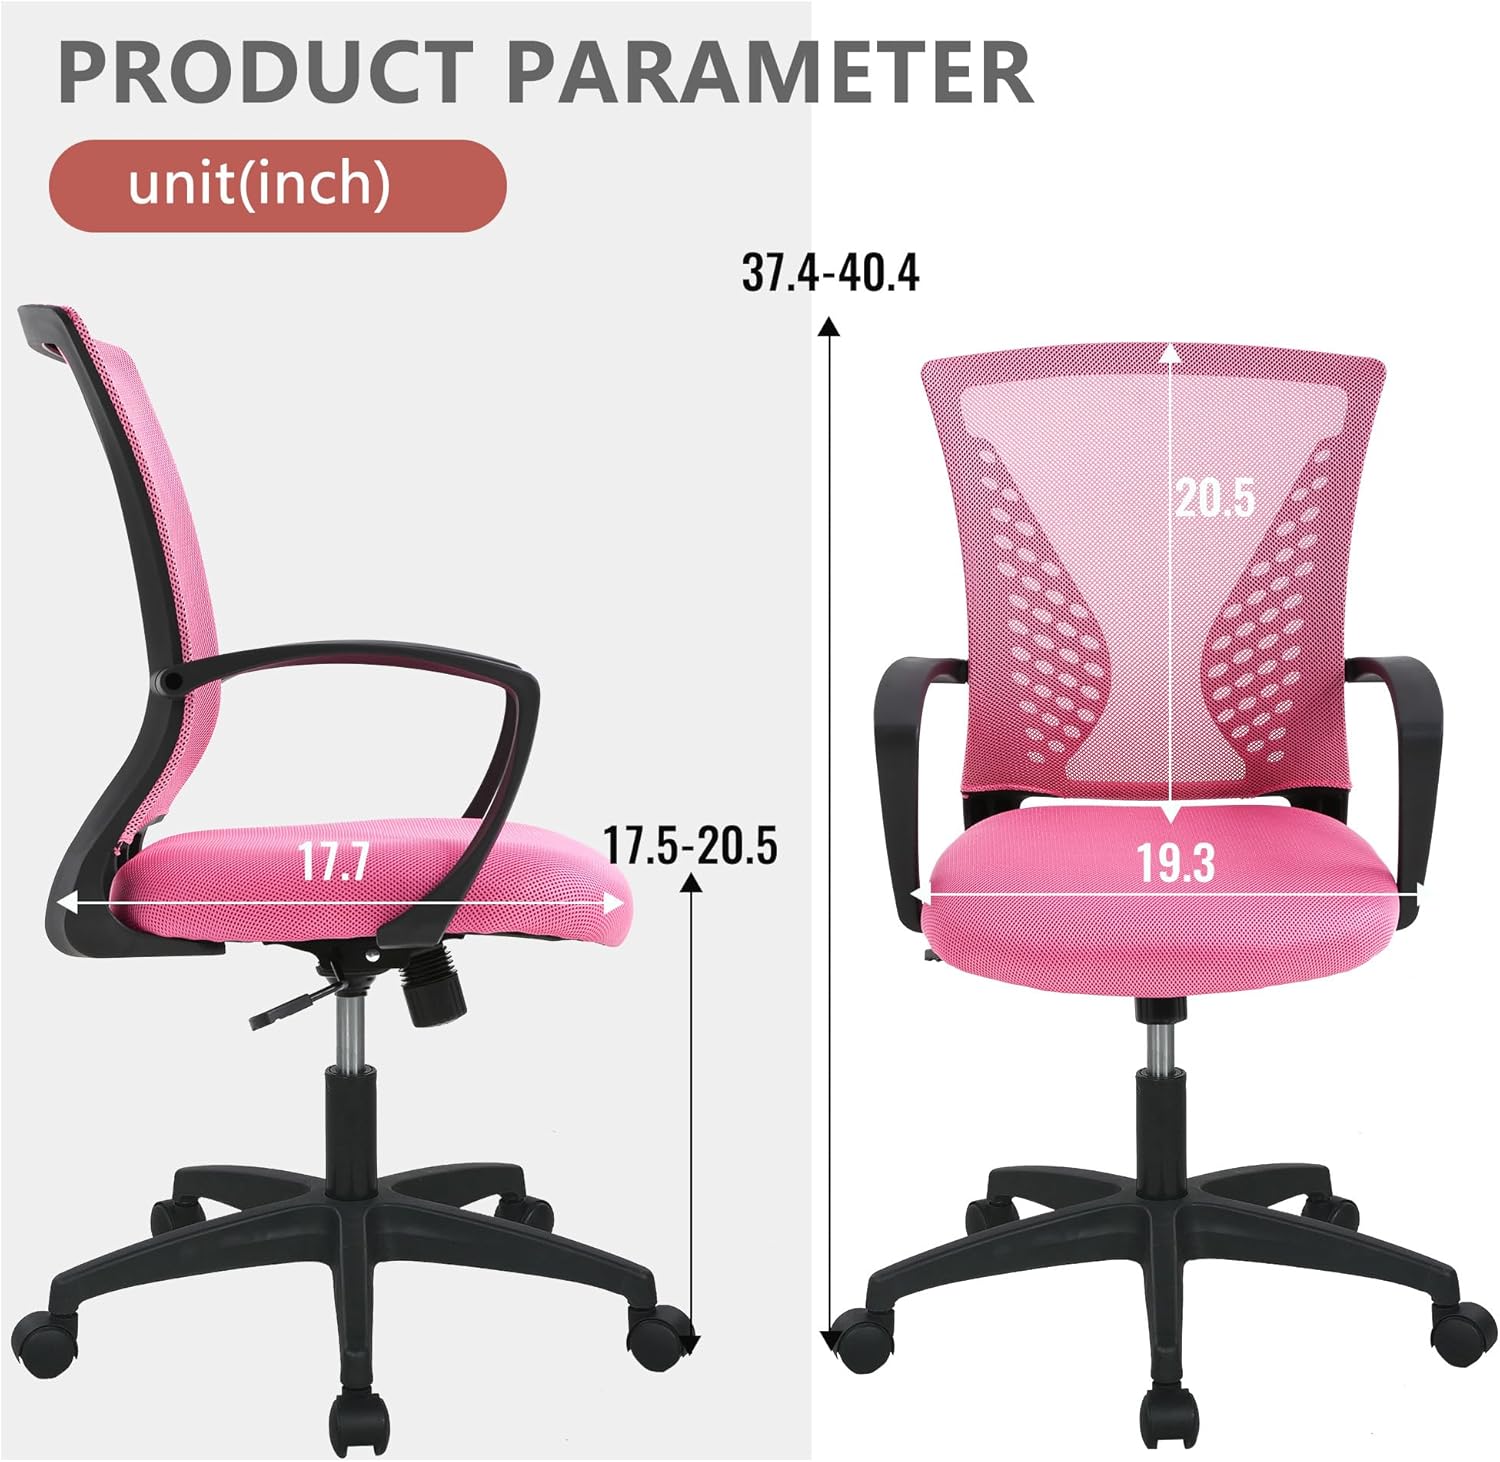
Image: Detailed product parameter diagram showing chair dimensions in inches.
Гаранција и поддршка
For warranty information, technical support, or to order replacement parts, please contact PayLessHere customer service through the retailer where the product was purchased. Keep your purchase receipt for warranty claims.