
Вовед
This manual provides detailed instructions for the Waveshare 7-inch DSI Capacitive Touch Display 2. This display features a 1280 × 800 resolution IPS panel, offering clear images and vivid colors with a 178° wide viewing angle. It supports up to 10-point capacitive touch, depending on the operating system, and incorporates an optical bonding toughened glass panel for enhanced durability and clarity. The display is designed for compatibility with various Raspberry Pi models (5/4B/3B/CM3/3+/4) and other development boards.
Официјален производ завршенview video for the Waveshare 7-inch DSI Capacitive Touch Display 2, highlighting its features and design.
Содржина на пакетот
Проверете дали сите артикли наведени подолу се вклучени во вашиот пакет. Доколку некои артикли недостасуваат или се оштетени, ве молиме контактирајте ја службата за корисници.

This image displays the Waveshare 7-inch DSI LCD (E) along with its accompanying accessories, including various FPC cables, a PH2.0 4PIN cable, a MIPI-DSI cable, and a screws pack for mounting.
- 7-inch DSI LCD (E) x1
- FPC 15PIN 1.0 pitch cable 160mm (opposite sides) x1
- PH2.0 4PIN cable ~200mm x1
- MIPI-DSI-Cable-12cm x1
- FPC 15PIN 1.0 pitch cable 50mm (opposite sides) x1
- Пакет завртки x1
Поставување
Follow these steps to properly set up your Waveshare 7-inch DSI Capacitive Touch Display 2 with your compatible device.
Хардверска врска
The display is compatible with various Raspberry Pi models (5/4B/3B/CM3/3+/4) and other development boards. Specific connection methods may vary slightly. Refer to the official Waveshare Wiki for detailed instructions for your specific model.
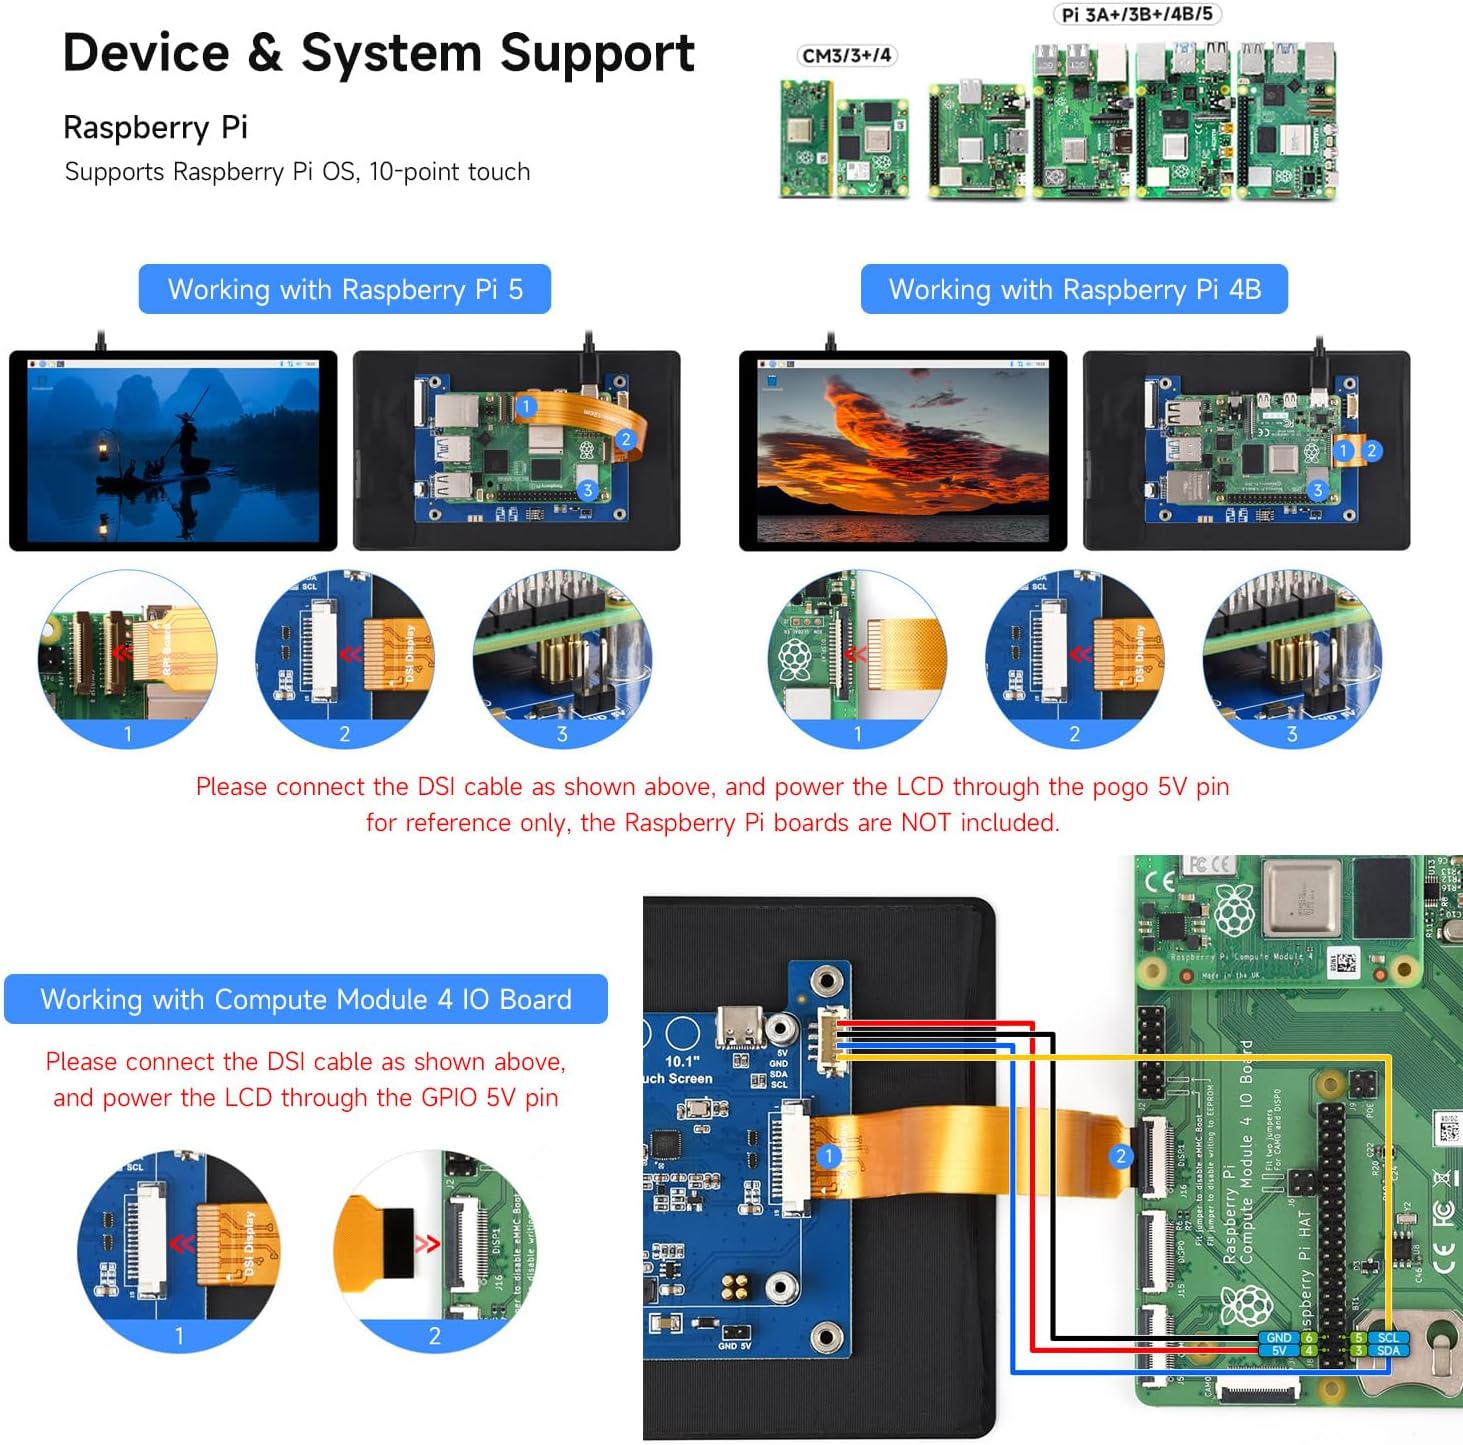
This image illustrates the device and system support for the display, showing various Raspberry Pi models and detailed connection examples for Raspberry Pi 5 and 4B, including DSI cable and power pin connections.
- Connect the DSI Cable: Use the provided FPC cable to connect the DSI interface of the display to the DSI port on your Raspberry Pi motherboard. Ensure the cable is inserted with the correct orientation (gold fingers facing the correct direction).
- Поврзете напојување: For Raspberry Pi 5, power the LCD through the pogo 5V pin. For other models or specific setups, use the 2PIN cable to connect the display power port to the 5V and GND pins on the Raspberry Pi GPIO.
- Secure the Raspberry Pi: Use the provided screws to secure the Raspberry Pi to the mounting holes on the back of the display.
This video provides a detailed tutorial on connecting and using the DSI screen, including hardware setup and software configuration steps for Raspberry Pi.
Поставки за софтвер
After hardware connection, software configuration is required for optimal performance. It is recommended to use the official Raspberry Pi OS system version Bookworm.
- Flash Raspberry Pi OS:
- Connect the TF card to your computer using a card reader.
- Use the Raspberry Pi Imager tool to write the Raspberry Pi OS image (Bookworm recommended) to the TF card.
- During the flashing process, you can configure hostname, username, password, and Wi-Fi settings.
- After flashing, safely eject the TF card and insert it into your Raspberry Pi.
- Измени
config.txt:- Пристапете до
config.txtfile во root директориумот на картичката TF. - Add the necessary configuration code for the DSI display to the end of the file and save. Specific code can be found on the Waveshare Wiki page for your model.
- Пристапете до
- Поставка за ротација на екранот:
- Once the system boots, open the "Screen Configuration" application from the Preferences menu.
- Navigate to "Screen" -> "DSI-2" -> "Touchscreen" and ensure the correct touchscreen option is selected.
- Go to the "Orientation" menu and select your desired rotation angle (e.g., Left, Right, Inverted). Click "Apply" to save settings. The touch and display will adjust synchronously.
- Прилагодете ја осветленоста на позадинското осветлување:
- Method 1 (System Settings): Open the "Screen Configuration" application, go to "Screen" -> "DSI-2" -> "Brightness", and select your desired brightness level.
- Method 2 (Waveshare Application): Download and install the brightness adjustment application provided on the Waveshare Wiki. After installation, you can launch the "Brightness" application from the Start Menu -> Accessories to make adjustments.
Ракување со дисплејот
The Waveshare 7-inch DSI display offers a responsive and clear user experience.
- Контрола на допир: The display supports 10-point capacitive touch, allowing for multi-finger gestures and precise interaction with the operating system.
- Visual Experience: With its 1280 × 800 IPS panel and 178° wide viewing angle, the display provides consistent and vibrant colors from various perspectives.
- Прилагодување на осветленоста: Adjust the backlight brightness as needed using the software settings described in the Setup section to suit your environment and preferences.
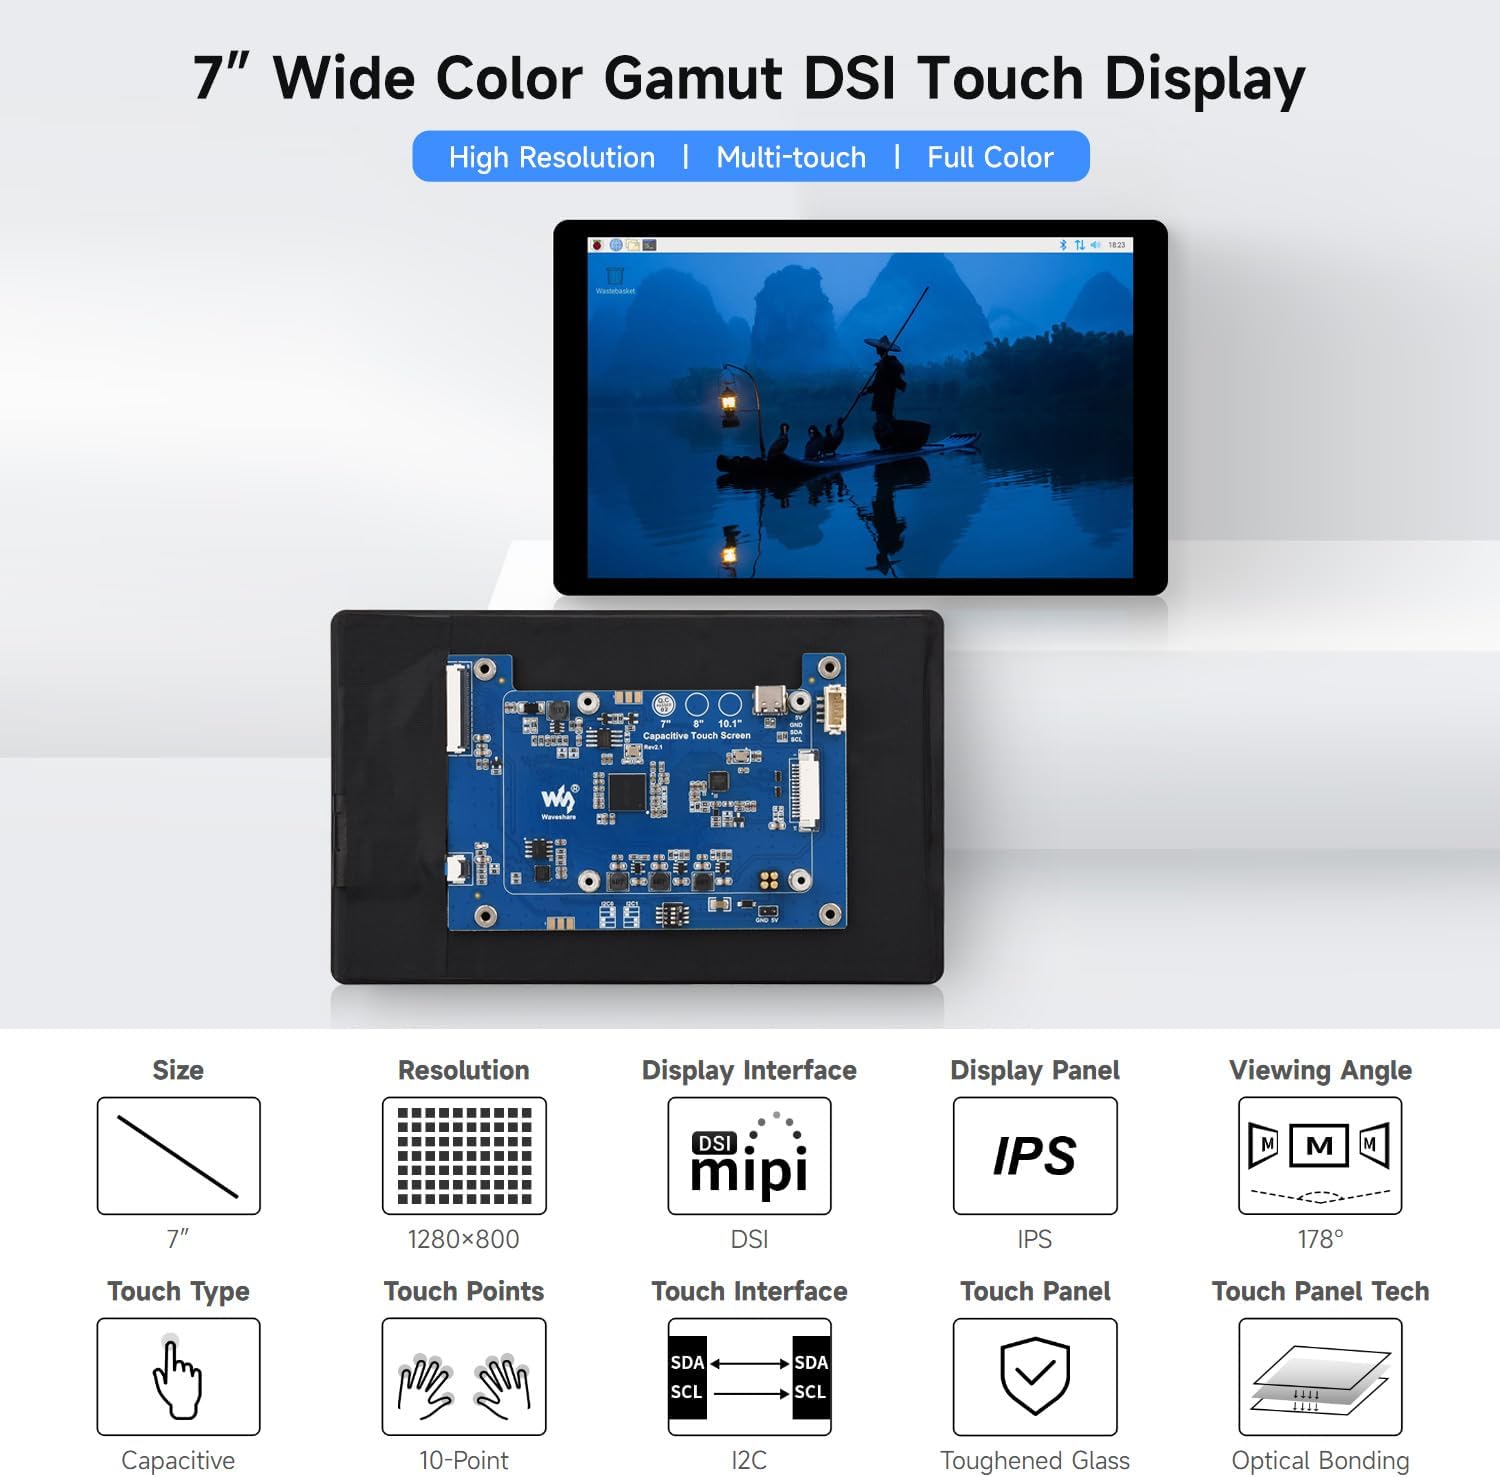
This image showcases the 7-inch DSI display's wide color gamut and high resolution, displaying a vibrant abstract image.
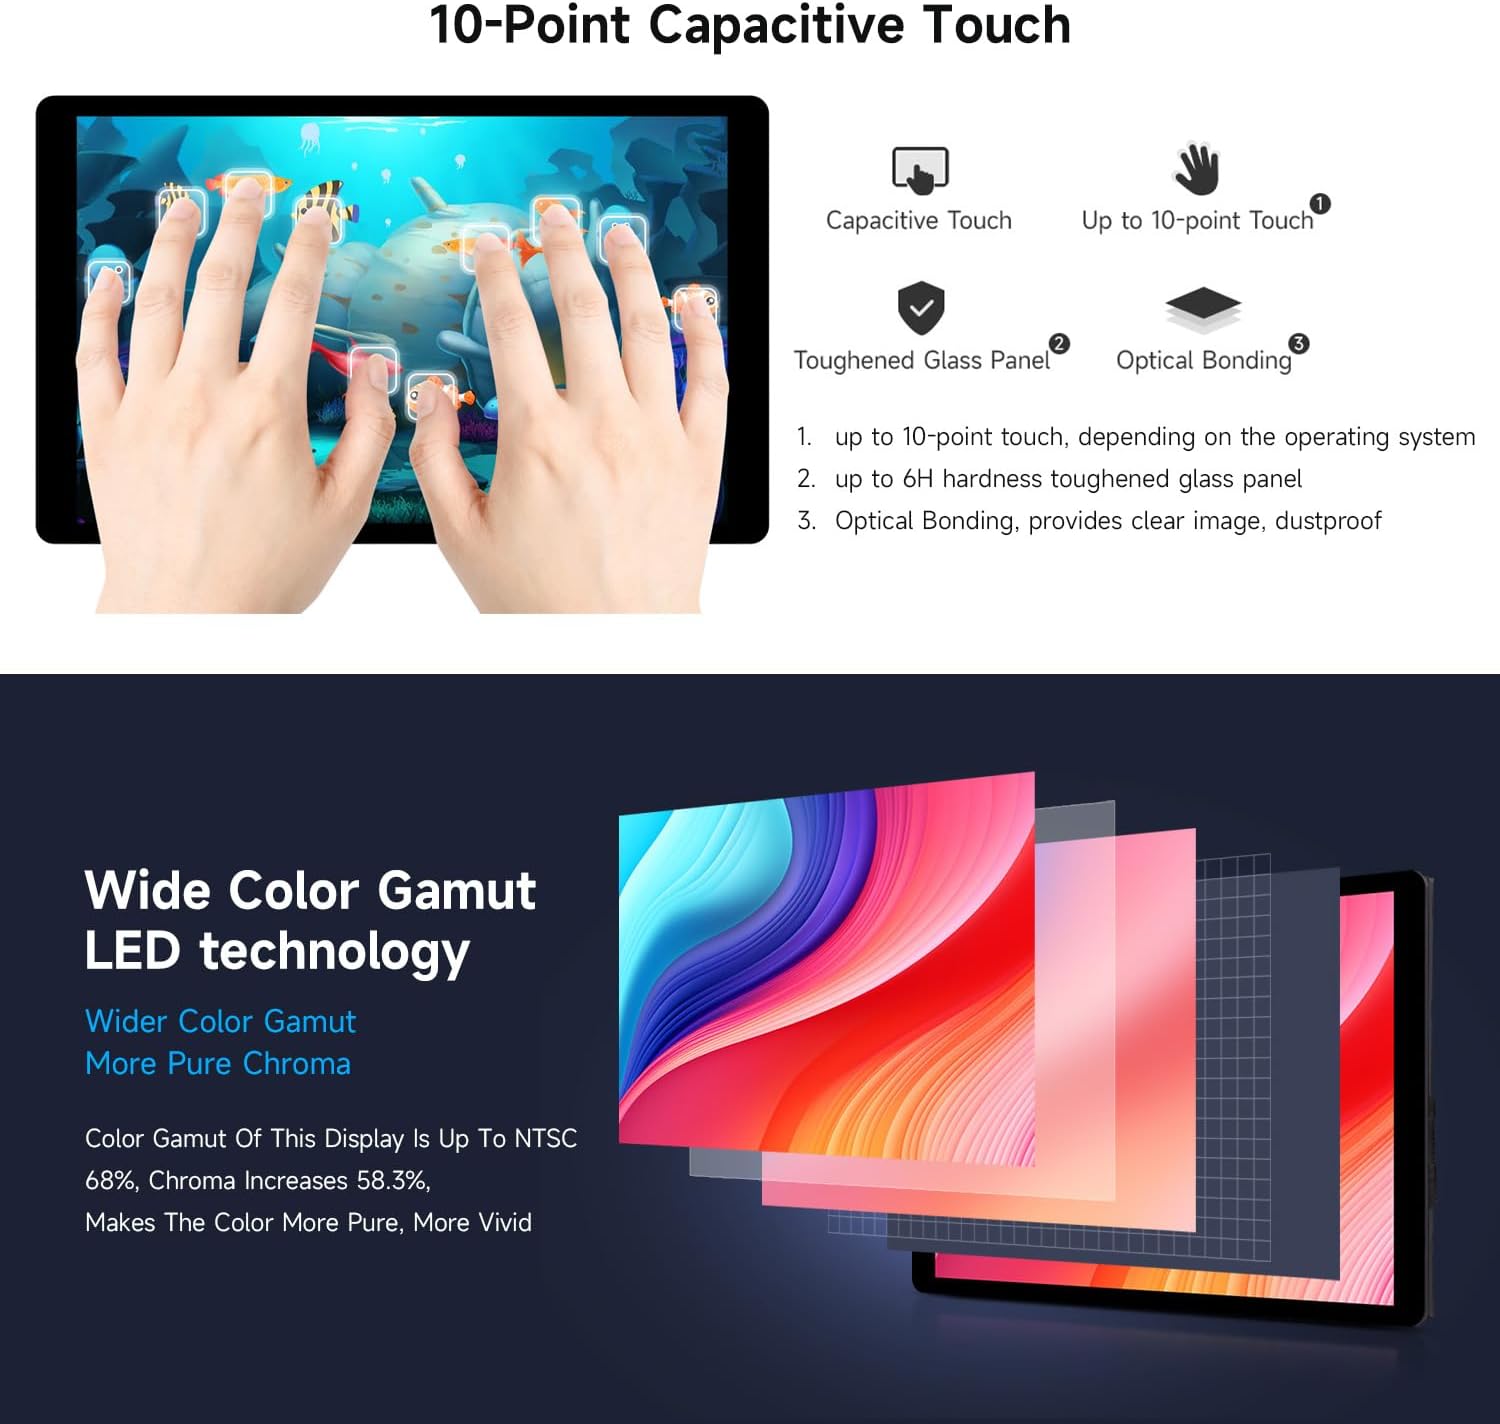
This image illustrates the 10-point capacitive touch capability of the display, showing multiple fingers interacting with the screen simultaneously.
Спецификации
| Карактеристика | Детал |
|---|---|
| Бренд | Waveshare |
| Број на модел | 7inch DSI LCD (E) |
| Големина на екранот | 7 инчи |
| Резолуција | 1280 × 800 |
| Тип на дисплеј | IPS |
| Viewинголен агол | 178 степени |
| Допрете Тип | 10-точки капацитивен |
| Panel Hardness | Up to 6H toughened glass |
| Технологија за поврзување | DSI |
| Стапка на освежување | 60 Hz |
| Сооднос на контраст на слика | 1000:1 |
| Picture Quality Enhancement | Оптичко поврзување |
| Време на одговор | 2 милисекунди |
| Димензии на ставката (Д x Ш x В) | 0.58" Д x 6.7" Ш x 4.1" В |
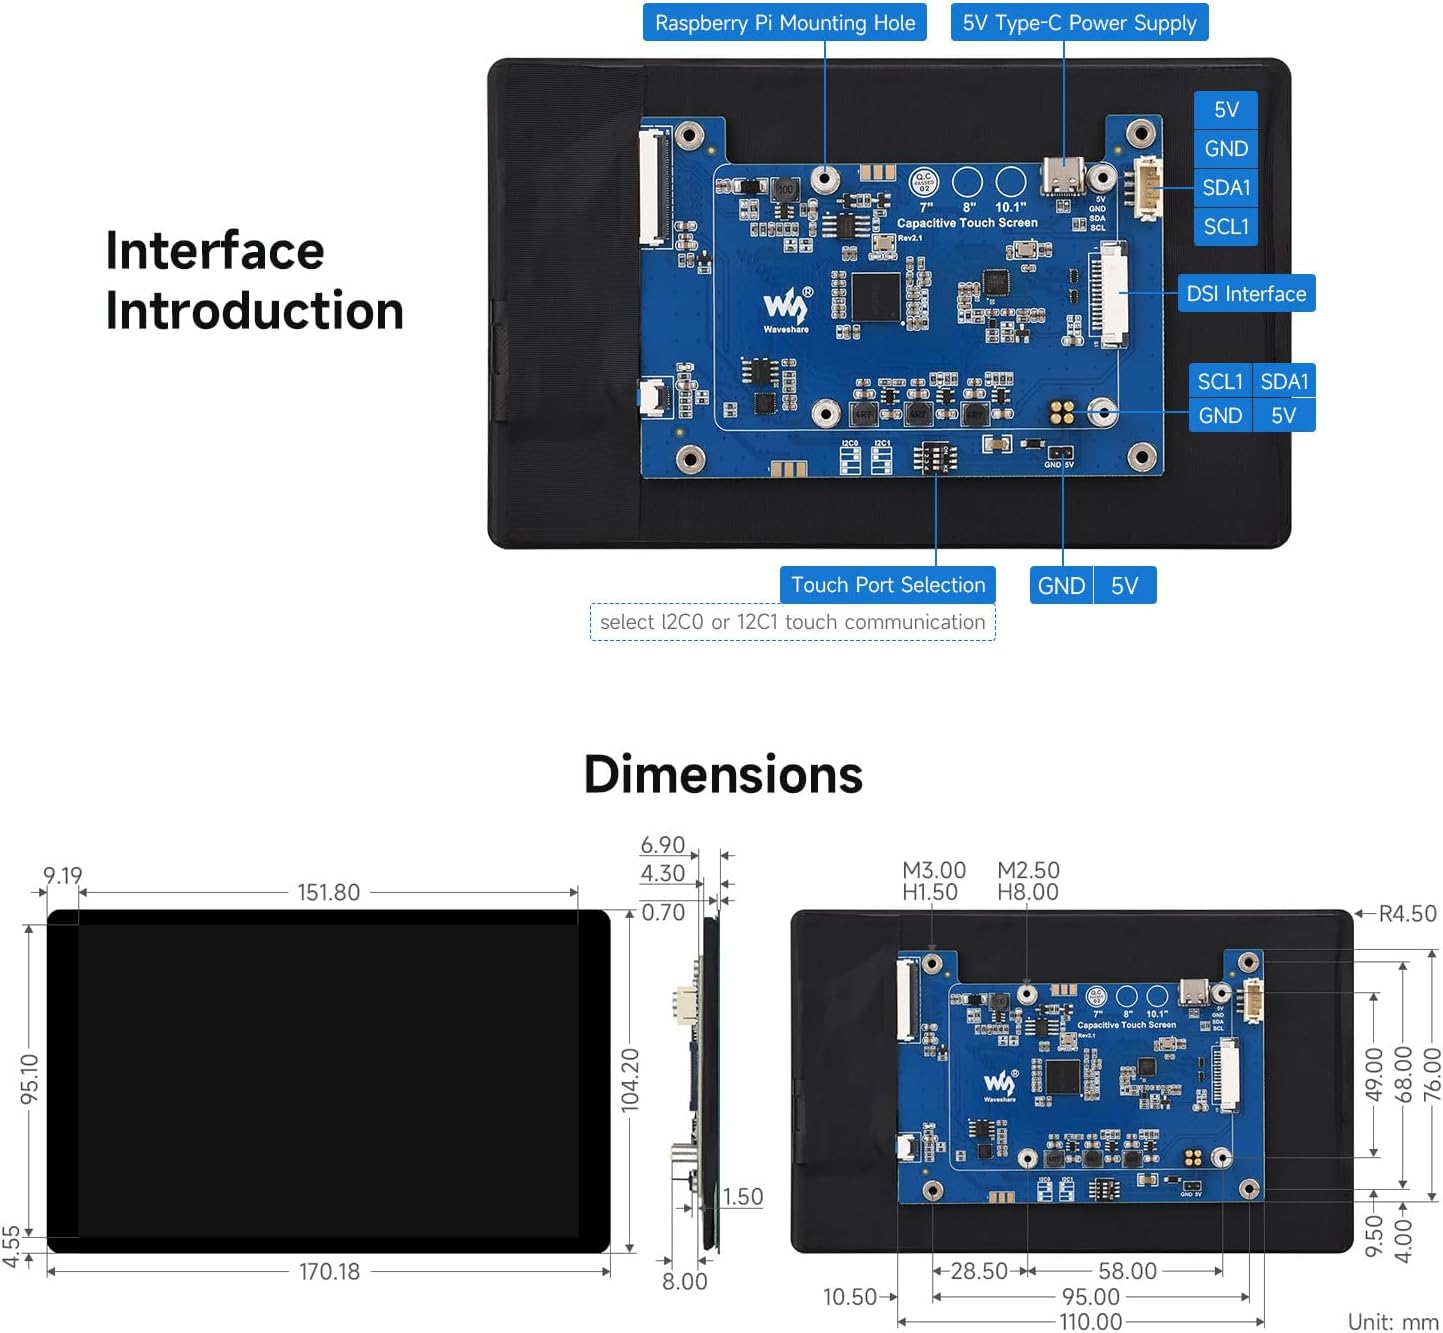
This image provides an interface introduction and detailed dimensions of the Waveshare 7-inch DSI LCD (E), highlighting key connection points and physical measurements.
Решавање проблеми
- Екранот не се вклучува:
- Ensure the DSI cable is correctly and securely connected at both ends.
- Verify that the display is receiving adequate power (5V). Check power connections to the Raspberry Pi or development board.
- Потврдете дека на
config.txtfile has been correctly modified with the display's configuration code.
- Функцијата на допир не работи:
- Check the DSI cable connection. A loose or incorrectly oriented cable can affect touch functionality.
- In the "Screen Configuration" application, ensure the correct touchscreen option is selected under "Screen" -> "DSI-2" -> "Touchscreen".
- If using a custom OS, ensure the necessary touch drivers are installed. Refer to the Waveshare Wiki for driver information.
- Неточна ориентација на екранот:
- Adjust the display orientation in the "Screen Configuration" application under "Orientation".
- Screen Flickering or Abnormal Display:
- Ensure the power supply is stable and provides sufficient current. An unstable power supply can cause display issues.
- Проверете дали има лабави врски или оштетени кабли.
For more detailed troubleshooting steps and specific error codes, please visit the official Waveshare Wiki for your product model.
Одржување
- Чистење: Користете мека крпа без влакненца за нежно да го избришете екранот. За тврдокорни дамки, малку избришете гоampИзбришете ја крпата со вода или средство за чистење безбедно за екрани. Избегнувајте груби хемикалии или абразивни материјали.
- Складирање: Кога не го користите подолго време, чувајте го дисплејот на ладно и суво место, подалеку од директна сончева светлина и екстремни температури.
- Ракување: Handle the display by its edges to avoid touching the screen surface or applying pressure to the panel.
Гаранција и поддршка
This Waveshare product comes with a 1 година гаранција од датумот на купување. Ве молиме зачувајте го доказот за купување за гаранциски барања.
For technical support, additional documentation, and the latest software updates, please visit the official Waveshare Wiki:
The Wiki provides comprehensive resources, including detailed setup guides, driver downloads, and community forums.