Вовед
This manual provides essential information for the setup, operation, and maintenance of your PowerA Enhanced Wireless Controller, featuring the unique Pikachu vs. Gengar design. This officially licensed controller is designed to enhance your gaming experience on Nintendo Switch, Nintendo Switch Lite, and Nintendo Switch (OLED Model) consoles.
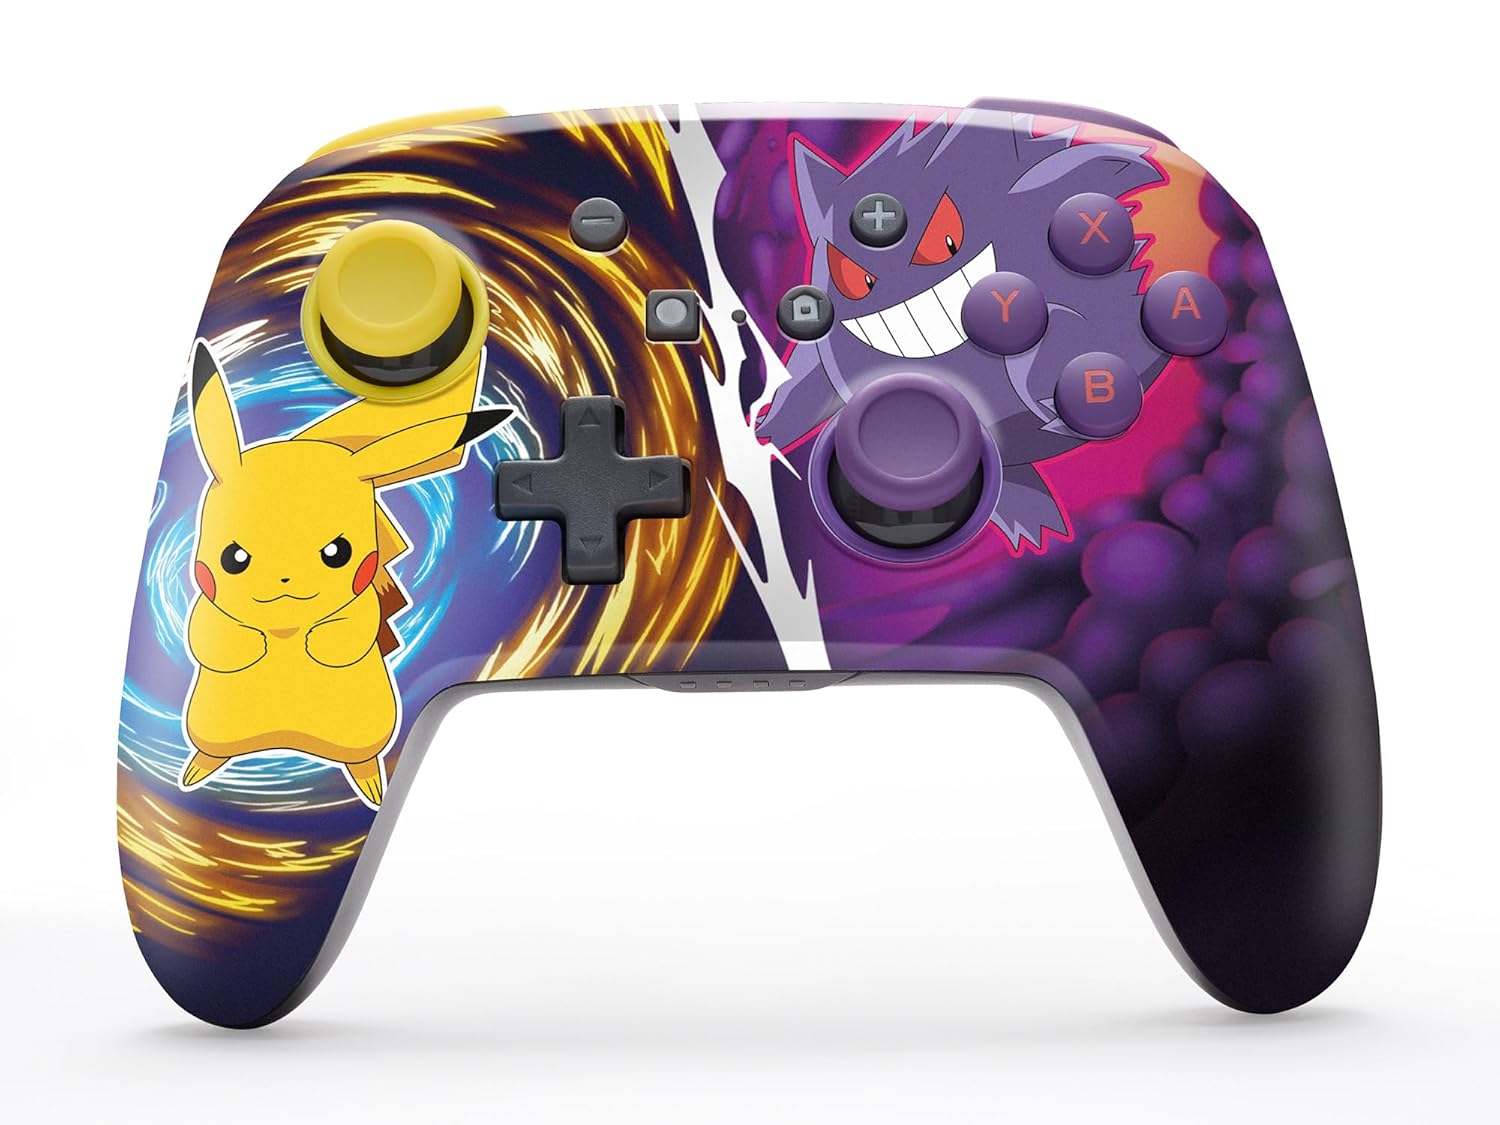
The PowerA Enhanced Wireless Controller with Pikachu vs. Gengar artwork.
Клучни карактеристики
- Безжична поврзаност: Utilizes Bluetooth 5.0 technology for a stable connection.
- Батерија на полнење: Integrated lithium-ion battery provides up to 30 hours of gameplay per charge.
- Mappable Advanced Gaming Buttons: Two programmable buttons on the back for custom control.
- Ергономски дизајн: Superior ergonomics for extended comfortable gaming sessions.
- Smooth Thumbstick Control: Embedded anti-friction rings ensure precise and fluid movement.
- Контроли на движење: Supports intuitive motion controls for compatible games.

Ergonomic design for comfortable gameplay.
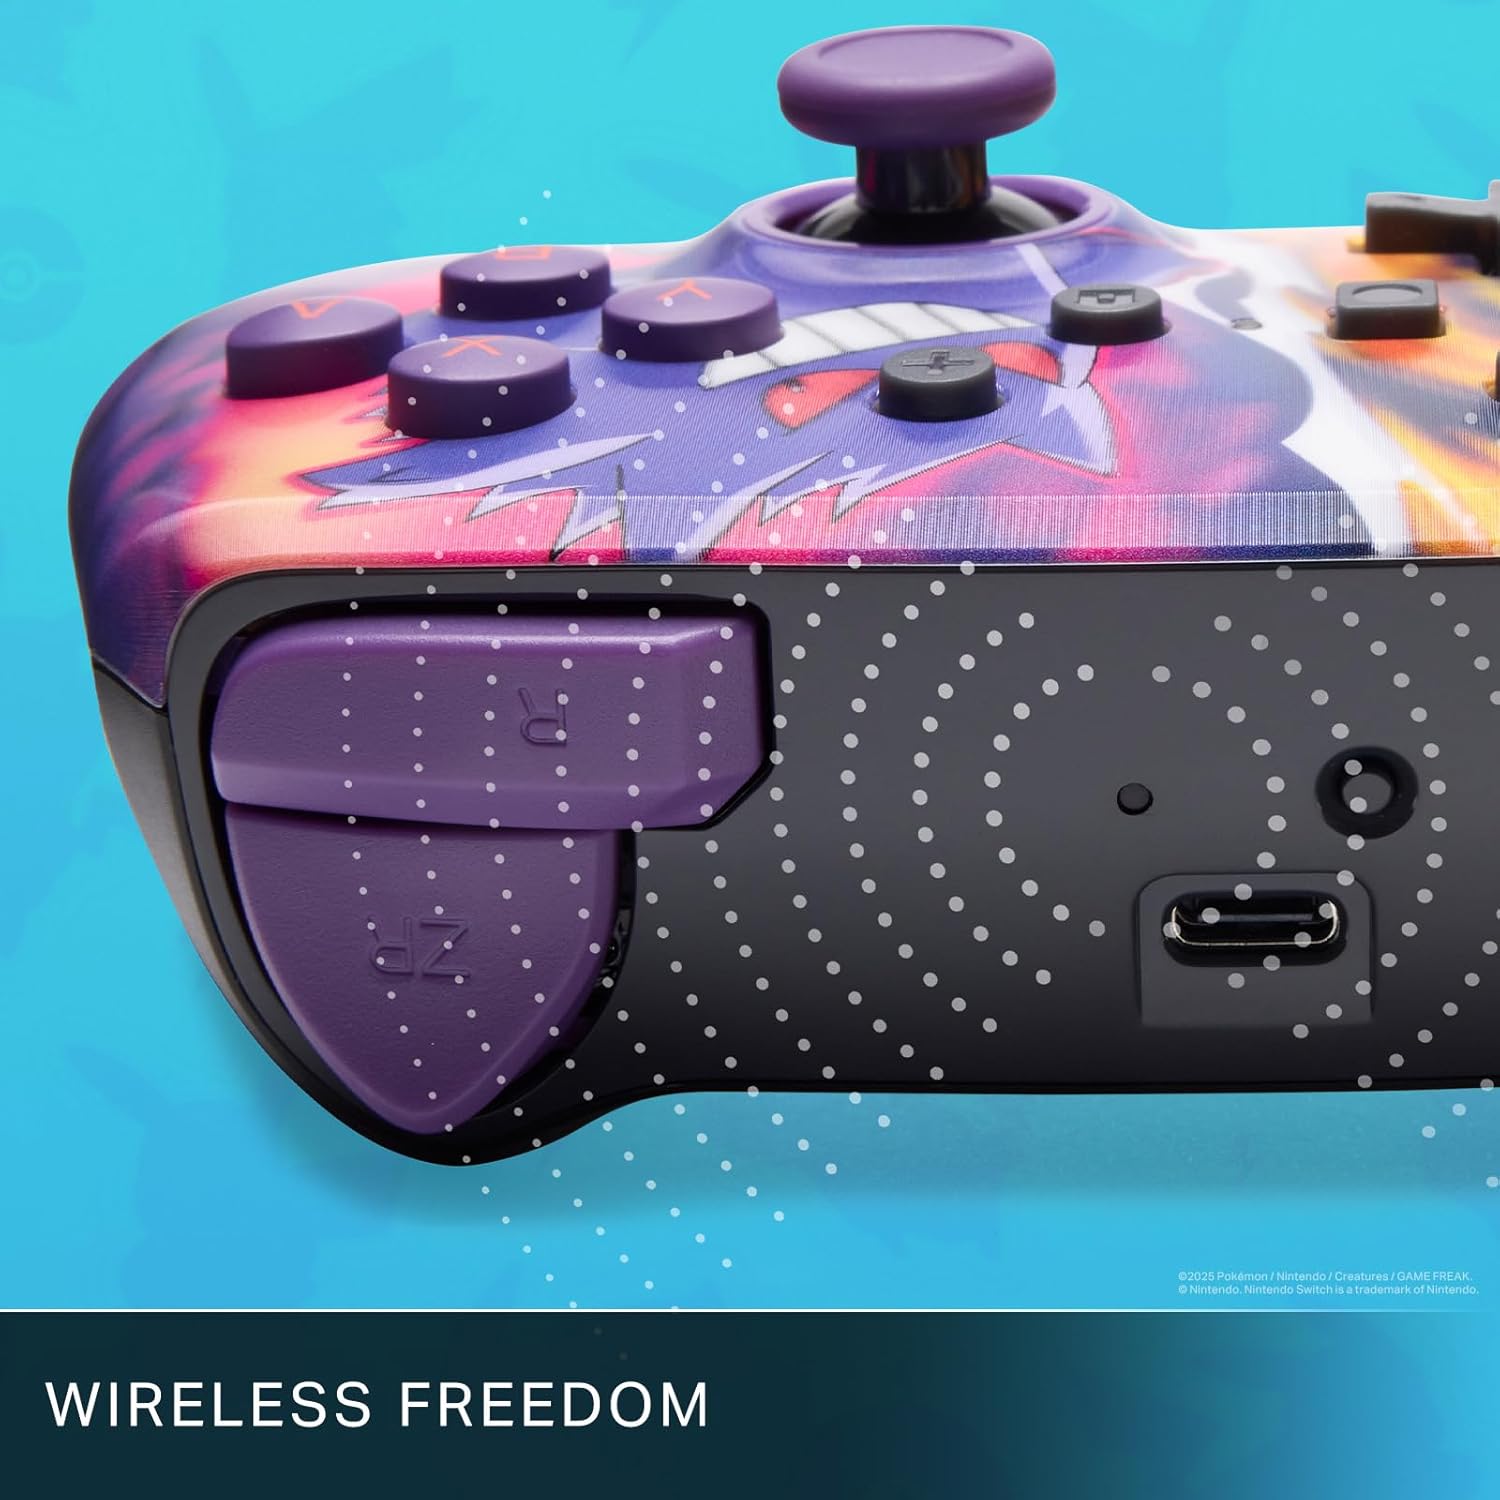
Enjoy wireless freedom with Bluetooth 5.0 technology.
Поставување и спарување
- Осигурајте се дека вашата конзола Nintendo Switch е вклучена и ажурирана со најновиот системски софтвер.
- Од менито HOME, изберете Контролори, тогаш Променете го зафат/нарачка.
- Притиснете и задржете го Копче SYNC on the top edge of your PowerA Enhanced Wireless Controller for at least one second. The Player LED(s) will flash.
- Once paired, the Player LED(s) corresponding to the controller number will remain lit.
- Притиснете го Копче to confirm and exit the menu. Your controller is now ready for use.
Полнење на контролорот
The controller features an internal 900mAh lithium-ion rechargeable battery, providing up to 30 hours of gameplay on a single charge. To charge your controller:
- Connect the included 10ft (3m) USB-C charge cable to the USB-C port on the top of the controller.
- Connect the other end of the USB-C cable to a USB power source (e.g., Nintendo Switch dock, USB wall adapter, or computer USB port).
- The LED indicator on the controller will show charging status. It will typically turn off or change color when fully charged.

Connect the USB-C cable to charge your controller.
Advanced Gaming Buttons
Your PowerA Enhanced Wireless Controller includes two mappable Advanced Gaming Buttons (AGBs) on the back, allowing you to assign specific button functions for quick access during gameplay.
Programming AGBs:
- Притиснете го Копче за програми on the back of the controller. The Program LED will flash, indicating programming mode.
- Press the button you wish to map (A/B/X/Y/L/R/ZL/ZR/Left Stick Click/Right Stick Click/D-Pad). The Program LED will flash rapidly.
- Press the Advanced Gaming Button (AGB L or AGB R) you want to assign the function to. The Program LED will stop flashing, indicating the AGB is now programmed.
Resetting AGBs:
To reset all Advanced Gaming Buttons to their default (no function) state, press and hold the Копче за програми for five seconds. The Program LED will flash slowly, then turn off, confirming the reset.
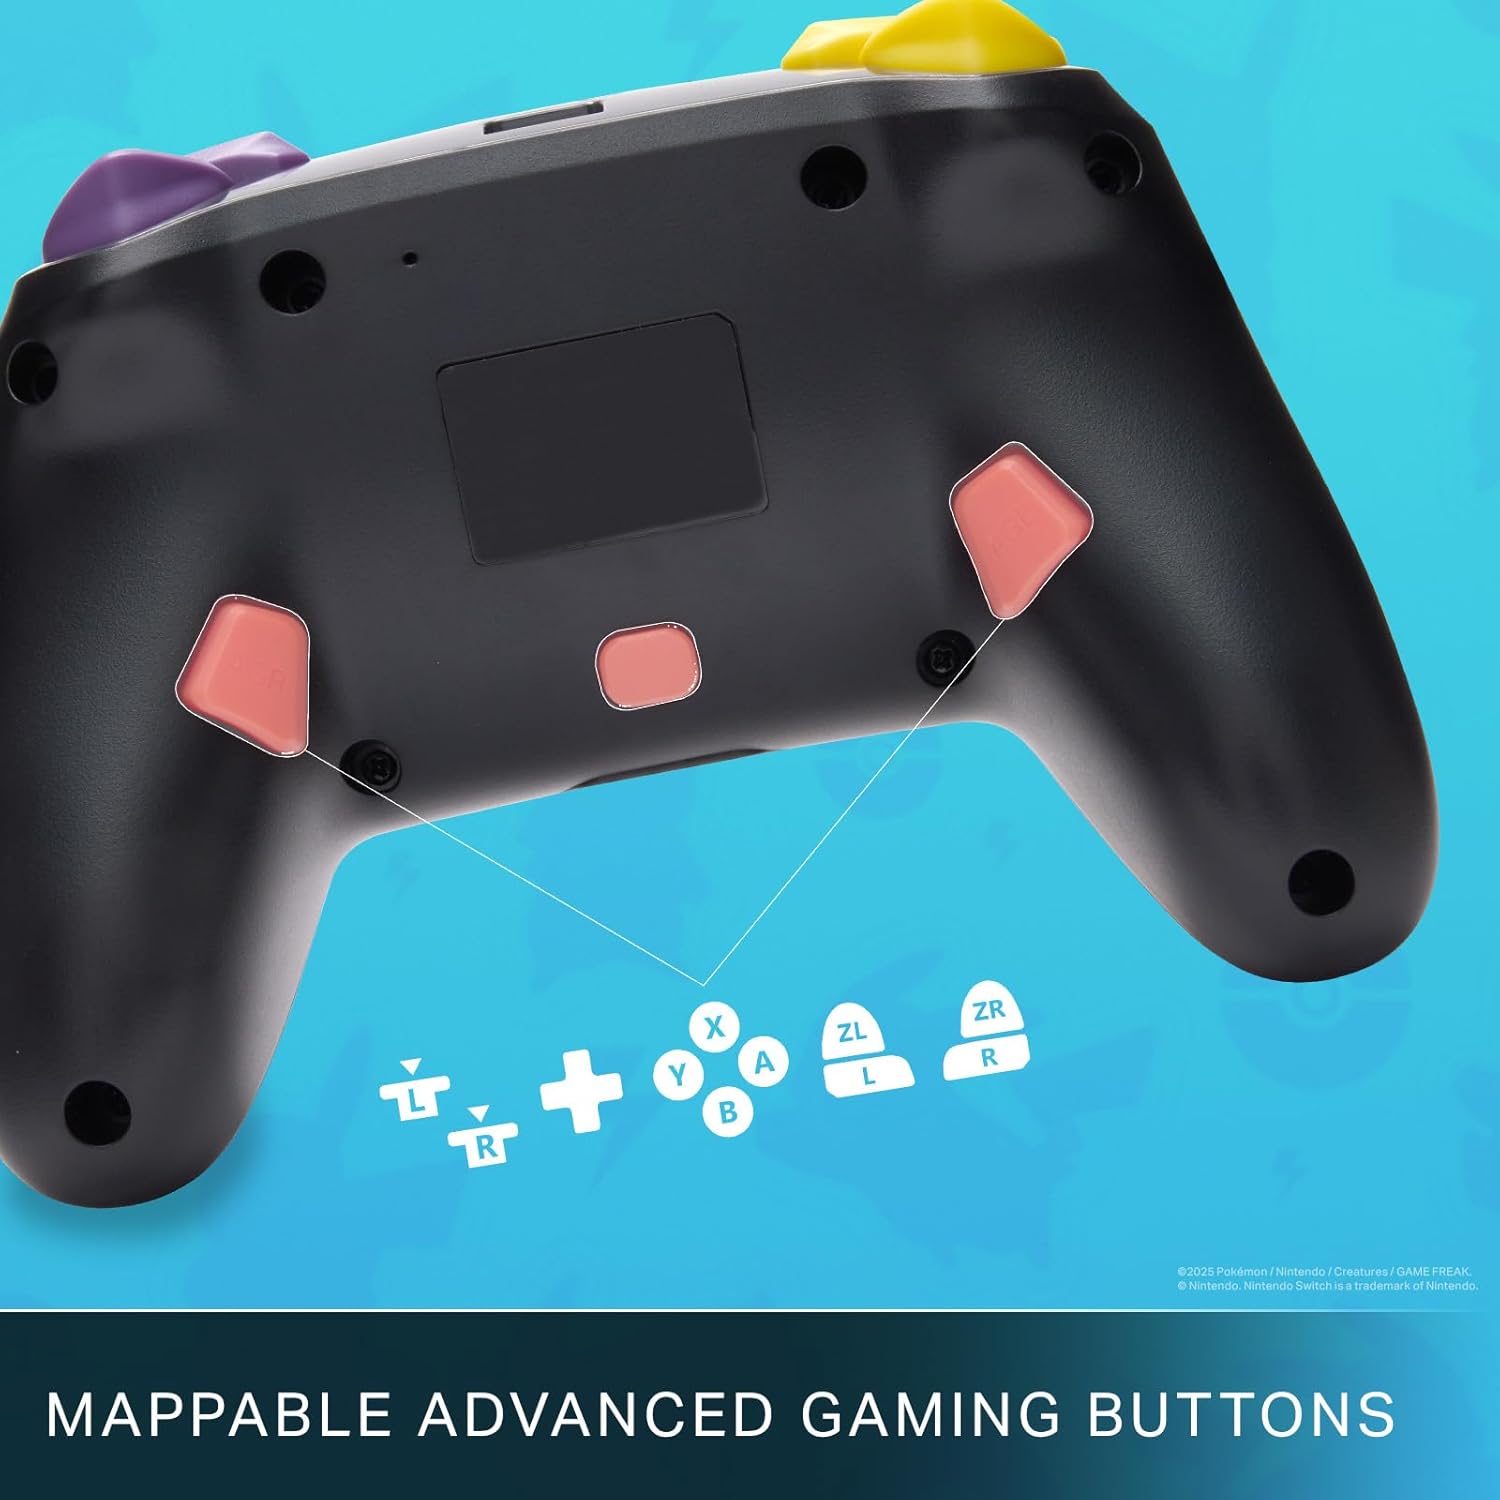
Mappable Advanced Gaming Buttons for personalized control.
Компатибилност
This PowerA Enhanced Wireless Controller is compatible with the following Nintendo consoles:
- Nintendo Switch
- Nintendo Switch Lite
- Nintendo Switch (OLED Model)
- Nintendo Switch 2 (Note: C button not available)

The controller is compatible with Nintendo Switch 2, though the C button functionality is not available.
Спецификации
| Карактеристика | Детал |
|---|---|
| Компатибилни уреди | Nintendo Switch |
| Тип на контролер | Подлога за игра |
| Технологија за поврзување | Bluetooth, USB |
| Дополнителни карактеристики | Ергономски, безжичен |
| Број на копчиња | 12 |
| Хардверска платформа | Конзола за игри |
| Извор на енергија | Напојува со батерија (литиум-јонски што се полни) |
| Компатибилни модели на конзоли за видео игри | Nintendo Switch, Nintendo Switch Lite |
| Тежина на ставката | 0.68 фунти |
| Димензии на ставката | 6.02 x 4.41 x 2.48 инчи |
| Боја | Pikachu vs Gengar |
| Име на моделот | Pikachu vs. Gengar |
| Број на модел | NSGP0420-01R |
Нега и одржување
- Чувајте го контролерот сув. Избегнувајте изложување на влага или екстремни температури.
- Чистете го контролерот со мека, сува крпа. Не користете груби хемикалии или абразивни материјали.
- Чувајте го контролерот на безбедно место кога не е во употреба за да спречите оштетување.
Решавање проблеми
Контролерот не се поврзува:
- Осигурајте се дека контролерот е целосно наполнет.
- Verify the controller is within the Bluetooth range of your Nintendo Switch console.
- Attempt to re-pair the controller following the "Setup and Pairing" instructions.
Копчиња/џојстици што не реагираат:
- Проверете дали има физички пречки или остатоци околу копчињата или џојстиците.
- Perform a hard reset by holding the SYNC button for 10 seconds, then attempt to re-pair.
- Ensure the controller's firmware is up to date (check PowerA's official webстраница за ажурирања).
Гаранција и поддршка
This PowerA Enhanced Wireless Controller comes with a Двегодишна ограничена гаранција. For detailed warranty information, product support, and troubleshooting assistance, please visit the official PowerA support webсајт: