1. Вовед
Thank you for choosing the Behringer B-2 Pro Dual-Diaphragm Condenser Microphone. This versatile microphone is designed for professional audio recording in various applications, including vocals, instruments, and ambient sound capture. Its robust construction and flexible features make it an excellent choice for home studios, project studios, and professional recording environments. This manual provides essential information for the proper setup, operation, and maintenance of your B-2 Pro microphone.
2. Важни безбедносни инструкции
- Прочитајте ги овие упатства темелно пред да го користите производот.
- Чувајте ги овие упатства за идна референца.
- Следете ги сите предупредувања и следете ги сите упатства.
- Не користете го овој апарат во близина на вода или влага.
- Чистете само со сува крпа.
- Не ги блокирајте отворите за вентилација. Инсталирајте во согласност со упатствата на производителот.
- Не инсталирајте во близина на извори на топлина како што се радијатори, топлински регистри, шпорети или други апарати (вклучувајќи ampлајфикатори) кои произведуваат топлина.
- Користете само додатоци/додатоци наведени од производителот.
- Целото сервисирање упатете го на квалификуван сервисен персонал. Сервисирањето е потребно кога апаратот е оштетен на кој било начин, како што е оштетен кабелот за напојување или приклучокот, течноста е истурена или предмети паднале во апаратот, апаратот бил изложен на дожд или влага, не работи нормално , или е исфрлен.
- This microphone requires +48V phantom power to operate. Ensure your audio interface or mixer provides phantom power and that it is enabled before connecting the microphone.
3. Содржина на пакетот
Проверете дали сите артикли наведени подолу се присутни во вашето пакување. Доколку некои артикли недостасуваат или се оштетени, ве молиме контактирајте го вашиот продавач.
- Behringer B-2 Pro Dual-Diaphragm Condenser Microphone
- Custom Shockmount
- Ветробранско стакло
- Durable Aluminum Carrying Case
- Tripod Microphone Stand
- Кабел XLR
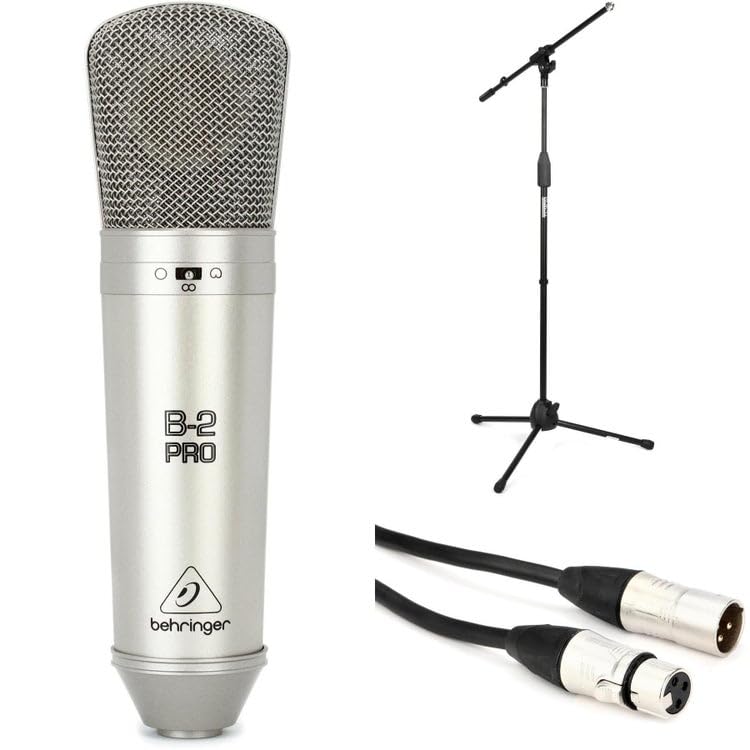
Image: Behringer B-2 Pro microphone with its shockmount, windscreen, and XLR cable, as typically included in the package.
4. Карактеристики на производот
The B-2 Pro is engineered to deliver high-quality audio performance with exceptional versatility.
- Dual-Diaphragm Design: Enables selection of multiple polar patterns for diverse recording applications.
- Selectable Polar Patterns: Choose between Cardioid, Omnidirectional, and Figure-8 patterns to optimize sound capture for different sources and environments.
- Switchable 10dB Pad: Attenuates input signals by 10dB, allowing the microphone to handle very loud sound sources without distortion. Ideal for drums, guitar amplifiers, or brass instruments.
- Филтер со низок пресек: Reduces unwanted low-frequency rumble or proximity effect, improving clarity in recordings.
- Позлатен XLR конектор: Ensures signal integrity and corrosion resistance.
- Цврста конструкција: Designed for durability and reliable performance in studio settings.
5. Поставување
- Отпакувајте го микрофонот: Carefully remove the B-2 Pro microphone and its accessories from the aluminum carrying case.
- Соберете го држачот за микрофон: Extend the tripod legs of the included microphone stand for stability. Adjust the height as needed.
- Прикачете го држачот за удари: Screw the custom shockmount onto the top of the microphone stand. Ensure it is securely fastened.
- Монтирајте го микрофонот: Gently insert the B-2 Pro microphone into the shockmount. The shockmount's elastic suspension helps isolate the microphone from vibrations and handling noise.
- Attach the Windscreen: Place the foam windscreen over the microphone capsule to reduce plosives (harsh "p" and "b" sounds) and protect the microphone from dust.
- Поврзете го XLR кабелот: Connect one end of the supplied XLR cable to the microphone's XLR output. Connect the other end to an XLR input on your audio interface, mixer, or preampживописен.
- Овозможи Фантомска моќност: The B-2 Pro is a condenser microphone and requires +48V phantom power to operate. Ensure that phantom power is enabled on your audio interface or mixer пред connecting the microphone to prevent potential damage.

Image: Illustration of the B-2 Pro microphone setup, including stand, shockmount, and cable connection to an audio interface.
6. Operating the B-2 Pro
6.1. Polar Pattern Selection
The B-2 Pro features a switch on the microphone body to select between three polar patterns. Adjust this switch according to your recording needs.
- Кардиоид: Овој шаблон го прима звукот првенствено од предната страна на микрофонот, отфрлајќи го звукот од страните и задната страна. Идеален е за изолирање на еден извор на звук, како што е вокалист или инструмент, во живо или студиска атмосфера.
- Семонасочно: This pattern picks up sound equally from all directions. It is suitable for capturing room ambiance, group vocals, or multiple instruments simultaneously.
- Слика-8: This pattern picks up sound equally from the front and rear of the microphone, while rejecting sound from the sides. It is commonly used for recording two vocalists facing each other, or for capturing a specific instrument while minimizing room reflections from the sides.

Image: Visual representation of the three selectable polar patterns: Cardioid, Omnidirectional, and Figure-8, showing their sound pickup characteristics.
6.2. 10dB Pad Switch
The B-2 Pro includes a switchable 10dB pad. When engaged, this pad reduces the microphone's output level by 10 decibels.
- Engage the Pad: Use the 10dB pad when recording very loud sound sources, such as drums, loud guitar amplifiers, or brass instruments, to prevent input clipping at your audio interface or mixer.
- Disengage the Pad: For quieter sources like vocals or acoustic guitars, disengage the pad to ensure a healthy signal level.
6.3. Low-Cut Filter Switch
The low-cut filter (also known as a high-pass filter) reduces low-frequency content below a certain point.
- Engage the Filter: Use the low-cut filter to reduce unwanted rumble, handling noise, or proximity effect (an increase in bass response when a microphone is close to the sound source). This can improve clarity, especially for vocals and acoustic instruments.
- Disengage the Filter: For sources where full low-frequency response is desired, such as bass instruments or kick drums, disengage the filter.
6.4. Поставување на микрофонот
Proper microphone placement is crucial for optimal sound quality. Experiment with distance and angle to achieve the desired tone.
- Вокал: Start with the microphone 6-12 inches from the vocalist, slightly off-axis to reduce plosives. Use the cardioid pattern.
- Акустична гитара: Aim the microphone towards the 12th fret at a distance of 6-18 inches. Cardioid pattern is generally preferred.
- Амбиент во собата: Use the omnidirectional pattern and place the microphone in the center of the room or at a distance that captures the desired room sound.
- Two Vocalists: Use the Figure-8 pattern with vocalists positioned on opposite sides of the microphone.
7. Одржување
- Чистење: Use a soft, dry cloth to clean the microphone body. Do not use liquid cleaners or solvents, as they may damage the finish or internal components.
- Складирање: When not in use, store the B-2 Pro microphone in its aluminum carrying case to protect it from dust, moisture, and physical damage. Avoid extreme temperatures and humidity.
- Ракување: Always handle the microphone with care. Avoid dropping it or subjecting it to strong impacts.
8 Смена на проблеми
| Проблем | Можна причина | Решение |
|---|---|---|
| Нема излез на звук |
|
|
| Искривен звук |
|
|
| Брмчење или бучава |
|
|
9. Спецификации
| Бренд | Берингер |
| Број на модел | B2ProPk |
| Тип | Кондензаторски микрофон |
| Поларни модели | Cardioid, Omnidirectional, Figure-8 (Switchable) |
| Преклопна подлога | -10 dB |
| Филтер со низок пресек | Да |
| Технологија за поврзување | XLR |
| Потребна моќност | +48V Phantom Power |
| Тежина на ставката | 1 фунти (0.45 кг) |
| Компатибилни уреди | Audio Interfaces, Mixers, Preamplifiers with XLR input |
| Поддржан софтвер | Any DAW with microphone input |
| Компатибилност на оперативниот систем | Windows, macOS |
| Максимална Сample Стапка | 192 KHz |
Белешка: Спецификациите може да се променат без претходна најава.
10. Гаранција и поддршка
За детални информации за гаранцијата и техничка поддршка, ве молиме погледнете го официјалниот Behringer webлокација или контактирајте го вашиот локален дистрибутер на Behringer. Чувајте ја сметката како доказ за купување за какви било гаранциски побарувања.
Официјално од Берингер Webсајт: www.behringer.com