1. Вовед
This manual provides comprehensive instructions for the installation, operation, maintenance, and troubleshooting of the NUUO NVRmini2 NE-4160 Network Video Recorder. The NE-4160 is a 16-channel NVR designed for robust surveillance systems, featuring 4 drive bays and a 4TB storage capacity, compatible with various IP cameras.
Ве молиме внимателно прочитајте го ова упатство пред да го користите уредот за да обезбедите правилно поставување и оптимални перформанси.
2. Безбедносни мерки на претпазливост
- Ensure the device is placed on a stable, level surface to prevent accidental falls.
- Do not expose the NVR to water or excessive humidity.
- Користете го само адаптерот за напојување испорачан со уредот.
- Избегнувајте блокирање на отворите за вентилација за да спречите прегревање.
- Исклучете го напојувањето пред да извршите какви било процедури за одржување или инсталација.
- Целото сервисирање упатете го на квалификуван сервисен персонал.
3. Содржина на пакетот
Проверете дали сите артикли се присутни во пакувањето:
- NUUO NVRmini2 NE-4160 Unit
- Адаптер за напојување
- Етернет кабел
- Водич за брза инсталација
- Софтверско ЦД (доколку е применливо)
- Завртки за инсталација на HDD
4. Производот завршиview
The NUUO NVRmini2 NE-4160 is a robust network video recorder designed for professional surveillance applications. It supports up to 16 IP camera channels and features four hot-swappable drive bays for extensive storage, pre-installed with 4TB capacity.
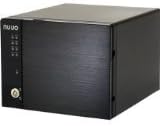
Слика 4.1: Предна страна view of the NUUO NVRmini2 NE-4160 NVR unit. This image shows the compact black chassis with the NUUO logo on the left side, status indicator lights, and a lockable front panel for drive bay access.

Слика 4.2: Аголна view of the NUUO NVRmini2 NE-4160 NVR unit. This perspective highlights the sleek design and the textured finish of the front panel, providing a better sense of the unit's dimensions.
Индикатори на предниот панел:
- Напојување LED: Покажува статус на моќност.
- HDD LEDs: Indicate hard drive activity for each bay.
- Мрежна LED: Означува мрежна поврзаност.
- LED за аларм: Indicates system alarms or errors.
5. Поставување и инсталација
5.1 Инсталација на хардвер
- Отпакување: Внимателно извадете го NVR-от од пакувањето.
- Инсталација на хард диск (доколку не е претходно инсталиран):
- Unlock the front panel and open the drive bay door.
- Slide the hard drive trays out.
- Secure 3.5-inch SATA hard drives into the trays using the provided screws.
- Slide the trays back into the bays until they click into place.
- Затворете го и заклучете го предниот панел.
- Мрежна конекција: Connect one end of the Ethernet cable to the NVR's LAN port and the other end to your network router or switch.
- Поврзување за напојување: Поврзете го адаптерот за напојување со приклучокот за напојување на NVR, а потоа вклучете го во штекер. NVR ќе се вклучи автоматски.
5.2 Initial Software Configuration
Upon first boot, the NVR will acquire an IP address via DHCP (if available). You can access the NVR's web interface using its IP address or by using the NUUO Finder utility.
- Discovering the NVR:
- Install the NUUO Finder utility from the provided CD or NUUO website on a computer connected to the same network.
- Run NUUO Finder to scan for the NVRmini2 NE-4160 on your network.
- Note down the NVR's IP address.
- Пристапување Web Интерфејс:
- Отвори a web browser (e.g., Chrome, Firefox) and enter the NVR's IP address in the address bar.
- Log in using the default username (e.g., "admin") and password (e.g., "admin"). It is highly recommended to change the default password immediately after the first login.
- Иницијализација на системот: Follow the on-screen wizard for initial setup, which typically includes:
- Поставување датум и време
- Network Settings (Static IP configuration, if desired)
- Hard Drive Formatting (if required)
- Додавање IP камери
6. Управување со NVR
6.1 Во живо View
Во живо View interface allows you to monitor all connected cameras in real-time. You can customize the layout, view multiple cameras simultaneously, and access various controls.
- Layout Selection: Choose from various grid layouts (e.g., 1x1, 2x2, 3x3, 4x4) to display cameras.
- Контрола на PTZ: If your cameras support Pan/Tilt/Zoom, use the on-screen controls to adjust camera angles and zoom levels.
- Инстант репродукција: Брзо повторноview recent recordings from the live view.
6.2 Управување со снимање
The NVRmini2 NE-4160 supports various recording modes:
- Континуирано снимање: Снимки 24/7.
- Снимање на откривање на движење: Records only when motion is detected by the camera.
- Распоред на снимање: Records based on a predefined schedule.
- Снимање аларм: Records when an external alarm input is triggered.
Configure recording settings for each camera in the "Recording" section of the web интерфејс.
6.3 Playback and Export
За повторноview снимен footage:
- Navigate to the "Playback" section.
- Изберете ја саканата/ите камера/и и опсег на датум/време.
- Користете ја временската линија за да се движите низ снимките.
- За извоз на хранаtage, select the desired segment and choose the export format (e.g., AVI, MP4).
7. Одржување
7.1 Редовни проверки
- Статус на системот: Periodically check the NVR's system status via the web interface to ensure all components are functioning correctly.
- Здравје на тврдиот диск: Monitor hard drive health and capacity. Replace drives showing signs of failure promptly.
- Ажурирања на фирмверот: Check the NUUO website regularly for firmware updates. Applying updates can improve performance, add features, and fix bugs.
- Физичко чистење: Одржувајте го NVR уредот чист и без прашина. Користете мека, сува крпа. Не користете течни средства за чистење.
7.2 Бекап на податоци
While the NVR records continuously, it is advisable to back up critical footage regularly to external storage or a network location.
8 Смена на проблеми
| Проблем | Можна причина | Решение |
|---|---|---|
| NVR not powering on | No power, faulty power adapter | Check power cable connection; try a different power outlet; test power adapter. |
| Не може да се пристапи web интерфејс | Incorrect IP address, network issue, firewall | Verify NVR's IP address using NUUO Finder; check network cable; temporarily disable firewall on PC. |
| No video from cameras | Camera not connected, incorrect camera settings, network issue | Ensure cameras are powered and connected; verify camera IP addresses and credentials in NVR settings; check network connectivity. |
| Хард дискот не е откриен | Improper installation, faulty drive, incorrect format | Re-seat the hard drive; try a different drive bay; ensure drive is compatible and formatted correctly. |
If the problem persists after attempting the above solutions, please contact NUUO technical support.
9. Спецификации
| Карактеристика | Детал |
|---|---|
| Број на модел | NE-4160-US |
| Бренд | NUUO |
| Поддржани канали | 16 |
| Диск Бејс | 4 |
| Pre-installed Storage | 4 ТБ (4000 ГБ) |
| Поврзување | Етернет |
| Компатибилни уреди | IP камери |
| Прво достапен датум | 9 декември 2013 година |
10. Информации за гаранцијата
NUUO products typically come with a limited manufacturer's warranty. Please refer to the warranty card included with your product or visit the official NUUO website for detailed warranty terms and conditions specific to the NE-4160-US model. Keep your proof of purchase for warranty claims.
11. Техничка поддршка
For technical assistance, software updates, or further inquiries, please contact NUUO technical support through their official channels:
- Webсајт: Visit the official NUUO website for support resources, FAQs, and downloads.
- Е-пошта: Refer to the NUUO webстраница за регионални е-адреси за поддршка.
- Телефон: Refer to the NUUO webстраница за регионални телефонски броеви за поддршка.
When contacting support, please have your product model number (NE-4160-US) and serial number ready.