1. Вовед
This instruction manual provides essential information for the safe and efficient operation of your Nuwave Pro Plus Infrared Oven. Please read all instructions thoroughly before initial use to ensure proper function and to prevent injury or damage. Keep this manual for future reference.
2. Важни безбедносни инструкции
Кога користите електрични апарати, секогаш треба да се следат основните безбедносни мерки за да се намали ризикот од пожар, електричен удар и повреди на лица, вклучувајќи го следново:
- Прочитајте ги сите упатства пред да ракувате со апаратот.
- Не допирајте жешки површини. Користете рачки или копчиња.
- За заштита од електричен удар, не потопувајте го кабелот, приклучоците или апаратот во вода или друга течност.
- Внимателен надзор е неопходен кога некој апарат се користи од или во близина на деца.
- Исклучете го од штекер кога не се користи и пред чистење. Оставете да се излади пред да ги ставите или извадите деловите.
- Не ракувајте со ниеден апарат со оштетен кабел или приклучок, или откако апаратот не функционира или е оштетен на кој било начин.
- Употребата на додатоци кои не се препорачани од производителот на апаратот може да предизвика повреди.
- Не користете на отворено.
- Не дозволувајте кабелот да виси над работ на масата или шанкот или да допира жешки површини.
- Не ставајте на или во близина на загреан гас или електричен пламеник или во загреана рерна.
- Потребна е голема претпазливост при движење на апарат кој содржи врело масло или други врели течности.
- Секогаш прво приклучувајте го приклучокот на апаратот, а потоа вклучете го кабелот во штекерот. За да го исклучите, исклучете го кој било контролер, а потоа извадете го приклучокот од штекерот.
- Не користете го апаратот за друга употреба освен наменетата.
3. Компоненти на производот
The Nuwave Pro Plus Infrared Oven consists of several key components designed for efficient cooking.

Figure 3.1: The Nuwave Pro Plus Infrared Oven, shown with its instruction manual and a recipe CD.
- Моќна глава: Содржи грејач, вентилатор и контролна табла.
- Купола: A transparent, heat-resistant dome that covers the cooking area.
- Решетка за готвење: Used to elevate food for even cooking.
- Base Pan: Collects drippings and holds the cooking rack.
- Дигитален контролен панел: For setting time, temperature, and other functions.

Слика 3.2: Одблиску view of the heating element and internal fan located within the power head.
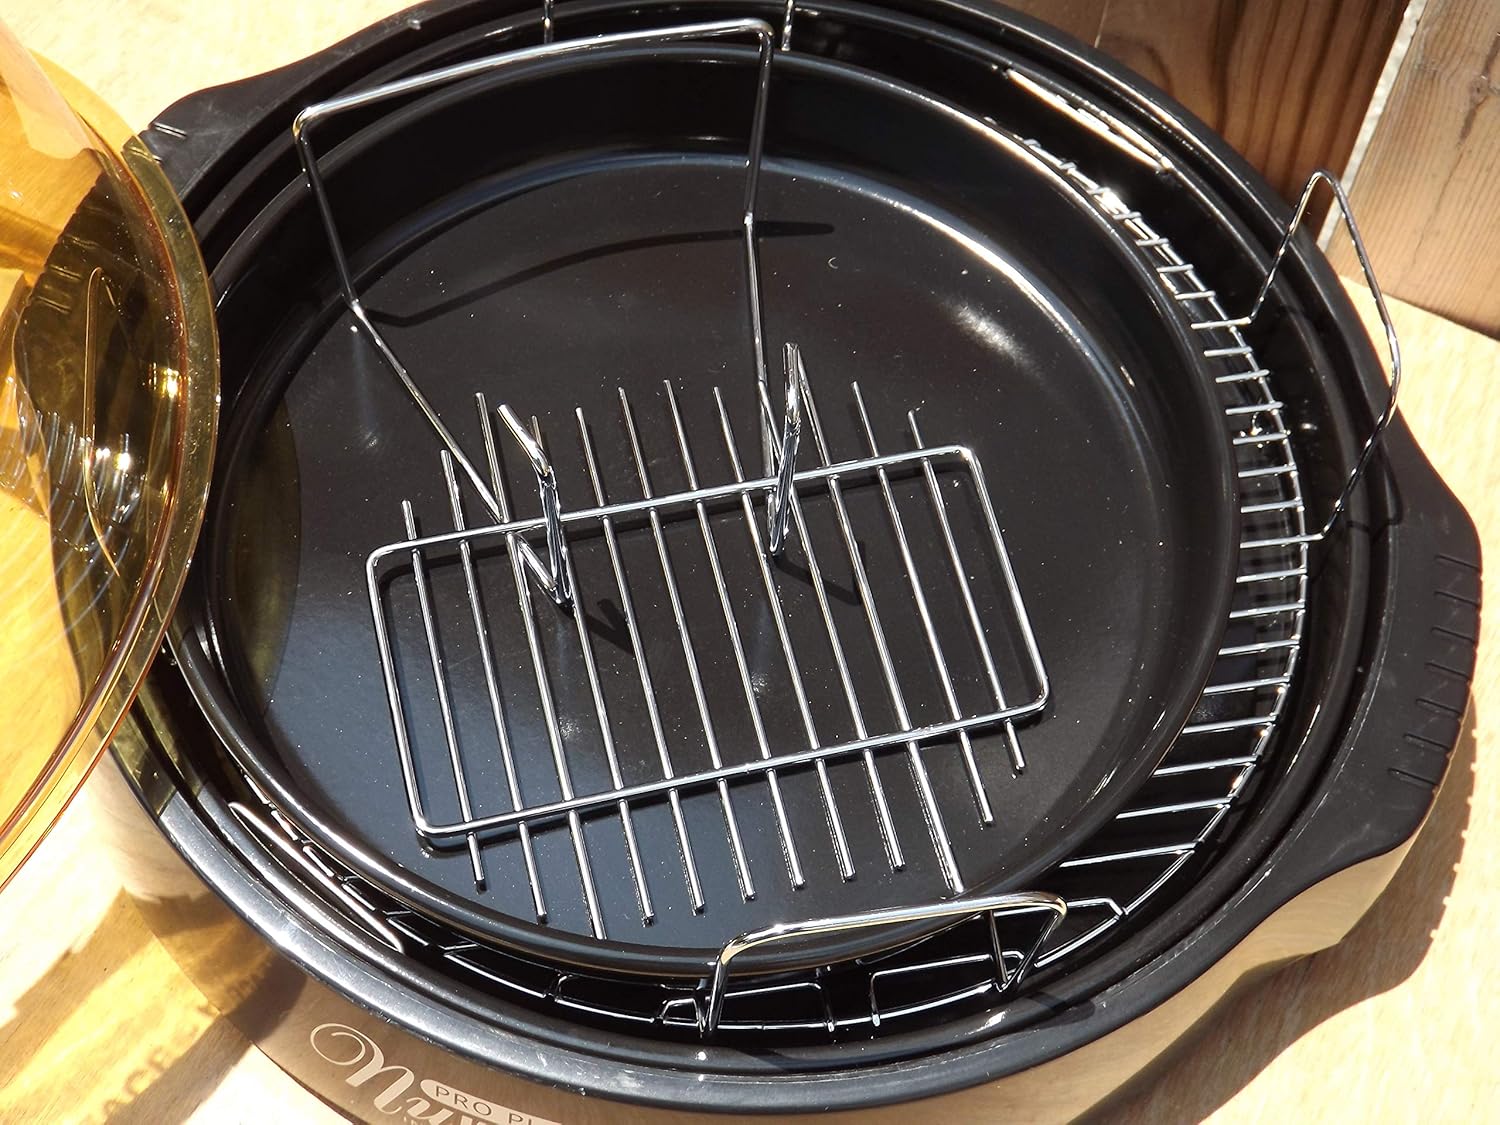
Figure 3.3: The cooking racks positioned within the oven's base pan, ready for food placement.
4. Поставување
Пред првата употреба, проверете дали сите материјали за пакување се отстранети и дали апаратот е правилно склопен.
- Отпакувај: Внимателно отстранете ги сите компоненти од пакувањето.
- Чисти: Wash the dome, cooking rack, and base pan with warm, soapy water. Rinse thoroughly and dry completely. The power head should only be wiped with a damp крпа.
- Собери: Place the base pan on a stable, heat-resistant surface. Insert the desired cooking rack into the base pan. Place the food on the rack. Carefully position the dome over the base pan. Finally, place the power head securely on top of the dome.
- Поврзување за напојување: Приклучете го кабелот за напојување во стандарден штекер со наизменична струја од 120 V.
5. Упатства за работа
The Nuwave Pro Plus Infrared Oven features a digital control panel for precise cooking.

Figure 5.1: The digital control panel with buttons for Cook Time, Cook Temp, Reheat, Warm, Delay, Pause/Clear, Start, and numerical input.
- Вклучување: Once plugged in, the display will illuminate.
- Поставете време за готвење: Press the 'Cook Time' button. Use the numerical keypad to enter the desired cooking duration in minutes. Press 'Start' to confirm.
- Set Cooking Temperature: Press the 'Cook Temp' button. Use the numerical keypad to enter the desired temperature in degrees Fahrenheit. Press 'Start' to confirm.
- Започнете со готвење: After setting time and temperature, press the 'Start' button to begin the cooking cycle.
- Пауза/Избриши: To temporarily stop cooking, press 'Pause/Clear'. Press 'Start' to resume. To cancel the current program, press 'Pause/Clear' twice.
- Функција за загревање: Press the 'Reheat' button for a preset reheating cycle. Adjust time if necessary using 'Cook Time'.
- Топла функција: Press the 'Warm' button to keep food warm after cooking.
- Функција за одложување: Press the 'Delay' button to set a delayed start time for cooking. Follow on-screen prompts to set the delay duration.
Always monitor food during cooking. Cooking times may vary based on food type, quantity, and desired doneness.
6. Одржување и чистење
Regular cleaning ensures optimal performance and extends the life of your Nuwave Pro Plus Infrared Oven.
- Исклучете го од струја и оладете: Always unplug the oven from the power outlet and allow all components to cool completely before cleaning.
- Dome, Rack, and Base Pan: These components are dishwasher safe or can be washed by hand with warm, soapy water. Use a non-abrasive sponge or cloth. Rinse thoroughly and dry completely.
- Моќна глава: The power head contains electrical components and should NEVER be immersed in water. Wipe the exterior with a damp крпа. За тврдокорни дамки, користете благ детергент на крпата, а потоа избришете со чиста,amp крпа. Уверете се дека е целосно сува пред складирање или следната употреба.
- Складирање: Чувајте ја рерната на чисто и суво место кога не е во употреба.
7 Смена на проблеми
Погледнете го овој дел за вообичаени проблеми и нивни решенија.
| Проблем | Можна причина | Решение |
|---|---|---|
| Рерната не се вклучува. | Не е вклучено во штекер; исклученоtage; неисправен штекер. | Проверете дали кабелот за напојување е безбедно вклучен. Проверете го прекинувачот. Обидете се со друг штекер. |
| Храната не се готви рамномерно. | Improper food placement; too much food; incorrect temperature/time. | Ensure food is placed on the rack and not directly on the base. Do not overcrowd the oven. Adjust cooking time or temperature as needed. |
| Чад или необичен мирис за време на работата. | Food drippings on heating element; residue from previous cooking. | Unplug immediately. Allow to cool and clean all components thoroughly. Ensure no food particles are on the heating element. |
| Контролната табла не реагира. | Temporary electrical glitch; power head not seated correctly. | Unplug the oven for 1 minute, then plug back in. Ensure the power head is securely placed on the dome. |
8. Спецификации
Detailed technical specifications for the Nuwave Pro Plus Infrared Oven.
- Бренд: Нувејв
- Име на модел: Nu-Wave Oven
- Тип на контрола: Knob (Digital Keypad)
- Стил на врата: Side Swing (Dome Lift)
- Вклучени компоненти: Crumb Tray (Base Pan), Cooking Rack
- Тип на завршница: Насликани
- Тип материјал на вратата: Stainless Steel (referring to internal components/accents)
- Извор на енергија: AC адаптер
- Број на полици: 1 (Cooking Rack)
- Големина: Средно
- Тежина на ставката: 14.26 фунти
- Димензии на пакетот: 15.8 x 14.9 x 12.1 инчи
- ASIN: B00IXC09QC
- UPC: 652185206021
9. Гаранција и поддршка
For warranty information and customer support, please refer to the documentation included with your purchase or visit the official Nuwave webлокација. Чувајте ја сметката за купување како доказ за какви било гаранциски побарувања.
For further assistance, you may contact Nuwave customer service directly. Contact details are typically found on the product packaging or the manufacturer's official webсајт.