Вовед
This manual provides detailed instructions for the installation, operation, and maintenance of your Venstar T1900 Residential Slimline Platinum Thermostat. Please read this manual thoroughly before attempting to install or operate the thermostat to ensure proper function and to avoid potential damage.
Важни безбедносни информации
- Секогаш исклучувајте го напојувањето на системот за греење/ладење на главниот прекинувач или кутијата со осигурувачи пред да го инсталирате или сервисирате термостатот.
- Овој термостат работи на 24 волти наизменична струја. Не поврзувајте на линија за напојување.tage (120V или 240V).
- Инсталацијата треба да ја изврши квалификуван техничар ако не сте запознаени со електричните инсталации.
- Do not short circuit the terminals on the gas valve or at the system control to test the thermostat. This will damage the thermostat and void the warranty.
- Ensure all wiring connections are secure and insulated to prevent short circuits.
Содржина на пакетот
Потврдете дека вашиот пакет ги содржи следниве ставки:
- Термостатска единица Venstar T1900
- Монтажни материјали (завртки и ѕидни анкери)
- Упатство за употреба (овој документ)
Производот завршиview
The Venstar T1900 is a 7-day programmable digital thermostat designed for residential use. It offers precise temperature control and energy-saving scheduling capabilities. This thermostat is compatible with heat/cool, heat pump, and dual-fuel systems, controlling up to three heat stages и две кул stagес.
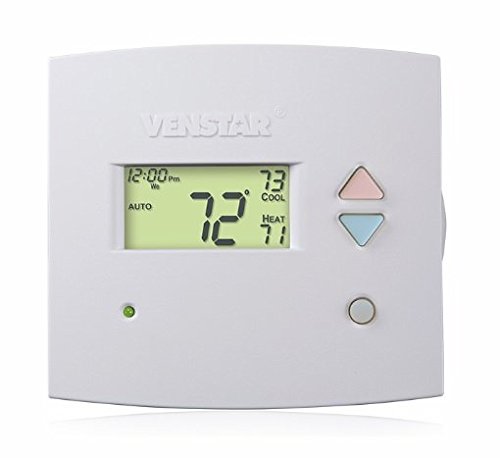
Слика 1: Предна страна view of the Venstar T1900 Thermostat. This image displays the thermostat's LCD screen and control buttons, indicating its slimline design.
Клучни карактеристики:
- 7-дневна програмабилност: Allows for customized heating and cooling schedules for each day of the week.
- Системска компатибилност: Works with heat/cool, dual-fuel, and heat pump systems.
- Мулти-Сtagд Контрола: Manages up to three heat stages и две кул stagес.
- Способност за далечински управувач: Controllable by phone using an optional add-on (sold separately).
- Automatic or Manual Operation: Provides flexibility for scheduled or on-demand temperature adjustments.
Водич за инсталација
Потребни алатки:
- Шрафцигер (Филипс и/или рамна глава)
- Drill with appropriate drill bit (if installing new wall anchors)
- Жица стриптизот
- Молив
- Ниво (изборно)
1. Исклучете го напојувањето
Locate the circuit breaker or fuse box that controls your heating and cooling system. Turn off the power completely before proceeding with any wiring.
2. Remove Old Thermostat (if applicable)
- Внимателно отстранете го капакот на вашиот стар термостат.
- Фотографирајте ги постојните жичени врски за референца.
- Означете ја секоја жица со ознаката на терминалот на кој е поврзана (на пр., R, G, Y, W).
- Disconnect the wires and remove the old thermostat's mounting plate from the wall.
3. Монтирајте ја новата основа на термостатот
- Separate the front cover of the T1900 thermostat from its base plate.
- Position the base plate on the wall where you want to install the thermostat. Ensure it is level.
- Обележете ги дупките за монтирање со молив.
- Доколку е потребно, издупчете пилотски дупки и вметнете ѕидни типли.
- Прицврстете ја основната плоча на термостатот на ѕидот со приложените завртки.
4. Wици
Connect the wires from your HVAC system to the corresponding terminals on the T1900 thermostat base. Refer to the wiring diagram provided with your specific HVAC system for precise connections. Ensure wires are stripped approximately 3/8 inch and securely fastened under the terminal screws.
Заеднички ознаки на терминали:
- R/Rc/Rh: Напојување од 24V (греење/ладење)
- C: Common (24V return)
- G: Вентилатор
- Y/Y1: Компресор Сtage 1 (ладење)
- Y2: Компресор Сtage 2 (ладење)
- W/W1: Топлина С.tage 1 (греење)
- С2: Топлина С.tage 2 (греење)
- О / Б: Reversing Valve (Heat Pumps)
Note: The T1900 supports various system types. Consult the detailed wiring diagrams in the full installation manual for specific configurations (e.g., heat pump with auxiliary heat, conventional multi-stagе системи).
5. Прикачете го термостатот на основата
Once wiring is complete and verified, carefully align the thermostat front cover with the mounted base plate and snap it into place.
6. Вратете ја моќта
Return to your circuit breaker or fuse box and restore power to your heating and cooling system.
Почетно поставување
Upon initial power-up, the thermostat may prompt you to configure basic settings. Follow the on-screen instructions to set the current date, time, and system type (e.g., Conventional, Heat Pump).
System Type Configuration:
It is crucial to correctly configure the thermostat for your specific HVAC system. Incorrect settings can lead to improper operation or damage. Access the installer settings menu (refer to the full installation guide for specific button sequences) to select:
- Тип на систем: Heat/Cool, Heat Pump, Dual Fuel
- Број на топлина Сtages
- Број на кул Сtages
- Reversing Valve Operation: O (Cooling) or B (Heating)
Упатства за работа
Разбирање на екранот:
The LCD screen displays the current temperature, set temperature, system mode, fan mode, time, and programming status. Refer to the icons and indicators on the screen for current operational status.
Setting System Mode:
Притиснете го РЕЖИМ копче за менување на достапните системски режими:
- ТОПЛИНА: The system will operate to maintain the heating setpoint.
- ЛУДЕЕ: The system will operate to maintain the cooling setpoint.
- АВТОМАТ: Термостатот автоматски се префрла помеѓу греење и ладење по потреба за да го одржи поставениот опсег на температура.
- ИСКЛУЧЕНО: Системот за греење и ладење е исклучен.
Setting Fan Mode:
Притиснете го FAN копче за менување на режимите на вентилаторот:
- АВТОМАТ: Вентилаторот работи само кога системот за греење или ладење е активно вклучен.
- НА: Вентилаторот работи континуирано, без оглед на повиците за греење или ладење.
Прилагодување на температурата:
Користете го UP и ДОЛУ arrow buttons to adjust the desired temperature setpoint. In programmable modes, this will temporarily override the schedule until the next scheduled change.
Распореди на програми (7 дена):
The T1900 allows for 7-day programming, enabling different schedules for each day of the week. This feature helps save energy by adjusting temperatures when you are away or asleep.
- Притиснете го ПРОГРАМА копче за да влезете во режим на програмирање.
- Користете го ДЕН button to select the day or group of days you wish to program (e.g., Mon-Fri, Sat-Sun, or individual days).
- Користете го ВРЕМЕ button to cycle through the four available periods: Wake, Leave, Return, Sleep.
- Користете го UP и ДОЛУ arrow buttons to set the desired temperature for each period.
- Користете го ДРЖИ button to exit programming mode or save changes.
Refer to the detailed programming section in the full user guide for advanced options and specific button sequences.
Remote Control (Optional Add-on):
The Venstar T1900 thermostat can be controlled remotely via a phone using an optional add-on module (sold separately). This module connects to the thermostat and allows for remote access and control through a dedicated application. Installation and setup instructions for the remote control module are provided with the module itself.
Одржување
Чистење на термостатот:
To maintain the appearance and functionality of your thermostat, periodically wipe the exterior with a soft, damp крпа. Не користете абразивни средства за чистење, растворувачи или хемиски спрејови, бидејќи тие можат да ги оштетат пластичните и електронските компоненти.
Замена на батерија:
The Venstar T1900 thermostat does not require batteries for operation as it is powered by the 24V AC system.
Решавање проблеми
If you experience issues with your Venstar T1900 thermostat, consult the following common problems and solutions:
| Проблем | Можна причина | Решение |
|---|---|---|
| Екранот на термостатот е празен | Нема струја до термостатот. | Проверете го прекинувачот за вашиот HVAC систем. Осигурајте се дека сите жичени врски се безбедни. |
| Heating/Cooling system does not respond | Incorrect system mode selected; wiring issue; system lockout. | Verify the system mode (HEAT/COOL/AUTO). Check wiring connections. Wait 5 minutes for system lockout to reset. |
| Отчитувањето на температурата се чини неточно | Локација на термостатот; опструкција на сензорот. | Ensure the thermostat is not exposed to direct sunlight, drafts, or heat sources. Clean any dust from the thermostat vents. |
| Programming schedule is not working | Program not saved; temporary override active; incorrect time/day setting. | Ensure programs are saved. Check if a temporary override is active and cancel it. Verify current time and day settings. |
| Вентилаторот работи континуирано во АВТОМАТСКИ режим | Fan mode set to ON; wiring issue. | Press the FAN button to ensure it is set to AUTO. Check fan wiring. |
If these solutions do not resolve the issue, please contact customer support or a qualified HVAC technician.
Спецификации
| Карактеристика | Спецификација |
|---|---|
| Бренд | Венстар |
| Име на моделот | Венстар Т1900 |
| Тип на контролер | Притиснете го копчето |
| Специјална карактеристика | Програмабилна |
| Боја | Бело |
| Специфична употреба на производот | Heat Pump, Heater |
| Тип на контрола на температурата | Programmable, Smart/Remote (with add-on) |
| Voltage | 24 волти наизменична струја |
| Тип на дисплеј | LCD или LED |
| Контролен метод | Remote (with add-on) |
| Задно осветлување | Да |
| Димензии на производот | 5.3 x 2 x 2 инчи |
| Тежина на ставката | 0.01 унци |
| Потребни се батерии? | бр |
Информации за гаранцијата
Venstar products are manufactured to high-quality standards. This product is covered by a limited warranty against defects in materials and workmanship. The specific terms and duration of the warranty may vary. Please refer to the warranty card included with your product or visit the official Venstar webстраница за детални информации за гаранцијата и процедури за регистрација.
Поддршка за корисници
For technical assistance, troubleshooting, or warranty inquiries, please contact Venstar customer support. You can typically find contact information, including phone numbers and email addresses, on the official Venstar webсајт (www.venstar.com) or on the product packaging.
When contacting support, please have your thermostat model number (T1900) and any relevant purchase information ready.


