1. Вовед
This manual provides detailed instructions for the installation, operation, and maintenance of your Vibe Powerbox Micro Mono Amplifier, model POWERBOX400.1M-V7. Please read this manual thoroughly before attempting installation or operation to ensure proper use and to prevent damage to the unit or your vehicle's audio system.
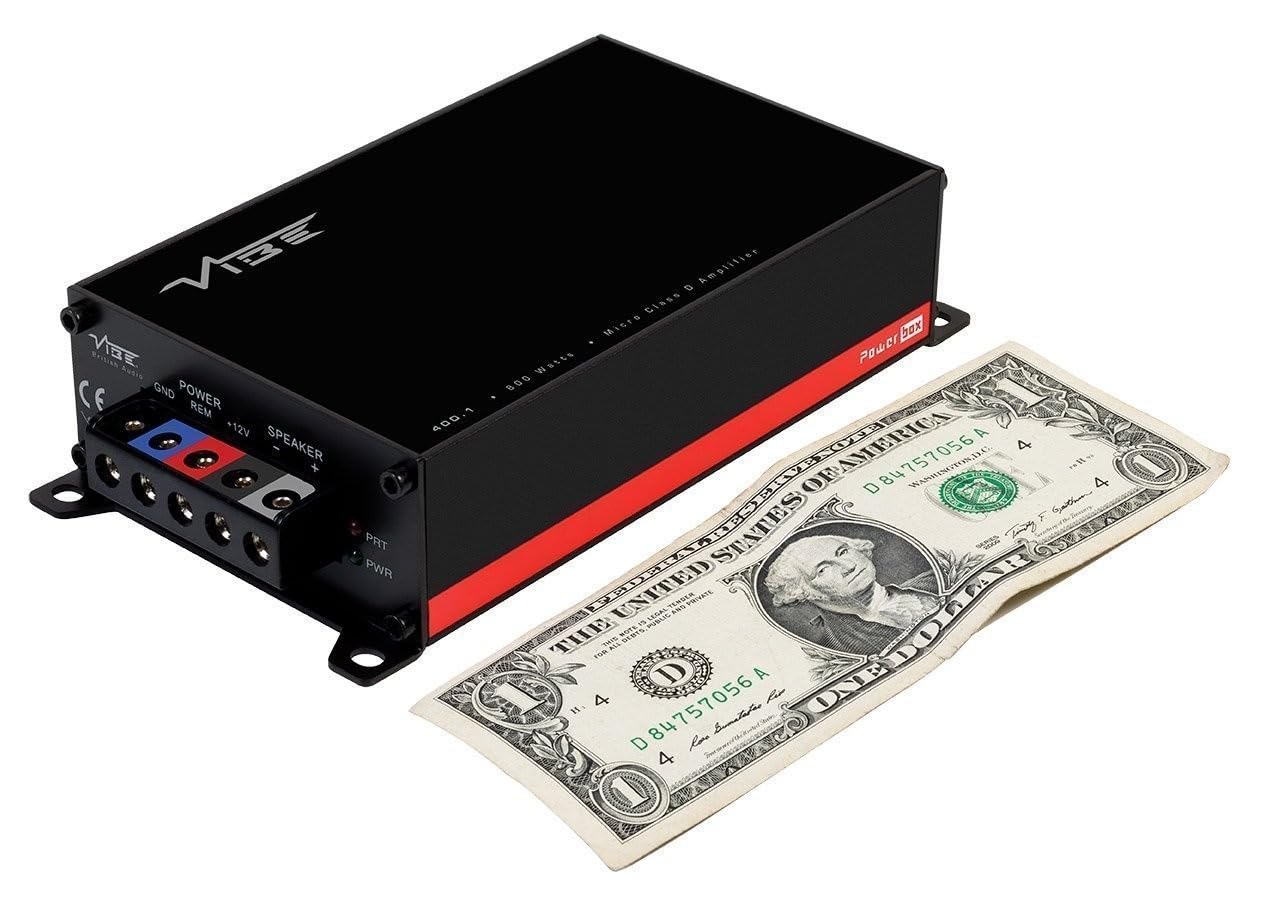
The Vibe Powerbox Micro Mono Amplifier is a compact, high-performance Class D amplifier designed for car audio systems. It delivers up to 400W RMS, making it suitable for powering subwoofers. Its small footprint allows for flexible installation options.
2. Информации за безбедност
- Секогаш исклучувајте го негативниот терминал на батеријата на возилото пред да започнете со какви било електрични работи.
- Ensure all wiring is correctly routed and secured to prevent damage from moving parts or sharp edges.
- Use appropriate gauge wiring for power and speaker connections as specified in this manual to prevent overheating and potential fire hazards.
- Не монтирајте го ampладилникот на места изложени на директна сончева светлина, прекумерна топлина, влага или прашина.
- Консултирајте се со професионален инсталатер на аудио системи за автомобили ако не сте сигурни за кој било дел од процесот на инсталација.
- Ракување со amplifier at excessively high volumes for prolonged periods can cause hearing damage.
3. Содржина на пакетот
Проверете дали сите елементи се присутни во пакувањето пред да продолжите со инсталацијата:
- Vibe Powerbox Micro Mono Amplifier (POWERBOX400.1M-V7)
- Remote Gain Control Unit
- RCA аудио кабли
- Mounting Hardware (screws, connectors)
- Упатство за употреба

4. Карактеристики на производот
- Class D Micro Amplifier design for high efficiency and compact size.
- Ultra-compact footprint for easy and discreet installation.
- Output: 1 x 400W RMS at 1 ohm, with a maximum output of 800W.
- Dimensions: 37 x 157 x 82mm (approximately 1.46 x 6.18 x 3.23 inches).
- Compatible with Critical Link Rapid kits for simplified integration.
- Features Deltabox™ Connectivity auto turn-on.
- VIBE Sound Studio™ Active crossovers.
- 1 Ohm Stable operation.
5. Идентификација на компоненти
5.1 Power and Speaker Terminals

The power input section includes terminals for Ground (GND), Remote Turn-On (REM), and +12V power. The speaker output section provides terminals for connecting your subwoofer.
5.2 Input and Control Panel
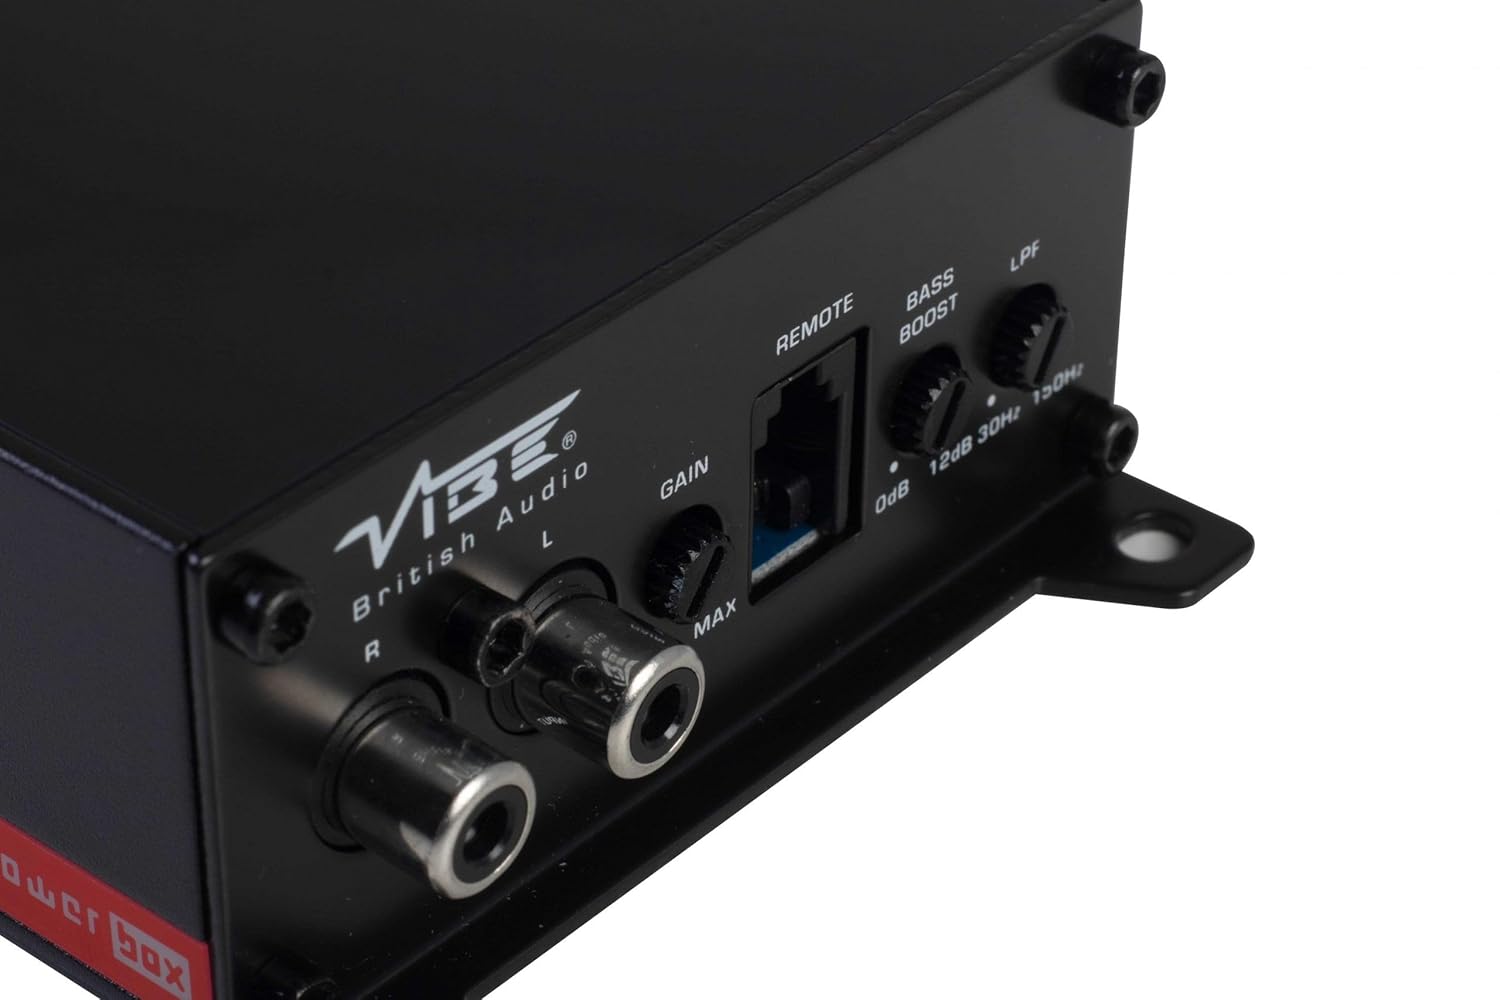
This panel features the RCA input jacks for audio signal, a Gain control knob to match the amplifier's input sensitivity to your head unit's output, a dedicated port for the remote gain control, a Bass Boost switch for enhancing low frequencies, and an LPF (Low Pass Filter) control to adjust the upper frequency limit for the subwoofer.
5.3 Далечинска контрола на засилување

The remote gain control unit connects to the amplifier via the 'REMOTE' port and allows for convenient adjustment of the subwoofer's output level from the vehicle's cabin.
6. Поставување и инсталација
Proper installation is crucial for optimal performance and safety. If you are not confident in your ability to install the ampлифир, побарајте стручна помош.
6.1 Локација за монтирање
Choose a mounting location that is dry, well-ventilated, and away from direct heat sources. The compact size of the Powerbox Micro allows for installation under seats, behind trim panels, or in other discreet locations. Ensure there is sufficient airflow around the ampлајфлер за ладење.
6.2 Приклучоци за жици
Енергетско поврзување:
- Поврзете го +12 V terminal to the vehicle's positive battery terminal using a suitable gauge power cable (e.g., 8 AWG or 10 AWG). Install an in-line fuse holder within 18 inches (45 cm) of the battery.
- Поврзете го ГНД terminal to a clean, unpainted metal surface on the vehicle's chassis. Ensure a good electrical connection. The ground cable should be of the same gauge as the power cable and as short as possible.
- Поврзете го РЕМ (Remote Turn-On) terminal to the remote output of your head unit. This wire signals the amplifier to turn on and off with your stereo. If your head unit lacks a remote output, you can use an accessory wire that turns on with the ignition, or utilize the amplifier's auto-sense feature if applicable.
Поврзување на звучниците:
- Поврзете го вашиот сабвуфер со Излез на звучник terminals (+ and -). Ensure correct polarity. This amplifier is 1 Ohm stable, allowing flexibility in subwoofer impedance configurations. Refer to your subwoofer's specifications for optimal impedance matching.
Signal Input (RCA):
- Connect the RCA output from your head unit or signal processor to the INPUT (L/R) RCA jacks on the ampживописен.
Далечинска контрола на засилување:
- Plug the remote gain control unit into the dedicated ДАЛЕЧИНСКИ пристаниште на amplifier. Route the cable to a convenient location for adjustment.
ISO T Harness / ISOAWK Kit:
- For simplified installation with existing stereo looms, an optional ISOAWK kit (available separately) can be used to make the amplifier compatible with an ISO T harness. This allows for plug-and-play integration for audio signal, power, and ground, potentially eliminating the need for separate battery connections.
7. Операција
7.1 Почетно вклучување
Откако ќе ги направите и потврдите сите врски, повторно поврзете ја батеријата на возилото. Вклучете ја главната единица. amplifier's power indicator (PWR) should illuminate green. If the protection indicator (PRT) illuminates red, refer to the troubleshooting section.
7.2 Прилагодување на засилување
Контролата на засилување се совпаѓа со ampВлезната чувствителност на ладилникот кон излезниот волуменtage of your head unit. To set the gain:
- Свртете го amplifier's Gain control to its minimum (MIN) setting.
- Поставете ја јачината на звукот на главната единица на околу 75-80% од нејзиниот максимум.
- Пушти динамично музичко дело.
- Полека зголемувајте го amplifier's Gain control until you hear distortion, then back it off slightly until the sound is clear.
The remote gain control unit allows for real-time adjustment of the subwoofer level without affecting the main system volume.
7.3 Нископропусен филтер (LPF)
The LPF control sets the upper frequency limit for the amplifier's output. This is essential for subwoofers, ensuring they only reproduce low frequencies. Adjust the LPF knob (typically 30Hz to 150Hz) to blend the subwoofer's output seamlessly with your main speakers. A common starting point is around 80-100Hz.
7.4 Засилување бас
The Bass Boost switch provides an adjustable low-frequency enhancement. Use this feature sparingly, as excessive bass boost can lead to distortion and potential damage to your subwoofer. Adjust the boost level (0dB to 12dB) to your preference.
8. Одржување
- Чистење: Периодично бришете го ampИзбришете ја надворешноста на ладилникот со мека, сува крпа. Не користете јаки хемикалии или абразивни средства за чистење.
- Врски: Regularly check all power, ground, and speaker connections to ensure they are secure and free from corrosion. Loose connections can cause performance issues or damage.
- Вентилација: Обезбедете дека на amplifier's cooling fins are not obstructed to maintain proper heat dissipation.
9 Смена на проблеми
| Проблем | Можна причина | Решение |
|---|---|---|
| Нема струја (LED диодата за PWR е исклучена) | Прегорен осигурувач, лабава врска за напојување/заземјување, нема сигнал од далечинскиот управувач. | Проверете го осигурачот во линијата, проверете ги +12V, GND и REM врските. |
| Режим на заштита (PRT LED вклучен) | Прегревање, краток спој во жиците на звучникот, прениска импеданса. | Ensure proper ventilation, check speaker wiring for shorts, verify speaker impedance. |
| Нема излез на звук | No input signal, gain too low, speaker wires disconnected. | Check RCA input connections, adjust gain, verify speaker wiring. |
| Искривен звук | Gain set too high, LPF incorrectly set, poor ground connection. | Reduce gain, adjust LPF, check ground connection. |
10. Спецификации
- Број на модел: POWERBOX400.1M-V7
- Ampпоживо Тип: Класа D Моно Ampживописен
- RMS излезна моќност: 1 x 400W RMS @ 1 Ohm
- Максимална излезна моќност: 800 W
- Димензии на производот (Д x Ш x В): Приближно 157 x 82 x 37 mm (6.18 x 3.23 x 1.46 инчи)
- Тежина: Приближно 1.54 фунти
- Voltage: 12 волти (номинално)
- Максимална понуда Voltage: 12 волти
- Тип на монтирање: Површинска монтажа
- Производител: Vibe Audio
- Прво достапен датум: 21 јули 2018 година
11. Гаранција и поддршка
Vibe Audio products are designed and manufactured to the highest standards. For warranty information and technical support, please refer to the warranty card included with your product or visit the official Vibe Audio webстраница. Зачувајте го доказот за купување за гаранциски побарувања.


