1. Вовед
Welcome to the user manual for your Modecom Oberon Pro Glass USB 3.0 White PC Case. This manual provides essential information for the proper installation, operation, and maintenance of your computer chassis. Please read this manual thoroughly before beginning assembly to ensure correct setup and to prevent damage to your components or the case itself.
Безбедносни мерки на претпазливост:
- Секогаш исклучувајте го напојувањето од ѕидниот штекер пред да инсталирате или отстраните било кои компоненти.
- Handle components with care to avoid electrostatic discharge (ESD). Consider using an anti-static wrist strap.
- Држете ги малите делови и материјалите за пакување подалеку од дофат на деца.
- Обезбедете соодветна вентилација околу куќиштето за да спречите прегревање.
2. Производот завршиview
The Modecom Oberon Pro Glass is a stylish mid-tower PC case designed to house your computer components. It features a tempered glass side panel for showcasing your build and a clean white finish. The front panel includes convenient USB 3.0 ports for high-speed data transfer.
Слика 2.1: Предно-десно view of the Modecom Oberon Pro Glass PC Case. This image displays the white exterior, the front panel with ventilation, and the top-mounted I/O ports including USB 3.0.
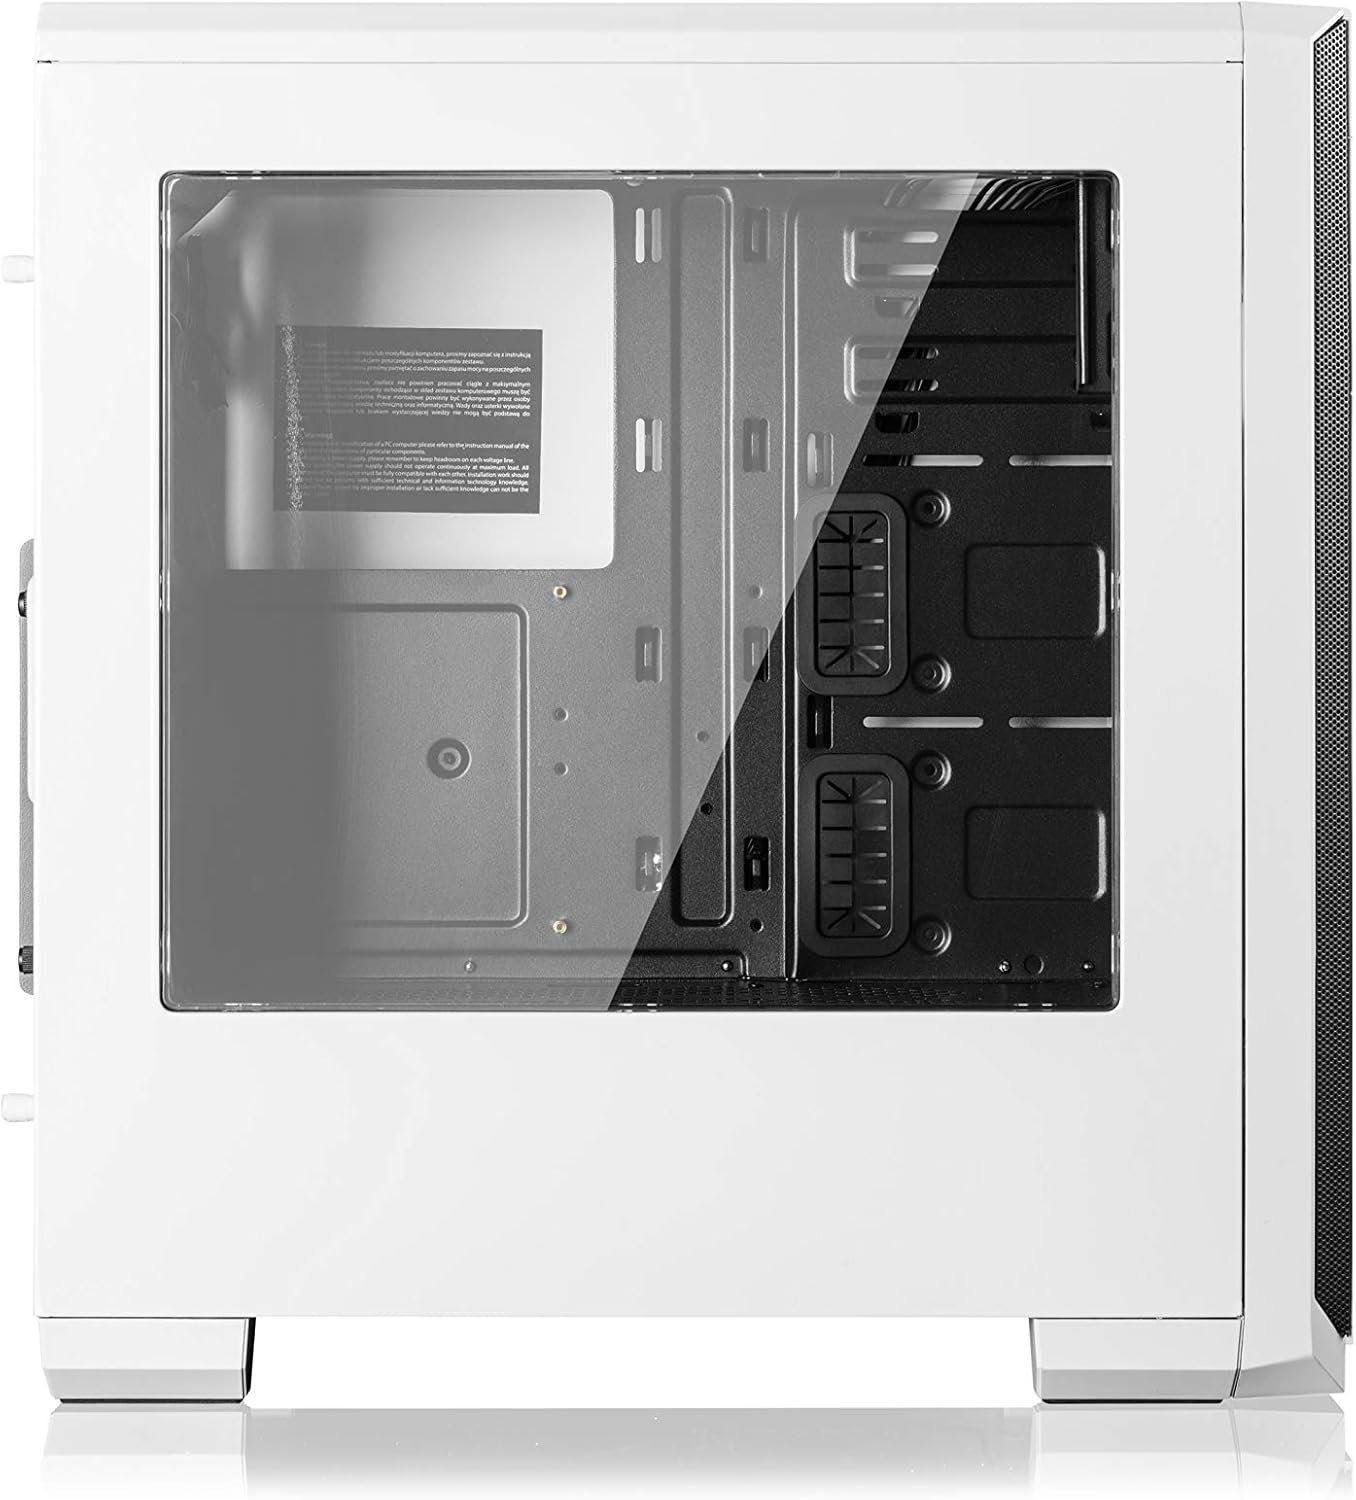
Слика 2.2: Страна view of the Modecom Oberon Pro Glass PC Case, highlighting the tempered glass side panel. This panel allows for a clear view of the internal components when installed.
3. Поставување и инсталација
Follow these steps to install your computer components into the Modecom Oberon Pro Glass PC Case.
3.1. Отпакување и првична проверка
- Внимателно извадете го куќиштето на компјутерот од пакувањето.
- Проверете го куќиштето за какви било знаци на оштетување за време на транспортот. Веднаш контактирајте го вашиот продавач доколку се открие оштетување.
- Remove the tempered glass side panel by unscrewing the thumb screws, typically located at the rear corners of the panel. Set the panel aside on a soft, flat surface to prevent scratches.
3.2. Инсталација на матична плоча

Слика 3.1: Внатрешност view of the Modecom Oberon Pro Glass PC Case, showing the motherboard tray, drive bays, and cable management cutouts.
- Install the I/O shield that came with your motherboard into the designated opening at the rear of the case.
- Ensure the motherboard standoffs are correctly aligned for your motherboard's form factor (ATX, Micro ATX, or ITX). Install additional standoffs if necessary.
- Внимателно поставете ја матичната плоча на држачите, порамнувајќи ги дупките за завртките.
- Прицврстете ја матичната плоча со приложените завртки. Не затегнувајте премногу.
3.3. Инсталација на единица за напојување (PSU)
- Position your PSU in the dedicated compartment, typically at the bottom rear of the case.
- Align the screw holes on the PSU with those on the case's rear panel.
- Secure the PSU with the provided screws.
3.4. Инсталација на диск за складирање (HDD/SSD)
- Locate the 3.5" HDD bays and 2.5" SSD mounting points within the case.
- For 3.5" HDDs, slide the drive into a bay and secure it with screws or tool-less clips if available.
- For 2.5" SSDs, mount them to the designated trays or screw points, typically behind the motherboard tray or in specific drive cages.
3.5. Expansion Card Installation (GPU, PCIe cards)

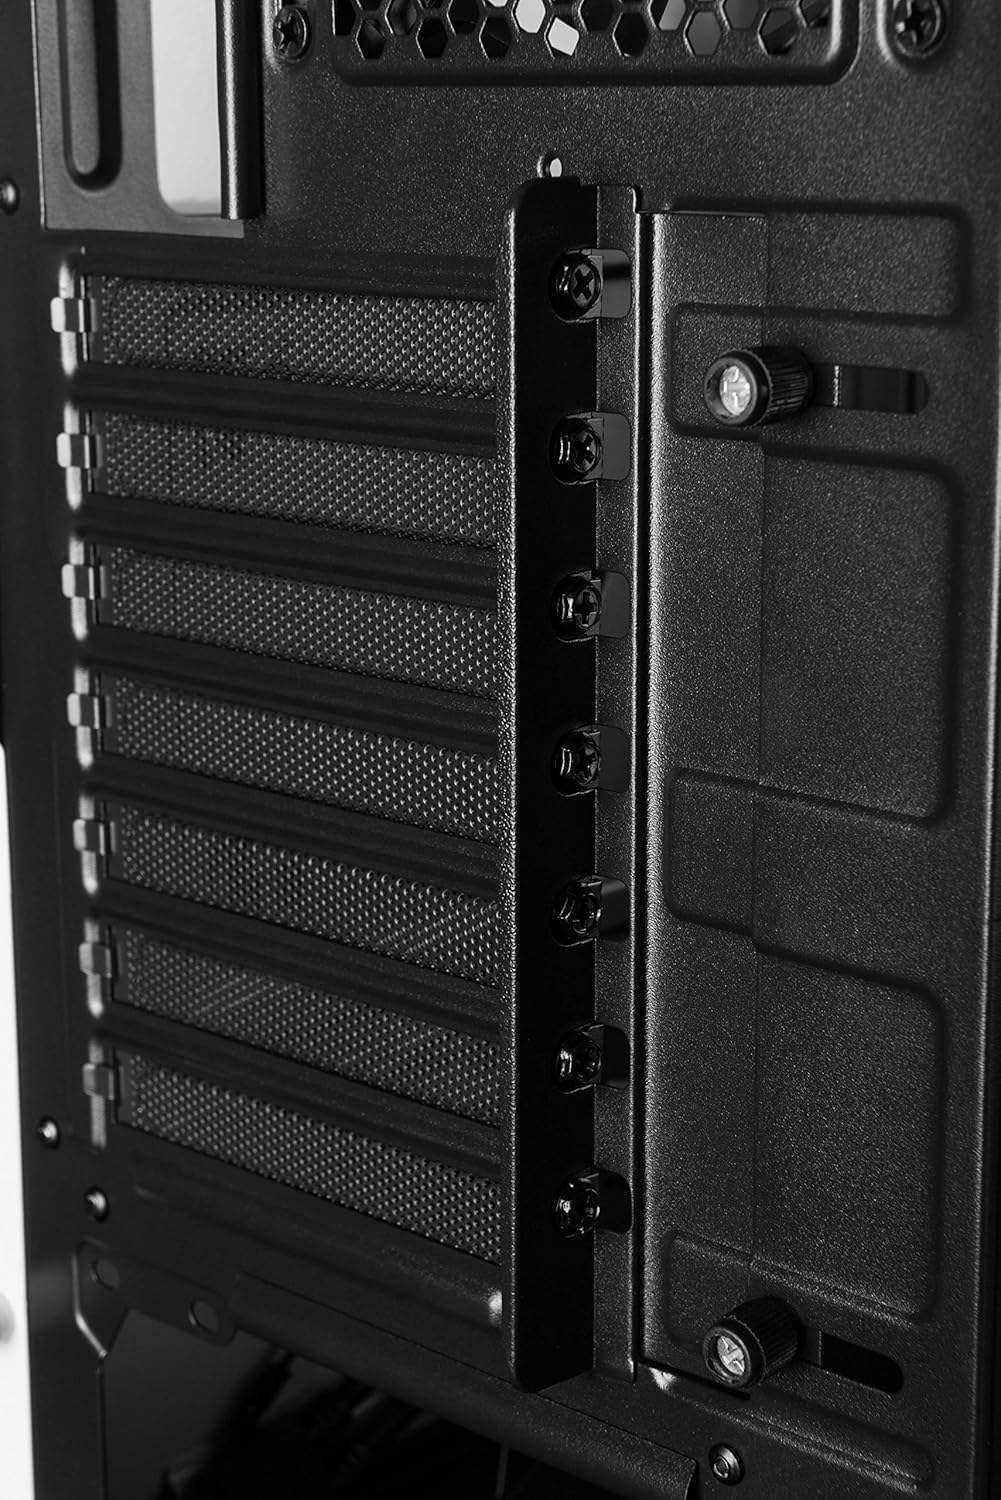
Слика 3.2: Заден ентериер view of the Modecom Oberon Pro Glass PC Case, illustrating the expansion slot covers and thumb screws for securing PCIe cards.
- Remove the necessary expansion slot covers from the rear of the case, corresponding to your card's slot on the motherboard.
- Insert your expansion card (e.g., graphics card) firmly into the PCIe slot on the motherboard.
- Secure the card to the case with the provided screws or retention mechanism.
3.6. Front Panel Connector Installation
- Connect the front panel cables (USB 3.0, HD Audio, Power Switch, Reset Switch, Power LED, HDD LED) to their respective headers on your motherboard. Refer to your motherboard manual for exact pin layouts.
3.7. Управување со кабли
- Користете ги отворите за насочување на каблите и точките за врзување зад фиоката на матичната плоча за да ги организирате каблите. Ова го подобрува протокот на воздух и естетиката.
- Once all components are installed and cables managed, reattach the tempered glass side panel and secure it with the thumb screws.
4. Операција
After successful installation, your PC is ready for operation.
- Вклучување: Press the power button located on the top I/O panel of the case.
- Using Front Panel Ports: The front panel includes USB 3.0 ports and audio jacks. Connect your USB devices (e.g., flash drives, external hard drives) to the USB ports for data transfer. Plug your headphones or microphone into the respective audio jacks.
5. Одржување
Редовното одржување помага да се обезбедат оптимални перформанси и долготрајност на компонентите на вашиот компјутер.
- Филтри за прашина: Periodically remove and clean the dust filters (if present) to maintain good airflow and prevent dust buildup inside the case. Use compressed air or a soft brush.
- Надворешно чистење: Избришете ги надворешните површини на куќиштето со мека, дamp крпа. Избегнувајте абразивни средства за чистење или растворувачи кои би можеле да ја оштетат завршната обработка или каленото стакло.
- Панел од калено стакло: Clean the tempered glass with a glass cleaner and a microfiber cloth to avoid streaks and scratches.
6 Смена на проблеми
Доколку наидете на проблеми, разгледајте ги следниве основни чекори за решавање проблеми:
- Системот не се вклучува:
- Проверете дали напојувањето е вклучено и правилно поврзано со ѕидниот штекер.
- Проверете дали кабелот за напојување на предниот панел е правилно поврзан со конекторот на матичната плоча.
- Проверете ги сите напојувачки приклучоци на матичната плоча и компонентите.
- USB-портите не работат:
- Confirm that the front panel USB 3.0 cable is securely connected to the corresponding header on the motherboard.
- Test with different USB devices.
- Прекумерна бучава:
- Identify the source of the noise (e.g., case fans, CPU cooler fan, GPU fan).
- Ensure all fans are free from obstructions and properly secured.
- Clean any dust buildup on fans.
За посложени проблеми, консултирајте се со упатствата за компонентите или побарајте стручна помош.
7. Спецификации
| Карактеристика | Опис |
|---|---|
| Бренд | Modecom |
| Име на моделот | Oberon Pro Glass |
| Број на модел | AT-OBERON-PG-20-000000-0002 |
| Тип на случај | Средината на кулата |
| Боја | Бело |
| Материјал | Поликарбонат (компјутер) |
| Компатибилни матични плочи | ATX, Micro ATX, ITX |
| Предни влезни порти | USB 3.0, Audio In/Out |
| Напојување | W/O PSU (Power Supply Unit not included) |
| Тежина на ставката | 2 килограми |
| Меѓународен членски код | 05901885248370 |
8. Гаранција и поддршка
Информации за гаранцијата:
Modecom provides a guarantee of spare parts availability for 2 years from the date of purchase. This ensures that essential components for repair or replacement will be accessible within this period.
Поддршка за корисници:
For technical assistance, warranty claims, or further inquiries, please refer to the official Modecom website or contact your local retailer where the product was purchased. Ensure you have your product model number and proof of purchase available when seeking support.


