Вовед
Thank you for choosing the GameMax H605 Micro ATX Gaming Tower Case. This manual provides essential information for the proper installation, operation, and maintenance of your new PC case. Please read this manual thoroughly before beginning assembly to ensure optimal performance and safety.
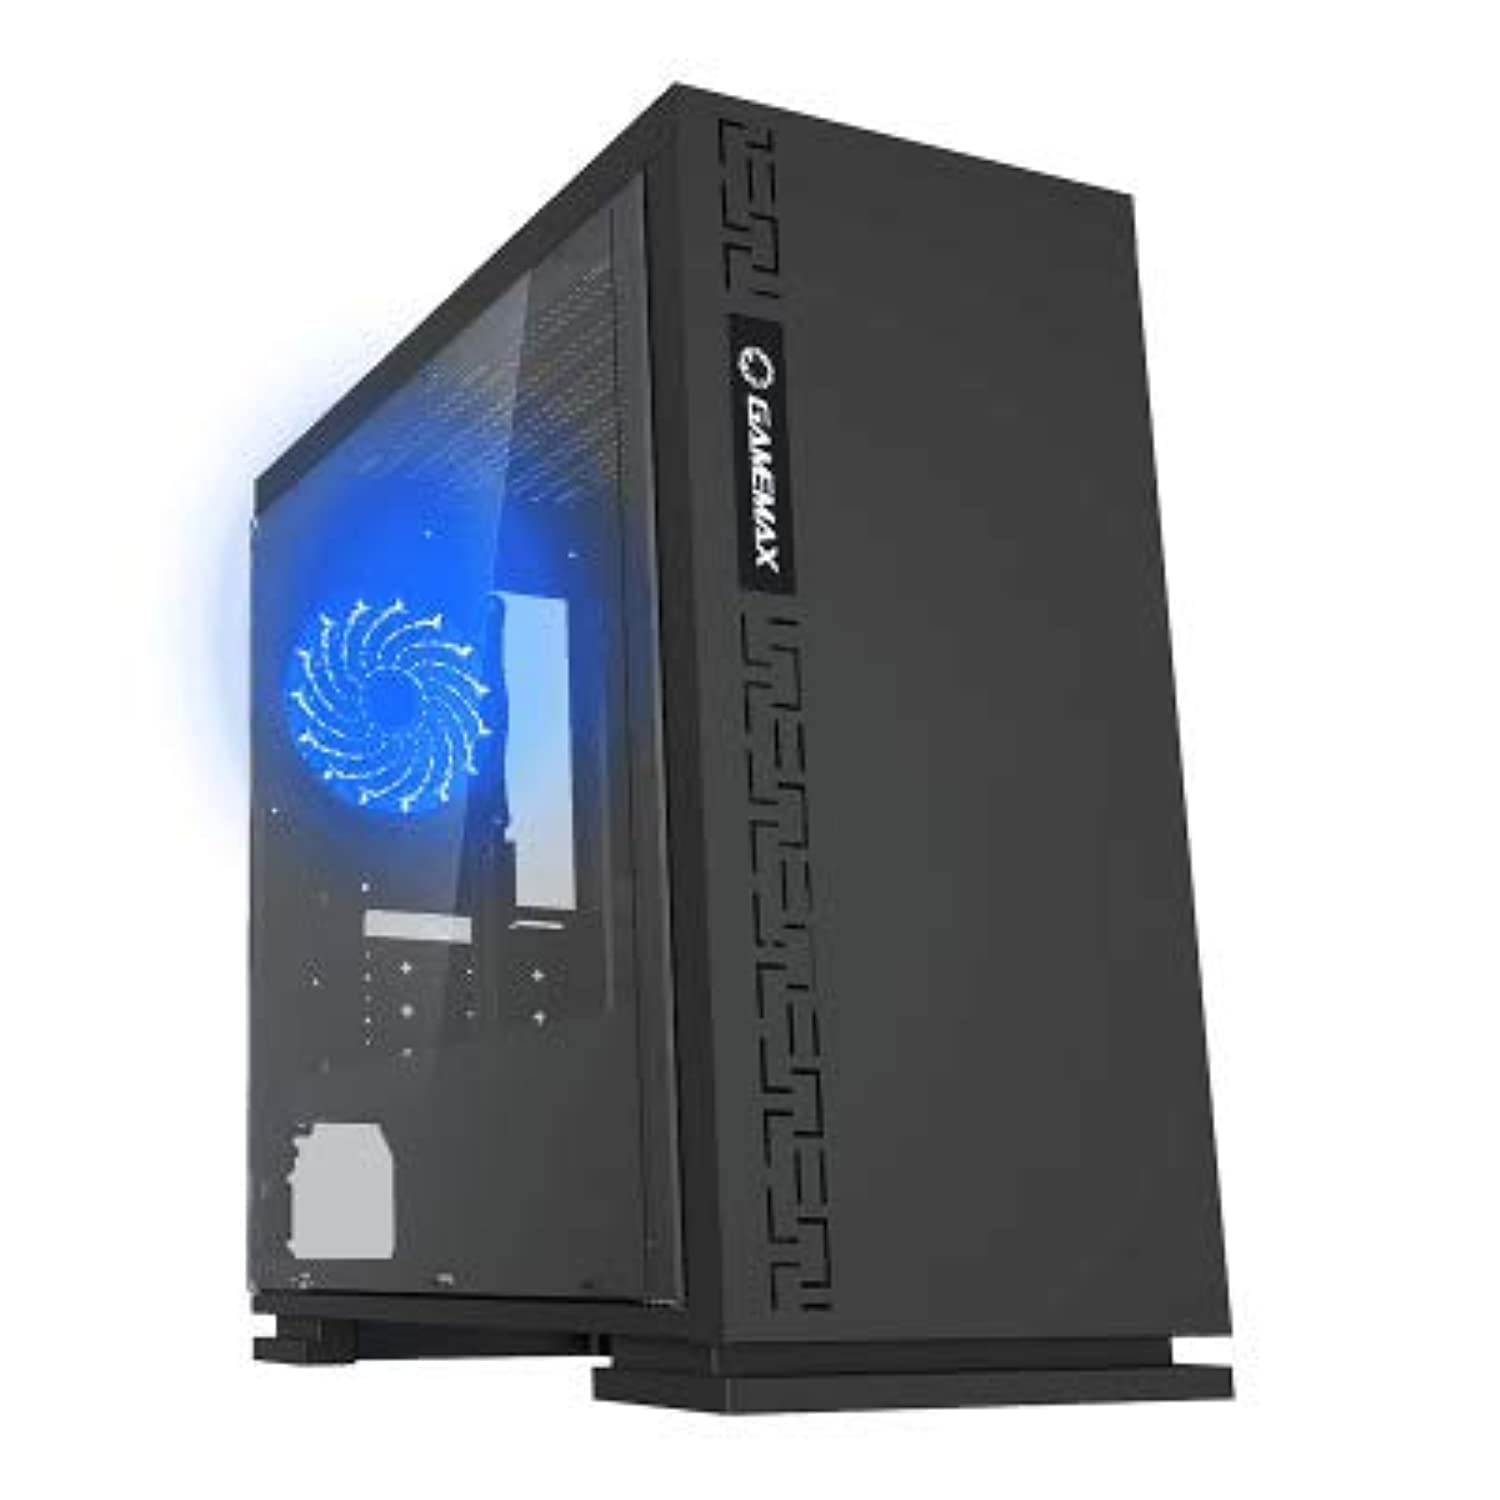
Слика 1: Предна страна view of the GameMax H605 Micro ATX Gaming Tower Case, showcasinнеговиот елегантен дизајн и преден панел.
The GameMax H605 is designed for Micro ATX motherboards and features a compact yet efficient layout for gaming components. It includes one pre-installed LED fan at the rear for immediate cooling. The case is constructed from steel and plastic, offering a balance of durability and aesthetics.
Информации за безбедност
Ве молиме почитувајте ги следниве безбедносни упатства за време на инсталацијата и работата:
- Секогаш исклучувајте го напојувањето од ѕидниот штекер пред да инсталирате или отстраните било кои компоненти.
- Носете антистатички ремен за зглоб за да спречите оштетување на чувствителните компоненти од електростатско празнење (ESD).
- Внимателно ракувајте со компонентите за да избегнете физичко оштетување.
- Држете го куќиштето подалеку од течности и прекумерна влажност.
- Обезбедете соодветна вентилација околу куќиштето за да спречите прегревање.
Содржина на пакетот
Verify that all the following items are present in your GameMax H605 package:
- GameMax H605 Micro ATX Gaming Tower Case
- Кутија со додатоци (завртки, држачи, врвки за кабел)
- Упатство за употреба (овој документ)
If any items are missing or damaged, please contact your retailer or GameMax support.
Поставување
1. Подготовка на случајот
- Поставете го куќиштето на рамна, стабилна површина.
- Отстранете ги страничните панели со одвртување на завртките на задниот дел од куќиштето и лизгање на панелите наназад.

Слика 2: Внатрешност view of the GameMax H605 case with the side panel removed, showing the motherboard tray and drive bays.
2. Инсталација на матична плоча
- Инсталирајте го I/O штитот во задниот отвор на куќиштето.
- Align your Micro ATX motherboard with the standoffs inside the case. Ensure the standoffs match the screw holes on your motherboard.
- Прицврстете ја матичната плоча со приложените завртки.
3. Инсталација на диск за складирање
- For 3.5-inch HDDs, slide the drive into the designated drive cage bays and secure with screws if necessary.
- For 2.5-inch SSDs, mount them onto the dedicated SSD brackets or trays and secure with screws.
4. Инсталација на напојување
- Position the power supply unit (PSU) in the bottom rear compartment of the case.
- Прицврстете го напојувањето на куќиштето со завртките што се испорачани со напојувањето.
5. Инсталација на графичка картичка и картичка за проширување
- Отстранете ги потребните капаци за слотовите за проширување од задниот дел на куќиштето.
- Вметнете ја вашата графичка картичка или други картички за проширување во соодветните PCIe слотови на вашата матична плоча.
- Прицврстете ги картичките со завртки.

Слика 3: Заден дел view of the GameMax H605 case, showing expansion slots and I/O shield opening.
6. Управување со кабли
Користете ги отворите за насочување на каблите и точките за врзување зад фиоката на матичната плоча за управување со каблите. Ова го подобрува протокот на воздух и естетиката.
Оперативни
Once all components are installed and connected, replace the side panels and connect your peripherals (monitor, keyboard, mouse) to the motherboard's I/O ports. Connect the power cable to the PSU and a wall outlet. Press the power button on the front panel to start your system.

Слика 4: Горе-предна страна view of the GameMax H605 case, highlighting the front panel I/O ports and power button.
Одржување
Regular maintenance helps ensure the longevity and optimal performance of your PC case and components:
- Чистење прашина: Periodically clean dust from the case interior, fans, and filters using compressed air or a soft brush. Ensure the system is powered off and unplugged before cleaning.
- Проверка на управувањето со кабли: Occasionally check cable routing to ensure no cables are obstructing airflow or fan operation.
- Инспекција на вентилаторот: Verify that all fans are spinning freely and are free from obstructions.
Решавање проблеми
Доколку наидете на проблеми со конфигурацијата на вашиот компјутер, разгледајте ги следниве вообичаени чекори за решавање проблеми:
- Без моќност: Ensure all power cables (24-pin ATX, 8-pin CPU, GPU power) are securely connected. Check if the PSU switch is in the 'ON' position.
- Нема приказ: Verify that the monitor cable is connected to the graphics card (not the motherboard I/O) and that the monitor is powered on and set to the correct input.
- Прегревање: Check fan connections and ensure they are spinning. Clean any dust buildup. Verify proper airflow within the case.
- Лабави врски: Re-seat RAM modules, graphics card, and all power/data cables to ensure they are firmly in place.
Спецификации
| Карактеристика | Детал |
|---|---|
| Бренд | Игра Макс |
| Број на модел на ставка | H605 BLK |
| Производител | Игра Макс |
| Серии | H605 BLK |
| Боја | Црното |
| Хардверска платформа | Windows 7 |
| Вклучени батерии | бр |
| Тежина на ставката | 7.53 грама |
| Компатибилност со матична плоча | Микро ATX |
| Тип на случај | Mid Tower |
| Препорачана употреба за производот | Играње |
| Материјал | Solid Plastic Alloy |
| Метод на ладење | Water (Implies compatibility for water cooling solutions) |
| Име на моделот | H605 BLK |
| Големина на вентилаторот | 120 милиметри |
| Вкупно USB порти | 1 |
| Датум прв на располагање | 9 јули 2019 година |
Гаранција и поддршка
GameMax products are designed for reliability and performance. For warranty information, please refer to the warranty card included with your purchase or visit the official GameMax website. If you require technical assistance or have questions regarding your GameMax H605 case, please contact GameMax customer support through their official channels.
Ве молиме чувајте го вашиот доказ за купување за барањата за гаранција.