1. Вовед
This manual provides detailed instructions for the installation, operation, and maintenance of your Anlapus 1080p HD-TVI Surveillance Camera. Please read this manual thoroughly before using the product to ensure proper function and safety.
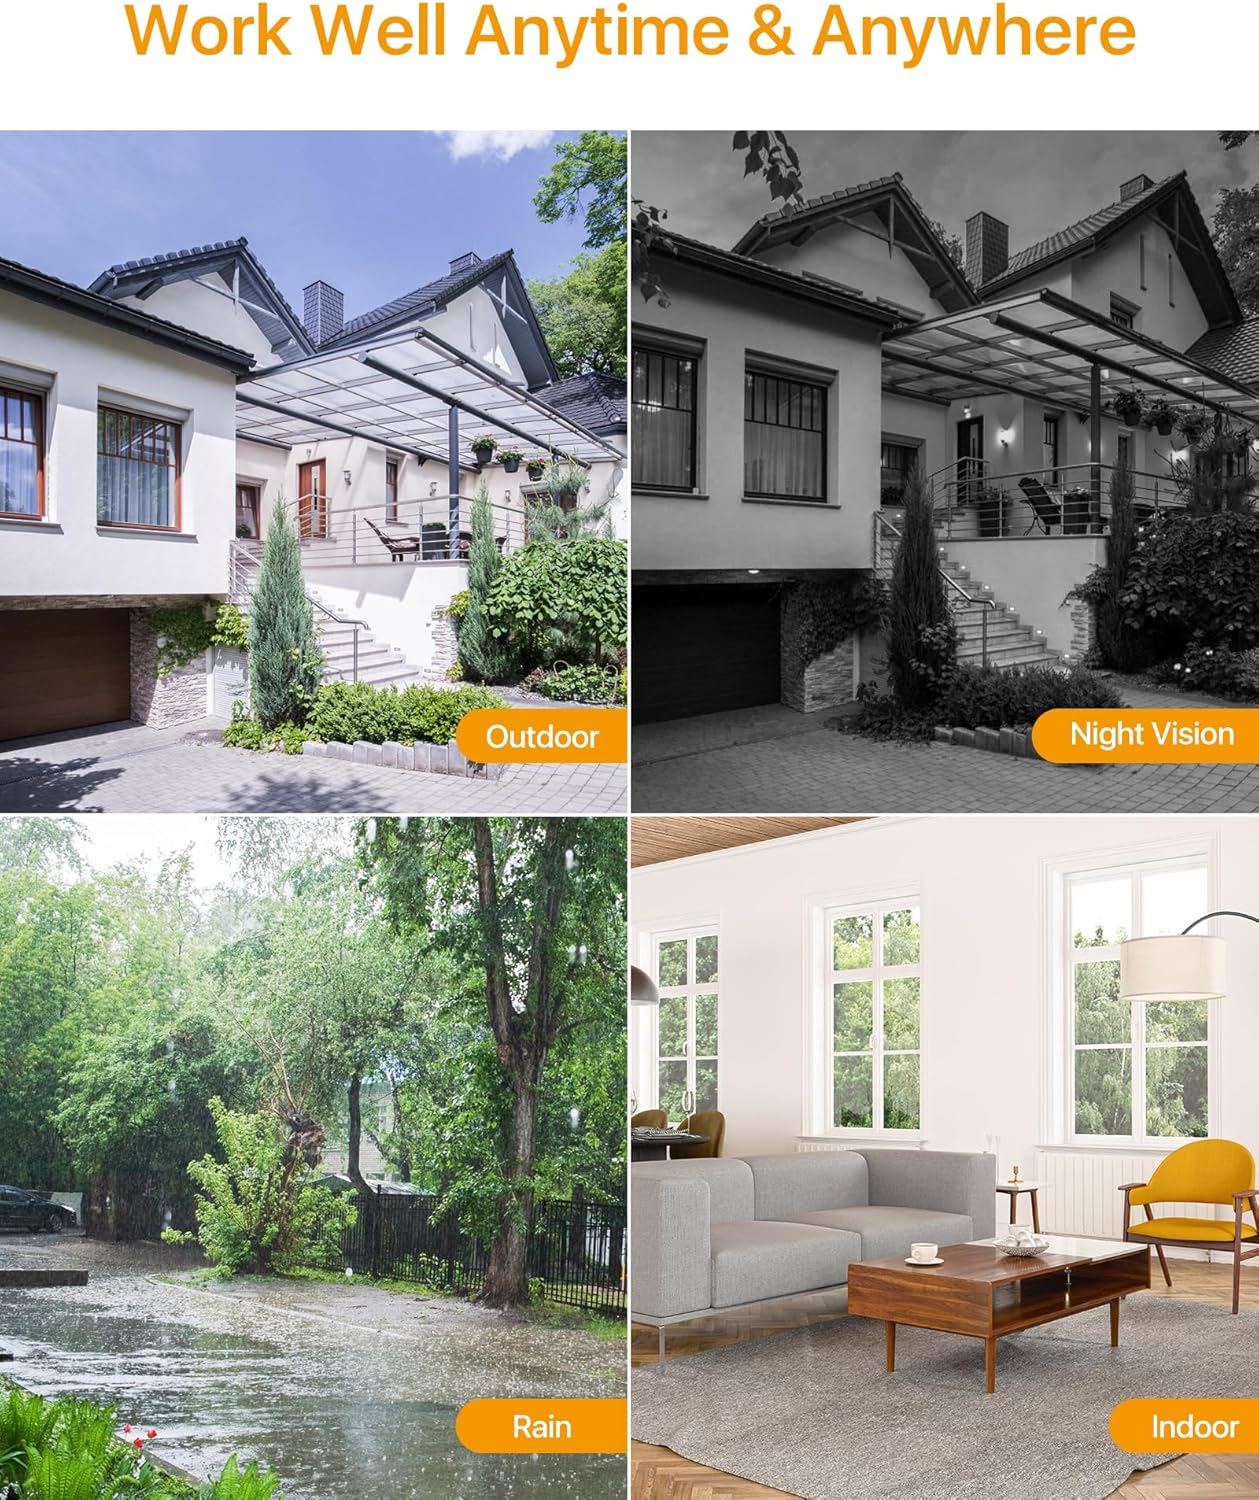
The Anlapus HD-TVI camera is designed for both indoor and outdoor surveillance, offering high-definition video quality and robust performance in various environmental conditions.
2. Содржина на пакетот
Проверете дали сите артикли наведени подолу се вклучени во вашиот пакет. Доколку некои артикли недостасуваат или се оштетени, ве молиме контактирајте ја службата за корисници.
- 4 x Anlapus 1080p HD-TVI Cameras
- 4 x BNC Video Cables
- 1 x Напојување
- 1 x 1-to-4 Power Splitter Cable
- 4 x Warning Stickers
- 4 x Mounting Screw Bags (including screws and wall plugs)
- 4 x Mounting Hole Templates
- 1 x Водич за брз почеток
3. Карактеристики на производот
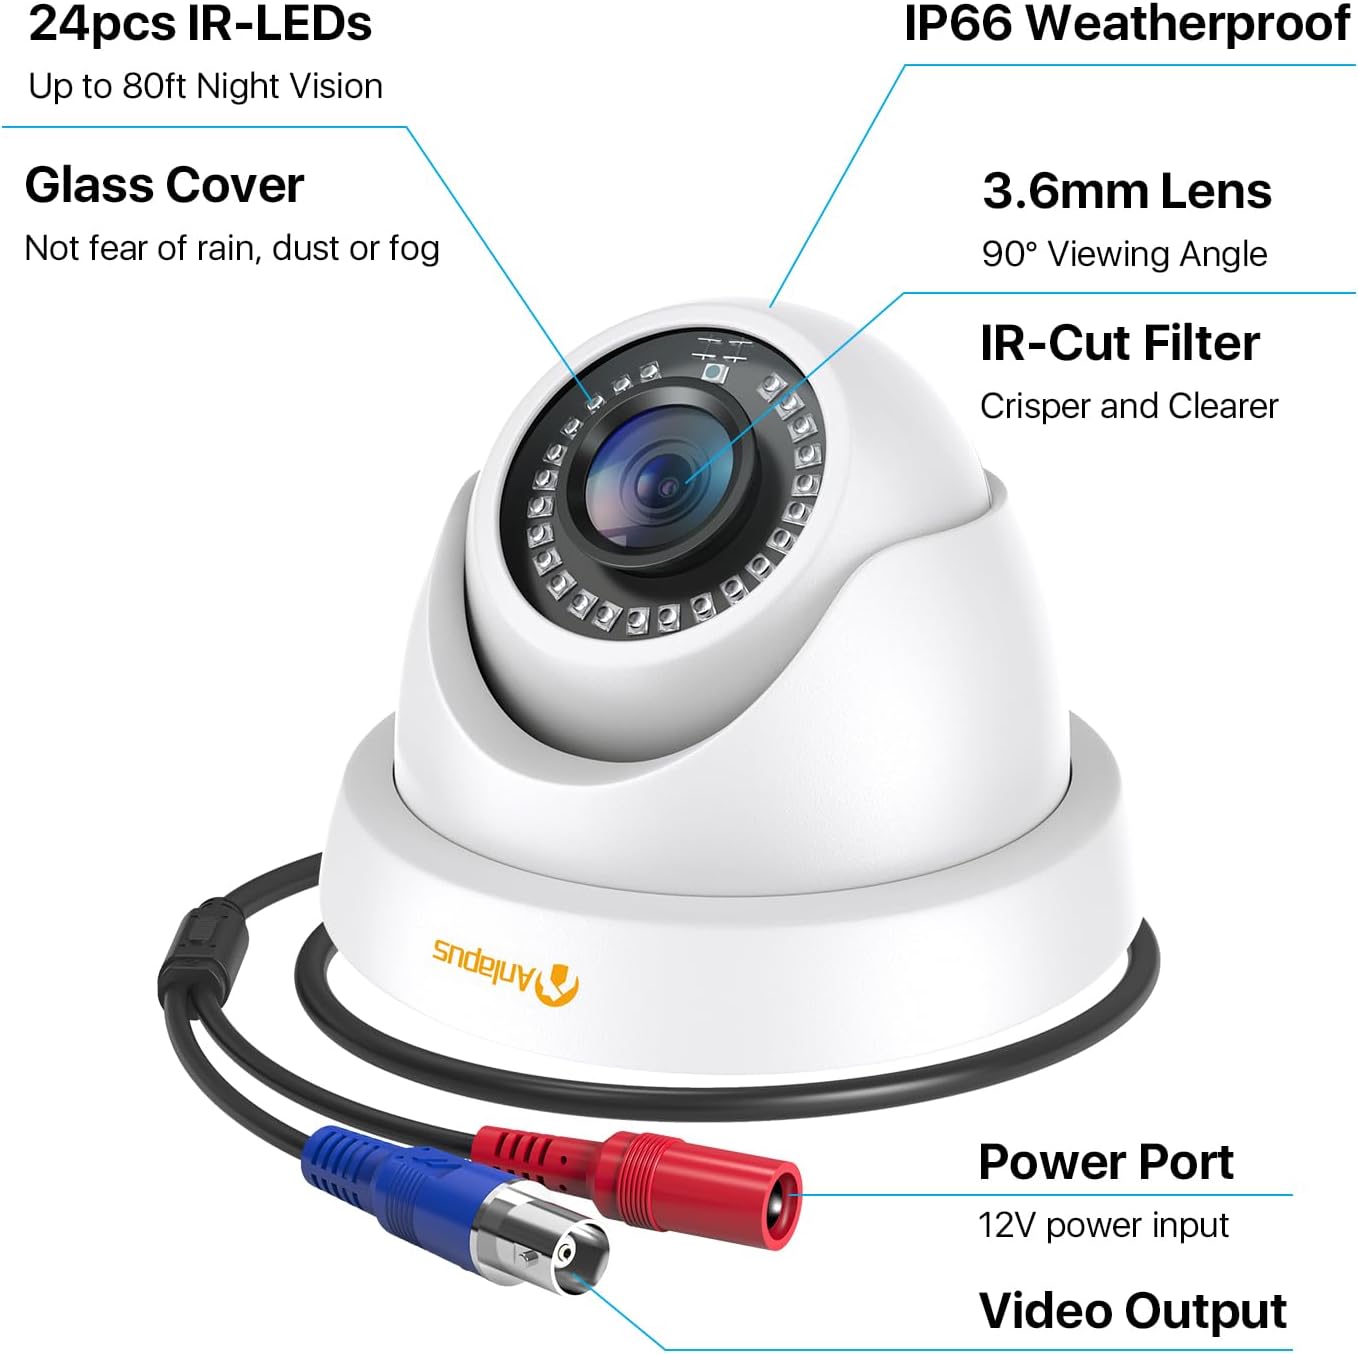
- 1080p HD резолуција: Обезбедува јасна и детална видео-фудбаtage (1920x1080 пиксели).
- Широк Viewагол: Equipped with a 3.6mm lens, offering a 90-degree field of view.
- HD-TVI Compatibility: Designed to work with HD-TVI DVRs. Ensure your DVR supports HD-TVI technology.
- Напредно ноќно гледање: Features 24 IR-Cut LEDs for up to 24 meters (80 feet) of clear black and white night vision.
- IP66 Оценка за водоотпорност: Robust metal housing ensures protection against dust and water, suitable for both indoor and outdoor use in various weather conditions.
- Флексибилно монтирање: Features a 3-axis adjustable bracket for ceiling or wall mounting, allowing 360-degree horizontal and 180-degree vertical adjustment.


4. Поставување и инсталација
4.1 Список за проверка пред инсталација
- Ensure your DVR is compatible with HD-TVI cameras.
- Plan the camera placement to cover desired surveillance areas.
- Ensure power outlets are accessible for the camera power supply.
- Gather necessary tools: drill, screwdriver, ladder (if mounting high).
4.2 Монтирање на камерата
- Select a suitable mounting location (wall or ceiling) that provides the desired viewing angle and is within reach of the BNC cable and power supply.
- Use the provided mounting hole template to mark the drill points on the surface.
- Дупчете пилот-дупки на означените позиции.
- Insert the wall plugs into the drilled holes (if mounting on masonry or drywall).
- Прицврстете ја основата на камерата на површината со помош на приложените завртки.
- Adjust the camera angle using the 3-axis bracket. The bracket allows for 360-degree horizontal rotation and 180-degree vertical tilt. Tighten the adjustment screws once the desired angle is achieved.
4.3 Поврзување на камерата
Погледнете ја шемата за поврзување подолу за правилно поврзување.
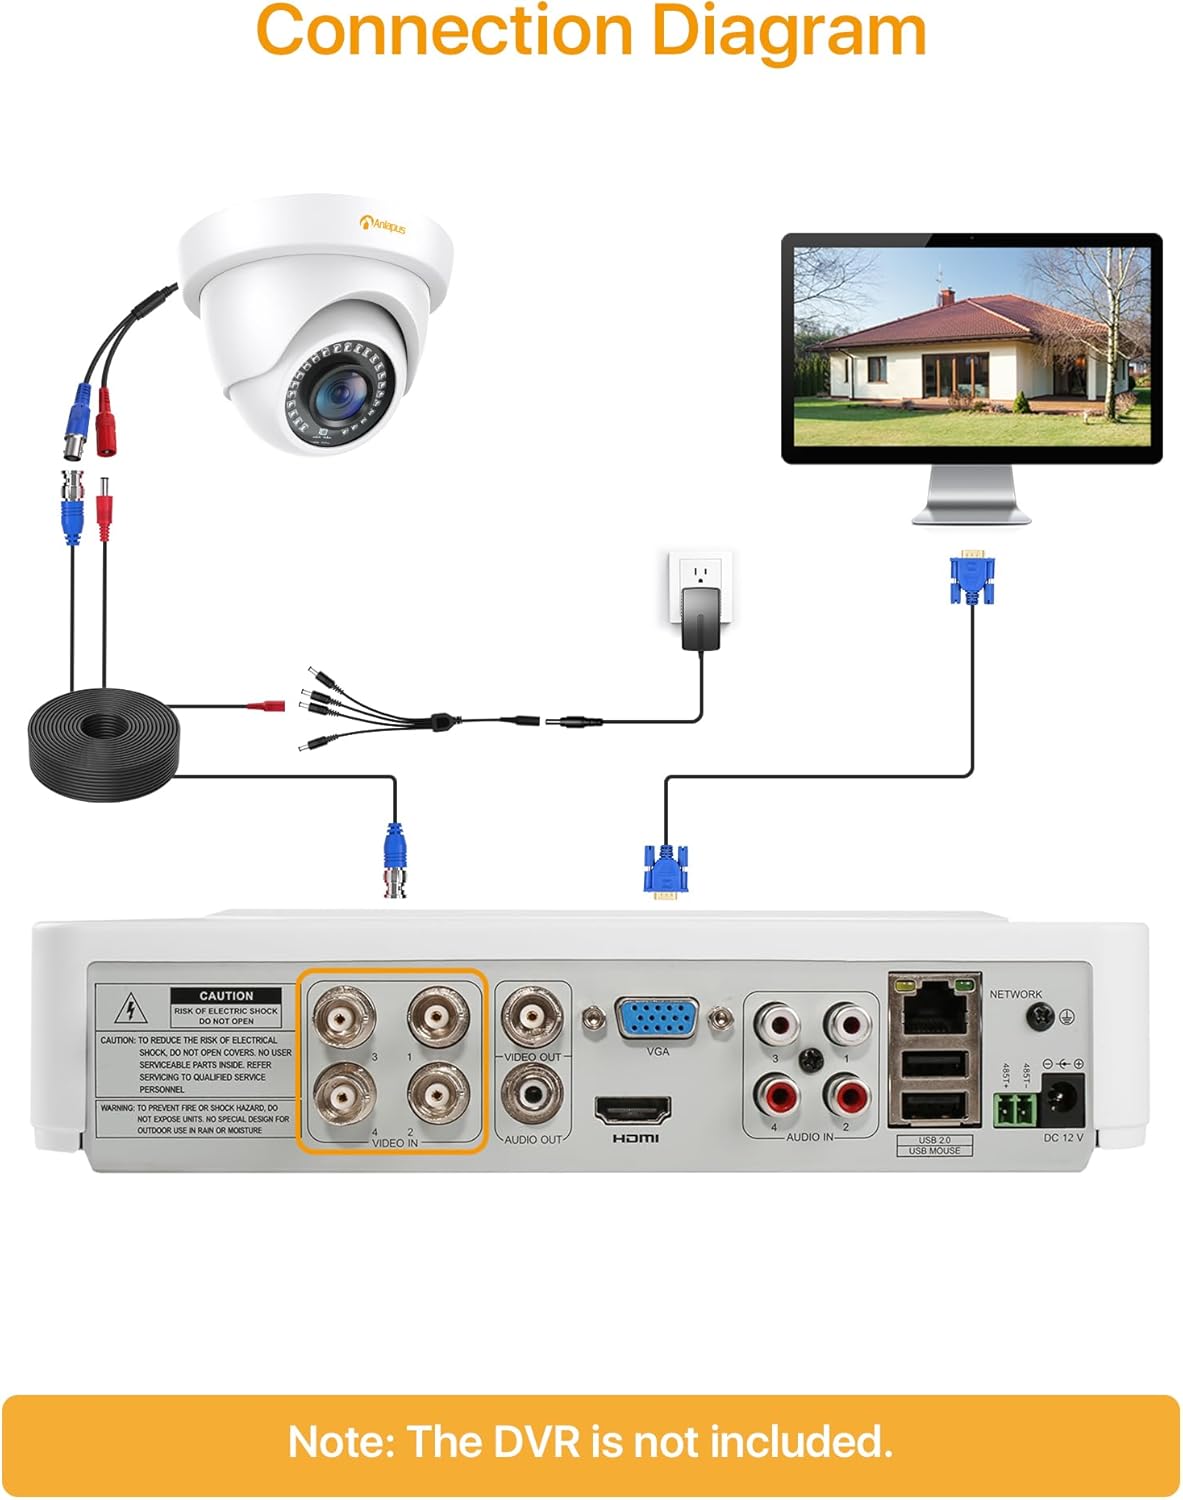
- Connect one end of the BNC video cable to the video output port of the camera.
- Connect the other end of the BNC video cable to a "VIDEO IN" port on your HD-TVI DVR.
- Connect the camera's power input to one of the outputs on the 1-to-4 power splitter cable.
- Connect the power supply to the 1-to-4 power splitter cable.
- Вклучете го напојувањето во стандарден електричен штекер.
- Repeat these steps for all cameras.
Важно: Уверете се дека сите врски се безбедни пред да го вклучите системот.
5. Упатства за работа
Once the cameras are properly installed and connected to your HD-TVI DVR, refer to your DVR's instruction manual for specific operating procedures, including:
- Viewво живоtagд од камерите.
- Recording and playback of video.
- Configuring motion detection and alerts.
- Accessing the system remotely via mobile app or web интерфејс.
- Adjusting camera settings (if supported by your DVR).
The Anlapus camera provides a continuous video feed to the DVR. Its night vision capabilities activate automatically in low-light conditions.
6. Одржување
- Чистење: Периодично чистете го објективот и куќиштето на камерата со мека, дamp крпа. Избегнувајте абразивни средства за чистење или растворувачи.
- Инспекција на кабел: Regularly check all cables for signs of wear, damage, or loose connections.
- Ажурирања на фирмверот: While the camera itself does not typically require firmware updates, ensure your DVR's firmware is up-to-date for optimal performance and compatibility.
- Заштита на животната средина: Although the camera is IP66 weatherproof, extreme weather conditions (e.g., heavy snow, ice) may temporarily affect performance. Ensure the camera is securely mounted to withstand strong winds.
7 Смена на проблеми
| Проблем | Можна причина | Решение |
|---|---|---|
| No image on DVR screen |
|
|
| Лош квалитет на слика / заматено видео |
|
|
| Ноќното гледање не работи |
|
|
If you encounter issues not covered here, please contact Anlapus customer support.
8. Спецификации
| Број на модел | AJ-A4K-202T4-WPES |
| Видео резолуција | 1080p (1920 x 1080 пиксели) |
| Леќа | 3.6 мм |
| Viewинголен агол | 90 степени |
| Опсег на ноќни визии | До 24 метри (80 стапки) |
| IR диоди | 24 pcs IR-Cut LEDs |
| Оценка за отпорност на атмосферски влијанија | IP66 |
| Материјал | Метал |
| Технологија за поврзување | Жичен (BNC) |
| Влез на енергија | 12 волти |
| Потрошувачка на енергија | 12 вати |
| Димензии (Д x Ш x В) | 42.9 x 27 x 8.71 cm |
| Тежина | 2.61 kilograms (for the package) |
| Препорачана употреба | Надзор |
| Компатибилни уреди | Дигитален видео-рекордер (DVR) |
9. Гаранција и поддршка
Anlapus products are designed for reliability and performance. For warranty information and technical support, please refer to the warranty card included in your package or visit the official Anlapus webсајт.
If you require assistance with installation, troubleshooting, or have any questions regarding your Anlapus surveillance camera, please contact our customer support team. Contact details can typically be found on the Anlapus brand store page or in the quick start guide.