1. Вовед
The ScopeAround MS450 Digital Otoscope Ear Camera is designed to provide a clear and detailed view of the ear canal and eardrum. This device features a 4.5-inch IPS screen, a high-definition camera with adjustable LED lights, and an intelligent gyroscope for image stabilization. It is intended for personal ear inspection and can assist in monitoring ear health. This manual provides essential information for the safe and effective use of your otoscope.
2. Информации за безбедност
- Do not insert the otoscope too deeply into the ear canal. Excessive insertion can cause injury to the eardrum or inner ear structures.
- Always use the provided ear specula to prevent over-insertion and protect the ear canal.
- Clean the camera lens and ear specula thoroughly before and after each use with alcohol wipes to prevent infection.
- This device is for observation and minor earwax removal only. For significant earwax impaction or ear infections, consult a medical professional.
- Држете го уредот подалеку од дофат на деца. Потребен е надзор од возрасен доколку се користи кај деца.
- Avoid using the device if you experience pain, discomfort, or bleeding during examination. Seek medical attention immediately.
- Не обидувајте се да го расклопите или модифицирате уредот. Ова може да ја поништи гаранцијата и да претставува ризик за безбедноста.
3. Содржина на пакетот
Проверете дали сите артикли се присутни во пакувањето:
- MS450 Otoscope Camera Unit
- Кабел за полнење (USB тип-C)
- Упатство за употреба
- 4 x Silicone Ear Spoons (various types)
- 3 x Ear Specula (protective cones)
- 1 Pack of Alcohol Prep Pads
- 32GB MicroSD Memory Card (pre-installed or included separately)

4. Производот завршиview
The MS450 otoscope consists of a main display unit and a connected camera probe. Familiarize yourself with the components and controls:

- Екран за приказ: Features a 4.5-inch IPS screen for real-time viewинг.
- Сонда за камера: Equipped with an HD camera, 6 adjustable LED lights, and a gyroscope.
- Контролни копчиња: Power, Photo/Video, Light Control, Mode Switch, Navigation (Up/Down), OK, and Settings.
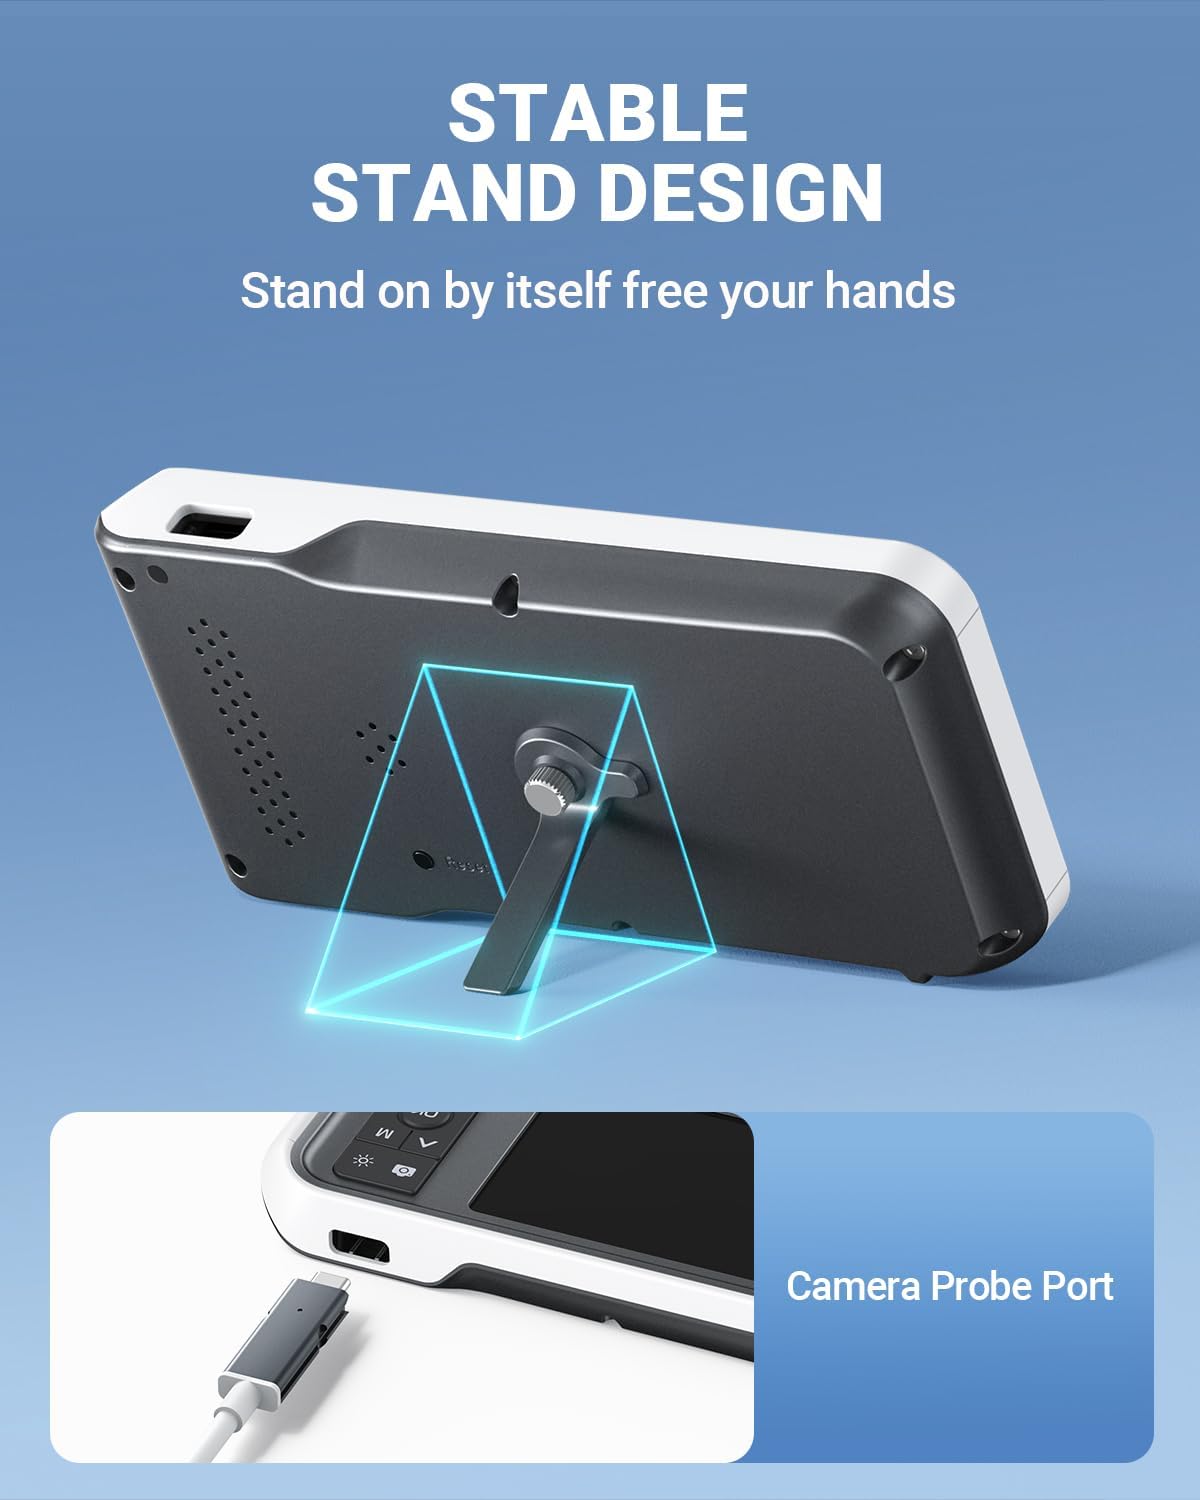
- Пристаништа: USB Type-C Charging Port, TF Card Slot, Camera Probe Connector.
- Интегриран држач: Allows for hands-free operation.
5. Поставување
- Наполнете го уредот: Before first use, fully charge the otoscope using the provided USB Type-C cable and a compatible power adapter (not included). The charging port is located on the side of the display unit. A full charge provides over 4 hours of continuous use.
- Вметнете MicroSD картичка: Ensure the 32GB MicroSD card is properly inserted into the TF Card Slot. This card is used to store photos and videos.
- Прикачете ја сондата за камера: Connect the camera probe cable securely to the Camera Probe Connector on the display unit.
- Select and Attach Specula/Ear Spoon: Choose an appropriate ear speculum (protective cone) or silicone ear spoon. Gently push it onto the tip of the camera probe until it is secure. Always use a speculum to protect the ear canal.


6. Упатства за работа
- Вклучување: Press and hold the Power Button (blue button) for a few seconds until the screen turns on.
- Прилагодете ја осветленоста на LED диодите: Use the Light Control Button (sun icon) to cycle through 3 levels of LED brightness to achieve optimal illumination for your ear canal.
- Позиционирање: Gently insert the camera probe into the ear canal. The 4.5-inch IPS screen will display a real-time view. The intelligent directional gyroscope helps stabilize the image, preventing disorientation.
- Ракување без раце: Utilize the integrated stand on the back of the display unit to position the device on a flat surface, allowing for hands-free viewing and easier manipulation of the probe.
- Снимајте фотографии/видеа:
- Press the Mode Switch Button (M) to switch between photo and video modes.
- In photo mode, press the Photo/Video Button (camera icon) once to take a picture.
- In video mode, press the Photo/Video Button once to start recording, and press again to stop.
- Review Медиуми: Use the navigation buttons (Up/Down) to browse captured photos and videos. Press the OK button to view избрана ставка.
- Трансфер на податоци: Connect the device to a computer using the USB Type-C cable to transfer photos and videos from the MicroSD card. Alternatively, remove the MicroSD card and insert it into a card reader.
- Исклучено: Притиснете и задржете го копчето за вклучување додека екранот не се исклучи.

7. Одржување
- Чистење на објективот на камерата: After each use, gently wipe the camera lens with an alcohol prep pad or a soft, dry cloth. Ensure no residue remains.
- Cleaning Ear Spoons/Specula: Wash reusable ear spoons and specula with soap and water, then sterilize with alcohol prep pads. Replace disposable specula after each use.
- Чистење на уредот: Wipe the main unit with a soft, dry cloth. Do not immerse the main unit in water. The camera probe is waterproof and can be cleaned with water and alcohol.
- Складирање: Store the otoscope in a clean, dry place at room temperature, away from direct sunlight and extreme temperatures.
- Нега на батеријата: За да го продолжите животниот век на батеријата, избегнувајте често целосно празнење на уредот. Полнете го редовно, дури и ако не го користите подолг период.

8 Смена на проблеми
| Проблем | Можна причина | Решение |
|---|---|---|
| Уредот не се вклучува. | Слаба батерија; уредот е замрзнат. | Charge the device fully. If unresponsive, press the Reset button with a pin. |
| Нема слика на екранот. | Camera probe not connected; faulty probe. | Ensure camera probe is securely connected. If problem persists, contact support. |
| Сликата е заматена. | Dirty lens; incorrect focal distance. | Clean the camera lens. Ensure the probe is within the optimal focal distance (approx. 1 inch / 2.5 cm). |
| Не може да се снимаат фотографии/видеа. | MicroSD card full or not inserted; incorrect mode. | Check MicroSD card status and ensure it is inserted. Verify device is in photo or video mode. |
| LED светлата не работат. | Lights turned off or set to lowest brightness. | Press the Light Control Button to adjust brightness levels. |
9. Спецификации
- Модел: MS450
- Прикажи: 4.5-инчен IPS екран
- Резолуција на камерата: Full HD (1080P for images, 720P for video)
- Извор на светлина: 6 adjustable LED lights (3 brightness levels)
- Батерија: 2500mAh Lithium Polymer (rechargeable)
- Траење на батеријата: Приближно 4 часа континуирана употреба
- Складирање: MicroSD картичка од 32GB (вклучена)
- Фокусна должина: Approximately 1 inch (2.5 cm)
- Жироскоп: Intelligent directional gyroscope for image stabilization
- Поврзување: USB Type-C for charging and data transfer
- Димензии на производот: 5.9 x 2.9 x 0.79 инчи
- Тежина на ставката: 12 унци
- Материјал: Glass (lens), other components as specified by manufacturer
10. Гаранција
ScopeAround products are covered by a limited manufacturer's warranty against defects in materials and workmanship. Please refer to the warranty card included in your package or visit the official ScopeAround webстраница за детални услови за гаранција. Зачувајте го доказот за купување за рекламации за гаранција.
11. Поддршка
For technical assistance, troubleshooting, or product inquiries, please contact ScopeAround customer support:
- Webсајт: Visit the official ScopeAround webстраница за често поставувани прашања и ресурси за поддршка.
- Е-пошта: Погледнете го пакувањето на вашиот производ или официјалниот webстраница за е-пошта за корисничка поддршка.
- Телефон: Погледнете го пакувањето на вашиот производ или официјалниот webстраница за телефонски број за корисничка поддршка.
Our US-based after-sales support team is available to assist you.