1. Вовед
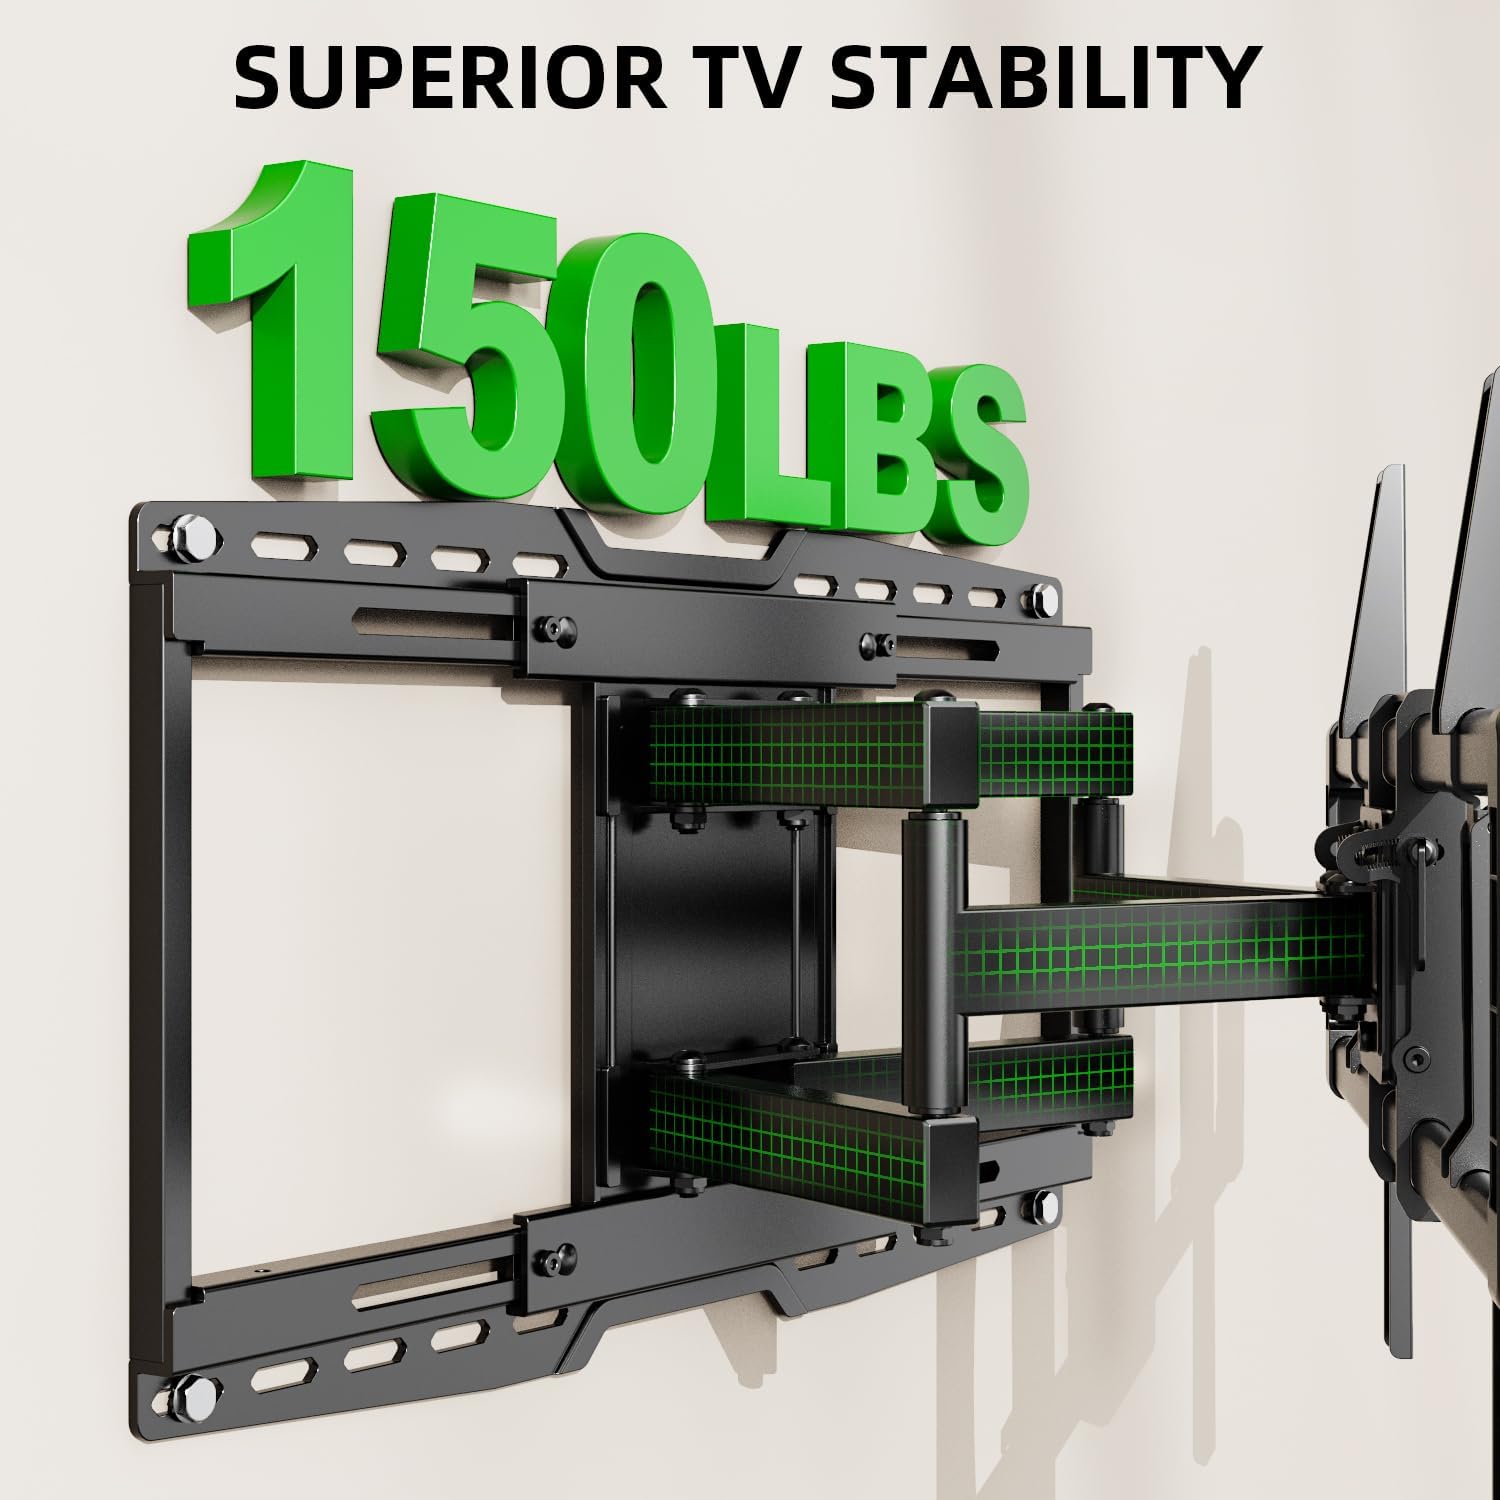
Thank you for choosing the USX MOUNT UL Listed Heavy Duty TV Wall Mount. This product is engineered for secure and versatile mounting of televisions ranging from 32 to 90 inches and weighing up to 150 lbs. It features a full-motion design with swivel, tilt, and leveling adjustments, along with an 8-inch horizontal sliding function for optimal TV positioning. Please read this manual thoroughly before installation and retain it for future reference.

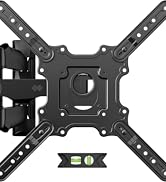
Слика 1: USX MOUNT Heavy Duty TV Wall Mount with bubble level and cable ties.
2. Важни безбедносни информации
- ПРЕДУПРЕДУВАЊЕ: This product is designed for use in wood stud, solid concrete, or brick walls only. НЕ инсталирајте само на drywall.
- Ensure your TV's weight and VESA pattern are within the specified limits of this mount.
- Секогаш користете пребарувач на столпчиња за точно да ги лоцирате дрвените столпчиња.
- If mounting to concrete or brick, appropriate concrete anchors are required. Contact USX MOUNT if you need these anchors.
- Installation should be performed by at least two people due to the weight and size of the TV and mount.
- Do not overtighten screws, as this may damage the wall or TV.
- Држете ги децата и домашните миленици подалеку за време на инсталацијата.
3. Содржина на пакетот
Verify that all components are present and undamaged before beginning installation. If any parts are missing or defective, please contact USX MOUNT customer support.
- Монтажа за телевизор на ѕид
- Држачи за телевизор (2 парчиња)
- Ѕидна плоча
- Ниво на меур
- Врвки за кабел (3 парчиња)
- Standard Mounting Hardware (various screws, washers, spacers for different TV types)
Слика 2: Сите компоненти вклучени во пакетот.
4. Потребни алатки (не се вклучени)
- Пронаоѓач на обетки
- Електрична дупчалка
- Level (a small one is included, but a larger one may be helpful)
- Молив
- Мерка со лента
- Шрафцигер за глави Филипс
- Socket Wrench (e.g., 13mm)
- Чекан (за бетонски сидра)
5. Спецификации на производот
| Карактеристика | Спецификација |
|---|---|
| Број на модел | XML018-1 |
| Компатибилни големини на ТВ | 32 - 90 инчи |
| Максимална носивост | 150 фунти (68.2 кг) |
| Компатибилност со VESA | Max 600x400mm, Min 200x100mm |
| Тип на движење | Артикулирање, вртење, навалување |
| Агол на навалување | +5° / -15° |
| Агол на вртење | +/-45° |
| Растојание до ѕид | 3.35 - 19.09 инчи |
| Horizontal Sliding | 8 inches (left or right) |
| Компатибилни типови ѕидови | Wood studs (8", 12", 16", 18", 24"), Solid concrete wall, Brick wall |
| Материјал | Легуриран челик |

Слика 3: Available VESA patterns and how to measure your TV's VESA.
6. Водич за инсталација
6.1. Список за проверка пред инсталацијата
- Confirm your TV's size and weight are within the mount's specifications.
- Verify your TV's VESA mounting pattern.
- Identify your wall type (wood studs, concrete, or brick).
- Gather all necessary tools and included hardware.
Слика 4: Confirm TV and wall compatibility before installation.
6.2. Чекор-по-чекор инсталација
Чекор 1: Прикачете ТВ-држачи на ТВ
- Внимателно поставете го телевизорот со лицето надолу на мека, чиста површина.
- Align the TV brackets with the mounting holes on the back of your TV.
- Select the appropriate screws, washers, and spacers from the hardware kit. For flat TV backs, spacers may not be needed. For irregular or curved TV backs, use spacers to ensure a secure fit without damaging the TV.
- Secure the brackets to the TV using a screwdriver. Do not overtighten.
Слика 5: TV brackets attached to the back of the television.
Видео 1: This video demonstrates the process of attaching the TV brackets to the television, including considerations for different TV back types.
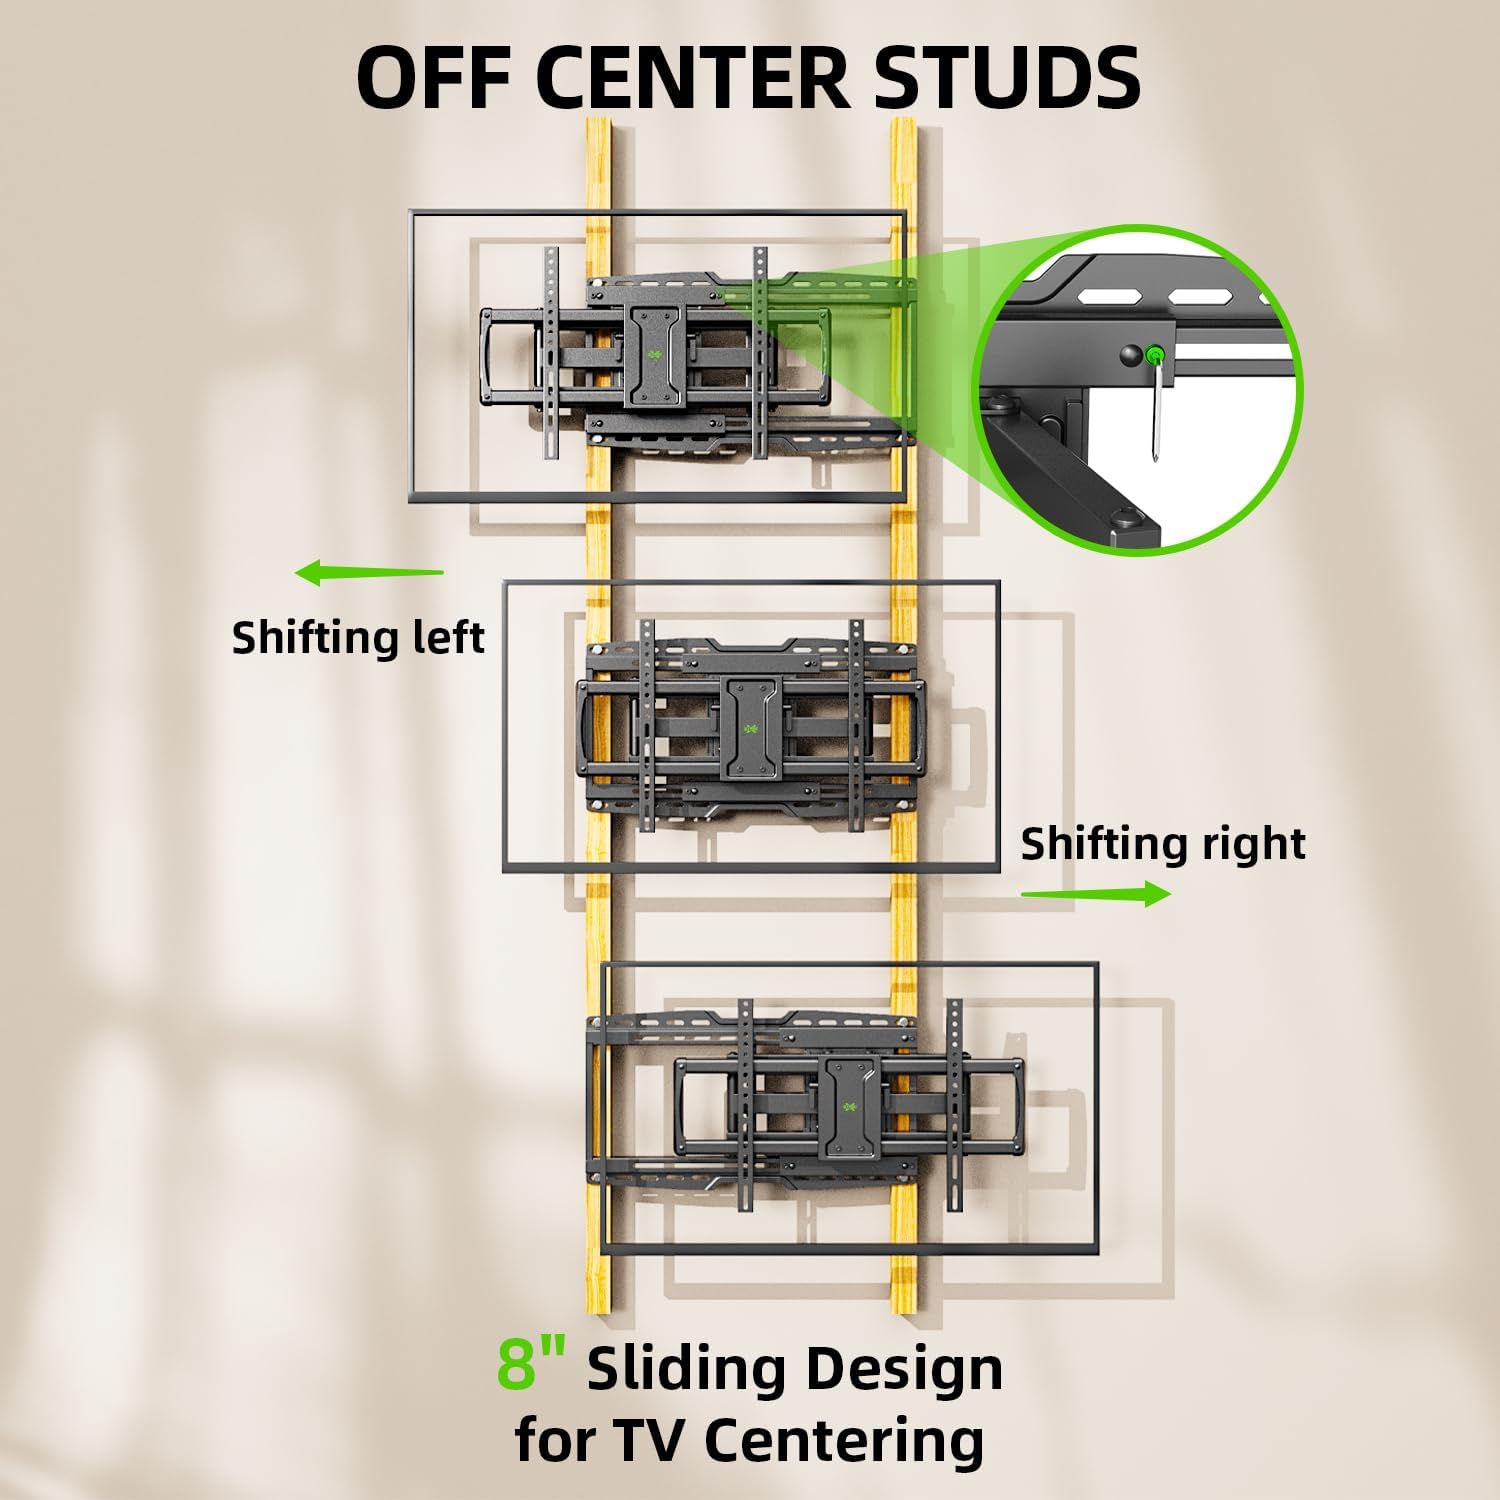
Step 2: Locate Wall Studs and Mark Drilling Points
- Use a stud finder to locate the edges and center of two adjacent wood studs. Mark the center of each stud.
- Hold the wall plate against the wall at your desired height and use a level to ensure it is perfectly horizontal. Mark the drilling points through the wall plate's holes onto the wall.
- The mount features an 8-inch horizontal sliding design, allowing you to center your TV even if your studs are off-center. Plan your wall plate placement accordingly.

Слика 6: The 8-inch sliding design allows for TV centering even with off-center studs.
Чекор 3: Прицврстете ја ѕидната плоча на ѕидот
За дрвени ѕидови со столбови:
- Drill pilot holes at the marked locations using a 7/32 inch (5.5 mm) drill bit. Ensure the depth is sufficient for the lag bolts.
- Attach the wall plate to the wall using the provided lag bolts and washers. Tighten securely with a socket wrench.
For Solid Concrete or Brick Walls:
- Drill pilot holes at the marked locations using a 3/8 inch (10 mm) drill bit. Ensure the depth is sufficient for the concrete anchors.
- Insert the concrete anchors into the pilot holes, tapping gently with a hammer if necessary until flush with the wall surface.
- Attach the wall plate to the wall using the provided lag bolts and washers, screwing them into the anchors. Tighten securely.

Слика 7: Compatible wall types for installation. Do not install on drywall alone.
Видео 2: This installation video demonstrates locating studs, drilling, and securing the wall plate for various wall types.
Step 4: Hang TV onto Wall Plate
- With assistance, carefully lift the TV and hook the attached TV brackets onto the wall plate.
- Осигурајте се дека телевизорот е безбедно поставен на ѕидната плоча.
- Engage the safety screws or locking mechanisms on the TV brackets to prevent accidental dislodging.

Слика 8: Во текот наview of the TV mounting process, including hanging and securing the TV.
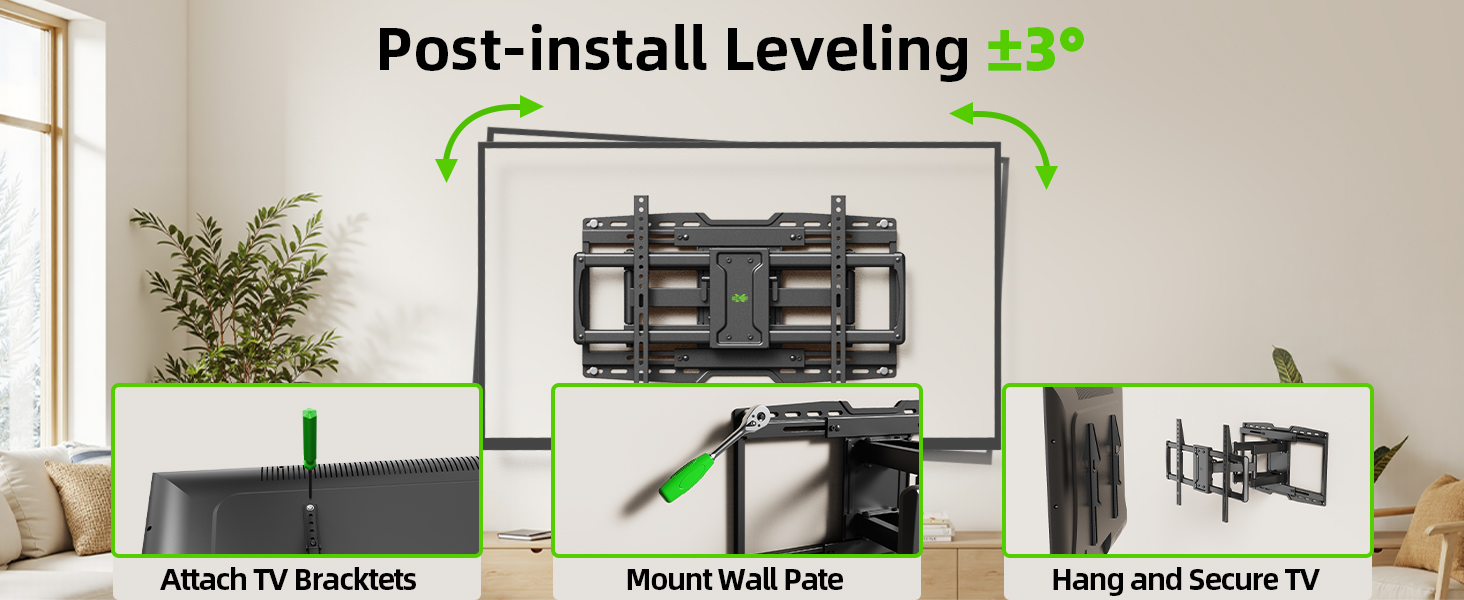
Step 5: Leveling Adjustment
- After hanging the TV, use the horizontal post-installation leveling screws to fine-tune the TV's level. This allows for a +/-3° adjustment.
- Use the included bubble level or a larger level to achieve perfect horizontal alignment.
Слика 9: Post-installation leveling screws for precise alignment.
7. Упатства за работа
7.1. Прилагодување на навалување
The mount allows for a tilt range of +5° (upward) to -15° (downward). This feature is useful for reducing glare and optimizing viewинг агли.
- Locate the tilt handles on the TV brackets.
- Loosen the tilt handles to adjust the TV to your desired vertical angle.
- Tighten the tilt handles to secure the TV in position.

Слика 10: Adjusting the TV tilt for comfortable viewинг.
7.2. Swivel and Extension/Retraction
The full-motion arms allow the TV to swivel up to +/-45° and extend from 3.35 inches to 19.09 inches from the wall.
- Gently pull the TV away from the wall to extend the articulating arms.
- Carefully pivot the TV left or right to achieve the desired swivel angle.
- To retract, push the TV back towards the wall until it is in the desired position.

Слика 11: Флексибилен viewing with extension, retraction, and swivel capabilities.
7.3. Horizontal Sliding
The mount features an 8-inch horizontal sliding function on the wall plate, allowing you to shift the TV left or right by up to 8 inches after installation, ensuring perfect centering.
- Gently slide the TV along the wall plate to adjust its horizontal position.
- Ensure the TV is securely positioned after adjustment.
8. Одржување
- Периодично проверувајте ги сите завртки и врски за да се осигурате дека се цврсто и безбедно прицврстени.
- Чистете го држачот со мека, сува крпа. Избегнувајте абразивни средства за чистење или растворувачи.
- Ако зглобните рачки станат вкочанети, може да се нанесе мала количина лубрикант на база на силикон на точките на вртење.
9 Смена на проблеми
9.1. TV is not level after installation
- Use the horizontal post-installation leveling screws (as described in Section 6.2, Step 5) to adjust the TV's angle by +/-3°.
9.2. Difficulty moving the TV (stiff arms)
- Осигурајте се дека нема кабли заглавени или пречки во движењето.
- Apply a small amount of silicone-based lubricant to the articulating joints if movement remains stiff.
9.3. TV is not centered on the wall
- Utilize the 8-inch horizontal sliding feature of the mount to reposition the TV left or right on the wall plate.
10. Гаранција и поддршка
This USX MOUNT product is manufactured by X-MOUNT LIMITED. For specific warranty details, please refer to the product packaging or visit the official USX MOUNT website. If you require concrete anchors not included in your package, or have any questions or concerns regarding installation or operation, please contact USX MOUNT customer support.


