1. Вовед
Thank you for choosing the ORSKEY S950 Dash Cam. This manual provides detailed instructions for the proper installation, operation, and maintenance of your new dash camera system. Please read this manual thoroughly before use to ensure optimal performance and longevity of the device.

Image: The ORSKEY S950 Dash Cam, showing the main front unit with a 3-inch IPS screen and the separate rear camera.
2. Производот завршиview
2.1 Содржина на пакетот
The ORSKEY S950 Dash Cam package includes the following items:
- ORSKEY S950 Front Dash Camera
- Задна камера
- Полнач за автомобил
- Mounting Bracket (Dashboard Mount)
- Кабел за задна камера
- Упатство за употреба
- Memory Card (Included components: Memory Card)
2.2 Клучни карактеристики
The ORSKEY S950 Dash Cam is equipped with advanced features for comprehensive vehicle surveillance:
- 4K Ultra HD Front Recording: Снима јасна, детална хранаtage.
- 1080P Rear Recording: Provides a wide view of the vehicle's rear.
- Sony Starvis Sensor: Enhances low-light performance for superior night vision.
- 3-инчен IPS екран: Offers a clear and wide viewing angle for playback and settings.
- 170-Degree Wide Field of View: Both front and rear cameras cover multiple lanes.
- Снимање на јамка: Автоматски го пребришува најстариот footage кога мемориската картичка е полна.
- G-Sensor (Emergency Accident Lock): Detects sudden impacts and locks the current video to prevent overwriting.
- Мониторинг на паркирање: Provides surveillance when the vehicle is parked (requires continuous power supply).
- Support for up to 128GB MicroSD Card: Allows for extended recording times.

Image: Visual representation of the ORSKEY S950's powerful functions, including 4K+1080P recording, Sony Sensor, 3" IPS screen, dual 170° FOV, G-Sensor, Loop Recording, Parking Monitoring, Emergency Recording, and Max 128GB support.
3. Поставување и инсталација
3.1 Вметнување на MicroSD картичката
- Осигурајте се дека камерата на таблата е исклучена.
- Пронајдете го слотот за MicroSD картичка на страната од главниот уред.
- Insert the MicroSD card (Class 10 or higher, up to 128GB) into the slot until it clicks into place.
- Важно: Format the MicroSD card within the dash cam's settings menu before first use and periodically thereafter to ensure stable recording.
3.2 Mounting the Front Camera
- Clean the windshield area where you intend to mount the camera.
- Attach the suction cup mount or adhesive mount to the windshield, ensuring it does not obstruct your view.
- Slide the main dash cam unit onto the mounting bracket until it locks securely.
- Adjust the camera lens angle to ensure it captures the road ahead clearly.
3.3 Инсталирање на задната камера
- Determine the optimal mounting location for the rear camera, typically on the rear windshield or near the license plate.
- Темелно исчистете ја површината за монтирање.
- Secure the rear camera using the provided adhesive or screws.
- Route the rear camera cable from the rear of the vehicle to the front dash cam unit. Ensure the cable is tucked away neatly to avoid interference with driving.
- Поврзете го кабелот на задната камера со назначениот порт на главната камера на таблата.

Image: Illustration of the dual lens dash camera's wide 170° viewing angles for both front and rear, providing comprehensive coverage.
3.4 Поврзување за напојување
- Поврзете го полначот за автомобил со влезот за напојување на камерата на таблата.
- Вклучете го другиот крај од полначот за автомобил во приклучокот за запалка на вашето возило.
- Камерата на таблата автоматски ќе се вклучи и ќе започне со снимање кога ќе се вклучи палењето на возилото.
4. Упатства за работа
4.1 Основно работење
- Вклучување/исклучување: The camera powers on/off automatically with the vehicle's ignition. You can also manually power on/off by pressing and holding the power button.
- Снимање: Once powered on and with a formatted MicroSD card, the camera will automatically start loop recording. A flashing indicator light usually signifies active recording.
- Вклучување/исклучување на екранот: The screen can be set to turn off automatically after a set period to avoid distraction while driving. Recording continues in the background.
4.2 Снимање во јамка
Loop recording ensures continuous recording by overwriting the oldest unlocked video files when the MicroSD card reaches its capacity. This feature prevents the card from filling up and stopping recording.
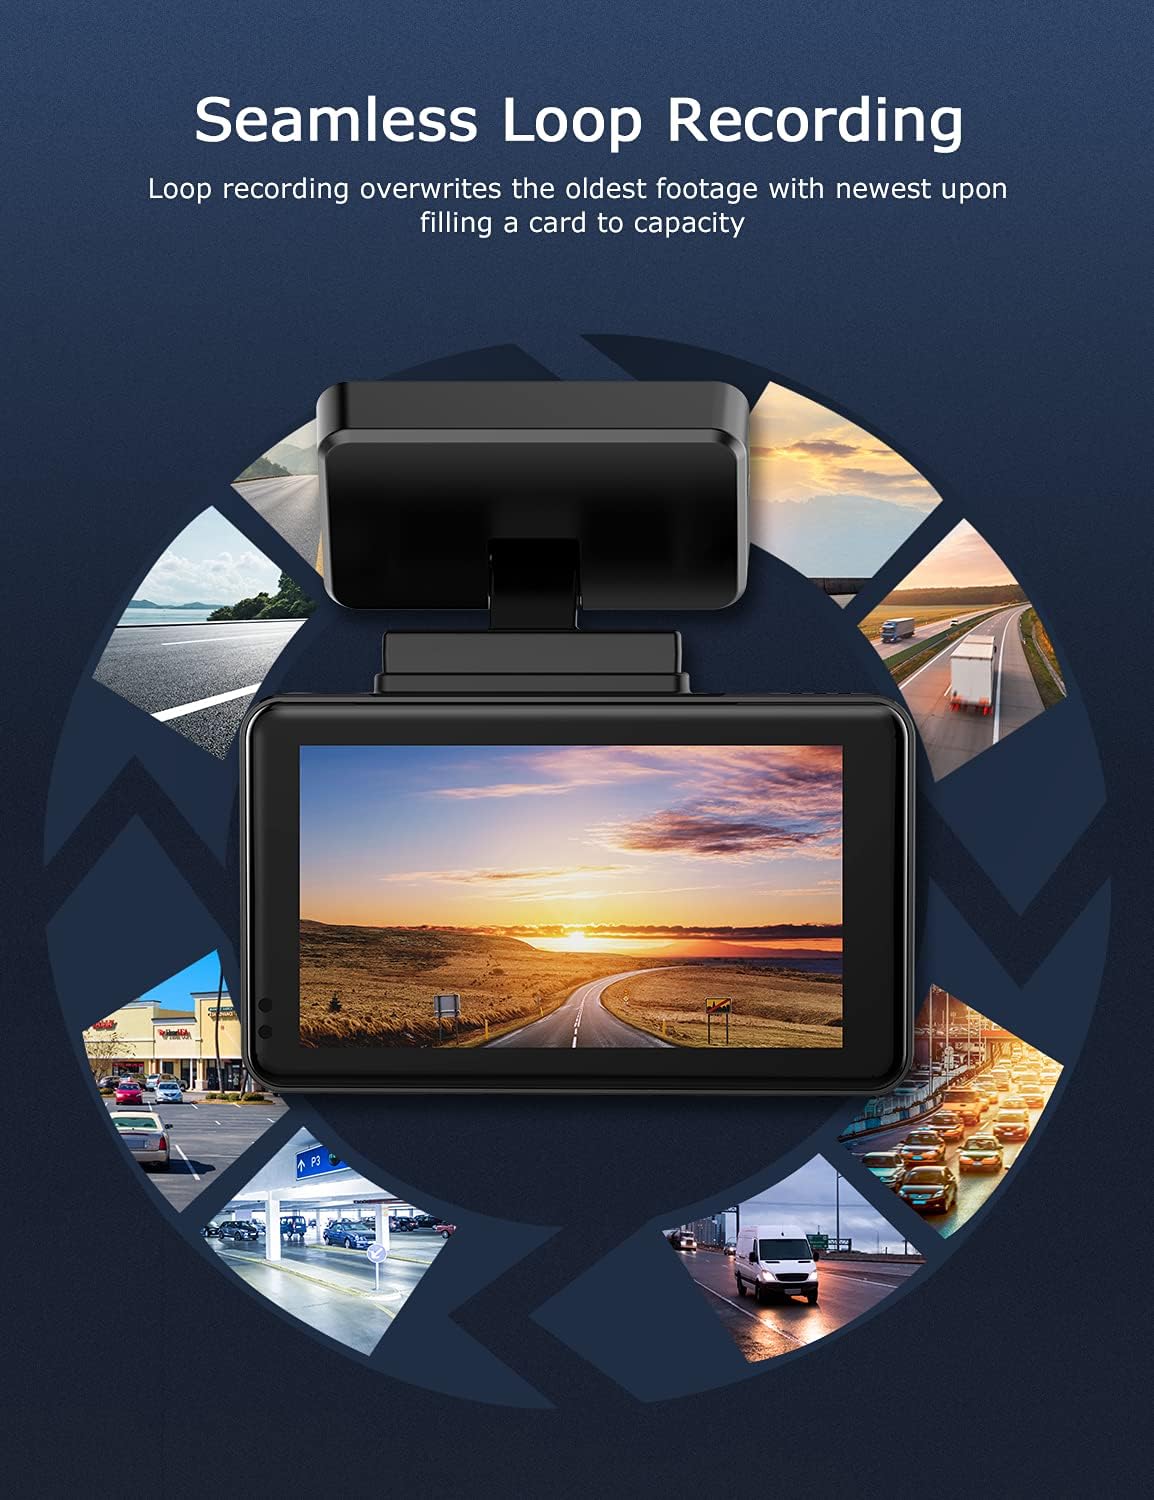
Image: Visual explanation of seamless loop recording, where the dash cam continuously records and overwrites the oldest footage once the memory card is full.
4.3 G-сензор и брава за итни случаи
The built-in G-sensor detects sudden acceleration, braking, or collisions. When triggered, it automatically locks the current video segment, protecting it from being overwritten by loop recording. These locked files are stored in a separate folder on the MicroSD card.

Image: Depiction of the Emergency Accident Lock feature, where the G-sensor detects an impact and automatically locks the video footage as important evidence.
4.4 Мониторинг на паркирање
When enabled, parking monitoring allows the dash cam to automatically record if it detects a collision or vibration while the vehicle is parked. This feature typically requires a hardwire kit (sold separately) for continuous power supply.
4.5 Ноќно гледање
Equipped with a Sony Starvis Sensor, the ORSKEY S950 provides enhanced night vision capabilities, capturing clear video footage дури и во услови на слаба осветленост.
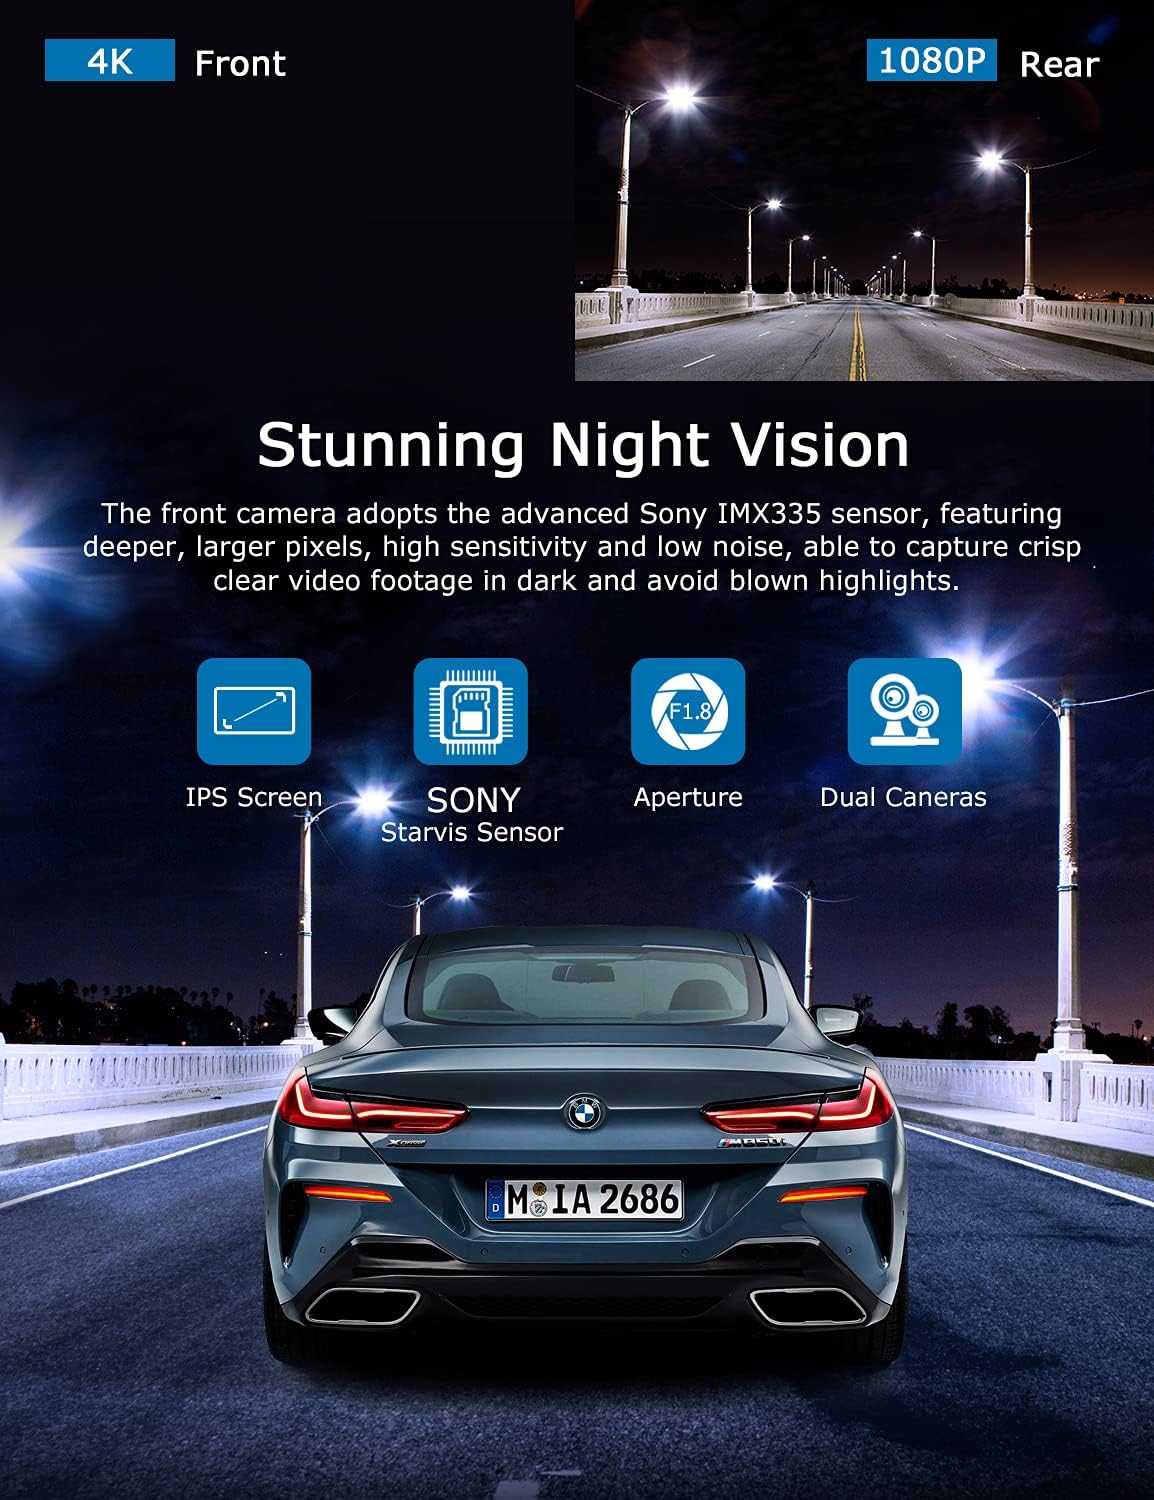
Image: Illustration highlighting the stunning night vision capability of the ORSKEY S950, showing clear footage во темни средини.
4.6 Репродукција
За повторноview снимен footage:
- Stop recording by pressing the OK button (if currently recording).
- Enter playback mode via the menu options.
- Navigate through video files using the up/down buttons.
- Изберете a file и притиснете ОК за репродукција.
- You can also remove the MicroSD card and view files на компјутер што користи компатибилен медиа плеер.
5. Одржување
- Форматирање на MicroSD картичка: Regularly format the MicroSD card (at least once a month) to prevent data corruption and ensure optimal performance. Back up important files пред форматирање.
- Чистење: Користете мека, сува крпа за чистење на објективот и екранот на камерата. Избегнувајте употреба на абразивни средства за чистење или растворувачи.
- Температура: Избегнувајте изложување на камерата на таблата на екстремни температури подолг период, бидејќи тоа може да влијае на животниот век на батеријата и интегритетот на компонентите.
6 Смена на проблеми
| Проблем | Можна причина | Решение |
|---|---|---|
| Камерата не се вклучува. | No power supply; faulty charger; dead battery. | Check car charger connection and vehicle's cigarette lighter. Ensure the camera's internal battery is charged. |
| "Card Error" or recording stops. | MicroSD card not formatted, incompatible, or corrupted. | Format the MicroSD card in the camera. Use a high-quality Class 10 (U3 recommended) MicroSD card from a reputable brand. Try a different card. |
| Video playback is laggy or corrupted. | Slow MicroSD card; file system issues; incompatible player. | Ensure you are using a high-speed MicroSD card (V30/U3). Format the card. Try playing videos with a different media player on your computer. |
| Rear camera image is reversed. | Default setting for mirror view. | Check camera settings for a 'Mirror Image' or 'Flip' option for the rear camera. If not available, this may be intended for reverse assistance rather than recording. |
| G-сензорот е премногу чувствителен/не е доволно чувствителен. | Поставување на чувствителност на G-сензорот. | Adjust the G-Sensor sensitivity level in the camera's settings menu. |
7. Спецификации
| Карактеристика | Спецификација |
|---|---|
| Број на модел | S950 |
| Резолуција за снимање видео | 4K (напред), 1080P (заден) |
| Големина на екранот | 3-инчен IPS екран |
| Поле на View | 170 степени (напред и назад) |
| Посебни карактеристики | Loop Recording, Night Vision, G-Sensor, Parking Monitoring |
| Поддршка за складирање | Up to 128GB MicroSD Card (Class 10/U3 recommended) |
| Контролен метод | Допрете |
| Извор на енергија | Car Charger (1 Lithium Polymer battery included) |
| Димензии на производот | 21 x 15.5 x 4.5 см; 505 гр |
8. Гаранција и поддршка
ORSKEY products are designed for reliability and performance. For warranty information, technical support, or any inquiries regarding your ORSKEY S950 Dash Cam, please refer to the contact details provided on the official ORSKEY website or the product packaging. Keep your purchase receipt as proof of purchase for warranty claims.
For further assistance, you may visit the ORSKEY Store on Amazon: ORSKEY Store


