1. Вовед
Thank you for choosing the ETA Falco Smart Robot Vacuum Cleaner with Mopping Function. This manual provides essential information for the safe and efficient operation, maintenance, and troubleshooting of your device. Please read this manual thoroughly before using the product and keep it for future reference.
Важни безбедносни информации
- Always ensure the robot is placed on a stable, level surface.
- Чувајте го уредот подалеку од вода и влага.
- Do not allow children or unauthorized persons to operate the robot.
- Use only the original charging adapter and accessories provided.
- Before cleaning or maintenance, ensure the robot is powered off and unplugged from the charging station.
- Avoid operating the robot near open flames or flammable materials.
2. Производот завршиview
Компоненти и контроли
Familiarize yourself with the main parts and controls of your ETA Falco Smart robot vacuum cleaner.
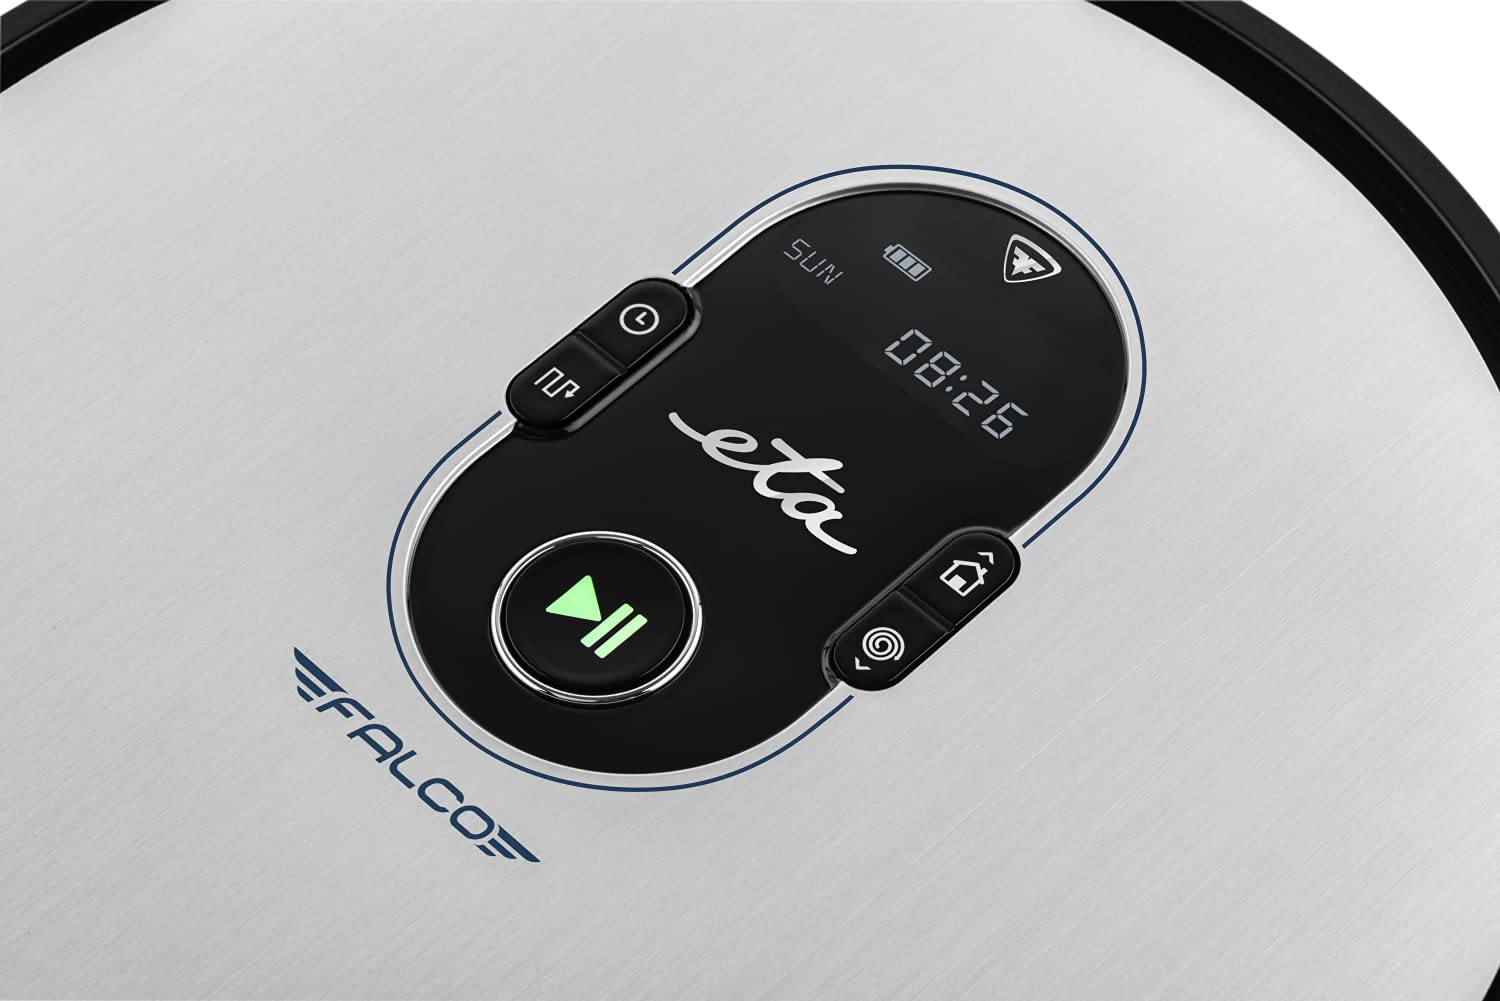
Слика 2.1: Top panel controls. This image shows the main control panel on the top of the robot, including buttons for power, scheduling, and return to charging station, along with a digital display.

Слика 2.2: Долната страна view. This image displays the bottom of the robot, highlighting the main brush, two side brushes, and the mop attachment.

Слика 2.3: Underside diagram. This diagram labels the key components on the robot's underside, including the side brushes, main brush, and mop attachment.
3. Содржина на пакетот
При распакување, проверете дали се присутни сите од следниве предмети:
- ETA Falco Smart Robot Vacuum Cleaner
- Станица за полнење
- Адаптер за полнење
- Далечински управувач
- 2x Spare Side Brushes
- Special Rotary and Lamella Brush
- 2x Cleaning Cloths (Mop Pads)
- Резервен HEPA филтер
- Mop Attachment with 300 ml Water Tank
- Виртуелен ѕид
4. Поставување
4.1 Почетно полнење
- Поставете ја станицата за полнење до ѕид на отворен простор, осигурувајќи се дека нема пречки во рамките на 1 метар од страните и 2 метри напред.
- Connect the charging adapter to the charging station and plug it into a power outlet.
- Place the robot vacuum cleaner on the charging station. Ensure the charging contacts align. The robot will begin charging automatically. A full charge takes approximately 5 hours.
4.2 Инсталирање на странични четки
Attach the side brushes to the designated posts on the underside of the robot by pressing them down until they click into place. Ensure the 'L' and 'R' markings on the brushes match the corresponding markings on the robot.
4.3 Connecting to the ETA SMART App
The ETA SMART app enhances the functionality of your robot. Download the app from your smartphone's app store. Follow the in-app instructions to connect your robot to your home Wi-Fi network and pair it with the app.
4.4 Setting up the Virtual Wall
The virtual wall creates an invisible barrier to restrict the robot's access to certain areas. Place the virtual wall device on the floor where you want to create a boundary. Ensure the infrared beam is directed towards the area you wish to block. The robot will detect this beam and avoid crossing it.

Слика 4.1: Robot with charging station and virtual wall. This image shows the robot positioned near its charging station, with a virtual wall device placed nearby to illustrate its function.
5. Упатства за работа
5.1 Режими на чистење
The ETA Falco Smart offers four distinct cleaning modes:
- ПАМЕТНО: General cleaning mode for optimal coverage.
- КЛАСИЧНО: Standard cleaning pattern.
- РАБ: Чисти по должината на ѕидовите и рабовите на мебелот.
- СПОТ: Концентрирано чистење на одредена област.
You can select these modes via the ETA SMART app or the remote control.
5.2 Закажување чистење
Use the ETA SMART app to set a cleaning schedule for your robot. You can program specific times and days for the robot to automatically start cleaning.
5.3 Рачна контрола
You can manually control the robot's movement and functions using the remote control or the ETA SMART app. The app also allows you to monitor cleaning activity, battery charge, and view cleaning routes.

Слика 5.1: ETA Smart App features. This image displays the ETA Smart App interface on a smartphone, highlighting features such as remote control, cleaning history, activity monitoring, battery status, cleaning modes (SMART, CLASSIC, EDGE, SPOT), cleaning schedule, mopping intensity control, and suction power adjustment.
5.4 Функција за бришење
- Fill the 300 ml water tank with clean water. Do not use detergents or cleaning solutions that are not approved for robot vacuums.
- Attach a clean mop pad to the mop attachment.
- Slide the mop attachment into the designated slot on the underside of the robot.
- Започнете циклус на чистење. Роботот ќе усисува и ќе брише истовремено.
6. Одржување
Редовното одржување обезбедува оптимални перформанси и го продолжува животниот век на вашата роботска правосмукалка.
6.1 Cleaning the Dust Bin and Filter
- Притиснете го копчето за ослободување на корпата за прав и извадете ја корпата за прав.
- Отворете ја корпата за прашина и истурете ја нејзината содржина во корпа за отпадоци.
- Remove the HEPA filter and primary filter. Tap them gently to remove dust. If washable, rinse under running water and allow to air dry completely before reinserting.
- Wipe the inside of the dust bin with a dry cloth.
- Reassemble the filters and dust bin, then reinsert into the robot.
6.2 Чистење на главната четка
- Превртете го роботот.
- Remove the main brush cover by pressing the release tabs.
- Извадете ја главната четка.
- Користете ја алатката за чистење (доколку е приложена) или ножици за да ги отстраните влакната и остатоците заплеткани околу четката.
- Clean the brush compartment.
- Reinsert the main brush and secure the cover.
6.3 Чистење на странични четки
Periodically check the side brushes for tangled hair or debris. If necessary, remove them by gently pulling upwards and clean them. Replace worn or damaged brushes with the spare ones provided.
6.4 Чистење на подлогата за бришење и резервоарот за вода
After each mopping session, remove the mop pad and wash it thoroughly. Empty any remaining water from the water tank and rinse it. Allow both to air dry completely before storing or reusing.
6.5 Сензори за чистење
Wipe the anti-drop sensors, bumper sensors, and charging contacts on the robot and charging station with a clean, dry cloth to ensure proper function.
7 Смена на проблеми
Доколку вашата роботска правосмукалка наиде на проблем, погледнете ги следните вообичаени проблеми и решенија:
| Проблем | Можна причина | Решение |
|---|---|---|
| Роботот не се вклучува | Слаба батерија; Прекинувачот за напојување е исклучен | Наполнете го роботот; проверете дали прекинувачот за напојување е ВКЛУЧЕН |
| Роботот не се полни | Charging contacts dirty; Charging station unplugged | Исчистете ги контактите за полнење; проверете дали станицата за полнење е вклучена во струја |
| Лоши перформанси за чистење | Корпата за прашина е полна; Четките се заплеткани; Филтерот е затнат | Empty dust bin; Clean brushes; Clean/replace filter |
| Роботот често се заглавува | Пречки на подот; Сензорите се валкани | Clear floor of cables/small items; Clean sensors |
| Virtual wall not working | Virtual wall batteries low; Incorrect placement | Replace batteries; Adjust virtual wall position |
Ако проблемот продолжи откако ќе ги испробате овие решенија, контактирајте ја корисничката поддршка.
8. Спецификации
Technical specifications for the ETA Falco Smart Robot Vacuum Cleaner (Model ETA251590000):
| Карактеристика | Детал |
|---|---|
| Производител | ЕТА |
| Димензии на производот (Д x Ш x В) | 32.5 x 33.5 x 7.5 cm |
| Тежина | 250 грама |
| Број на модел на ставка | ETA251590000 (T2261) |
| Боја на моделот | Сино |
| Материјал | Пластика |
| Тип на енергија | Напојува со батерија |
| Voltage | 3 Volts (14.4V Li-ion battery, 2400 mAh) |
| Број на артикли во пакетот | 1 |
| Посебни карактеристики | Pet brush compatibility, Smart App control, Floating brush system, HEPA filter, Virtual wall |
| Вклучени компоненти | Battery, Filter, Charging station, Adapter, Remote control, Side brushes, Rotary brush, Cleaning cloths, Mop attachment, Virtual wall |
| Состав на батерија | Литиум-јон |
| Траење на батеријата | До 120 минути |
| Време на полнење | Прибл. 5 часа |
| Препорака за површина | Ламинат |
| Тип на контролер | Контрола на апликацијата |
| Достапност на резервни делови | Информациите за резервни делови се недостапни |
9. Гаранција и поддршка
For warranty information, product support, or to inquire about spare parts, please refer to the warranty card included with your purchase or visit the official ETA webстраница. Зачувајте го доказот за купување за гаранциски побарувања.


