1. Вовед
Ви благодарам за купувањетоasing the DOOMAY Digital Alarm Clock. This compact and versatile alarm clock is designed for convenience and readability, featuring an adjustable LCD display, snooze function, weekend mode, and temperature display. This manual will guide you through the setup, operation, and maintenance of your new alarm clock to ensure optimal performance.
2. Информации за безбедност
- Држете го уредот подалеку од вода и средини со висока влажност.
- Avoid exposing the clock to direct sunlight or extreme temperatures.
- Не обидувајте се сами да го расклопите или поправите уредот. Обратете се кај квалификуван персонал за сервис.
- Use only the specified battery type (2 x AAA batteries).
- Отстранете ги батериите ако уредот нема да се користи подолг период за да спречите протекување.
- Чувајте ги батериите подалеку од дофат на деца.
3. Содржина на пакетот
- DOOMAY Digital Alarm Clock (1 unit)
- AAA батерии (2 единици)
- Упатство за употреба (овој документ)
4. Производот завршиview
Familiarize yourself with the components and controls of your DOOMAY Digital Alarm Clock.
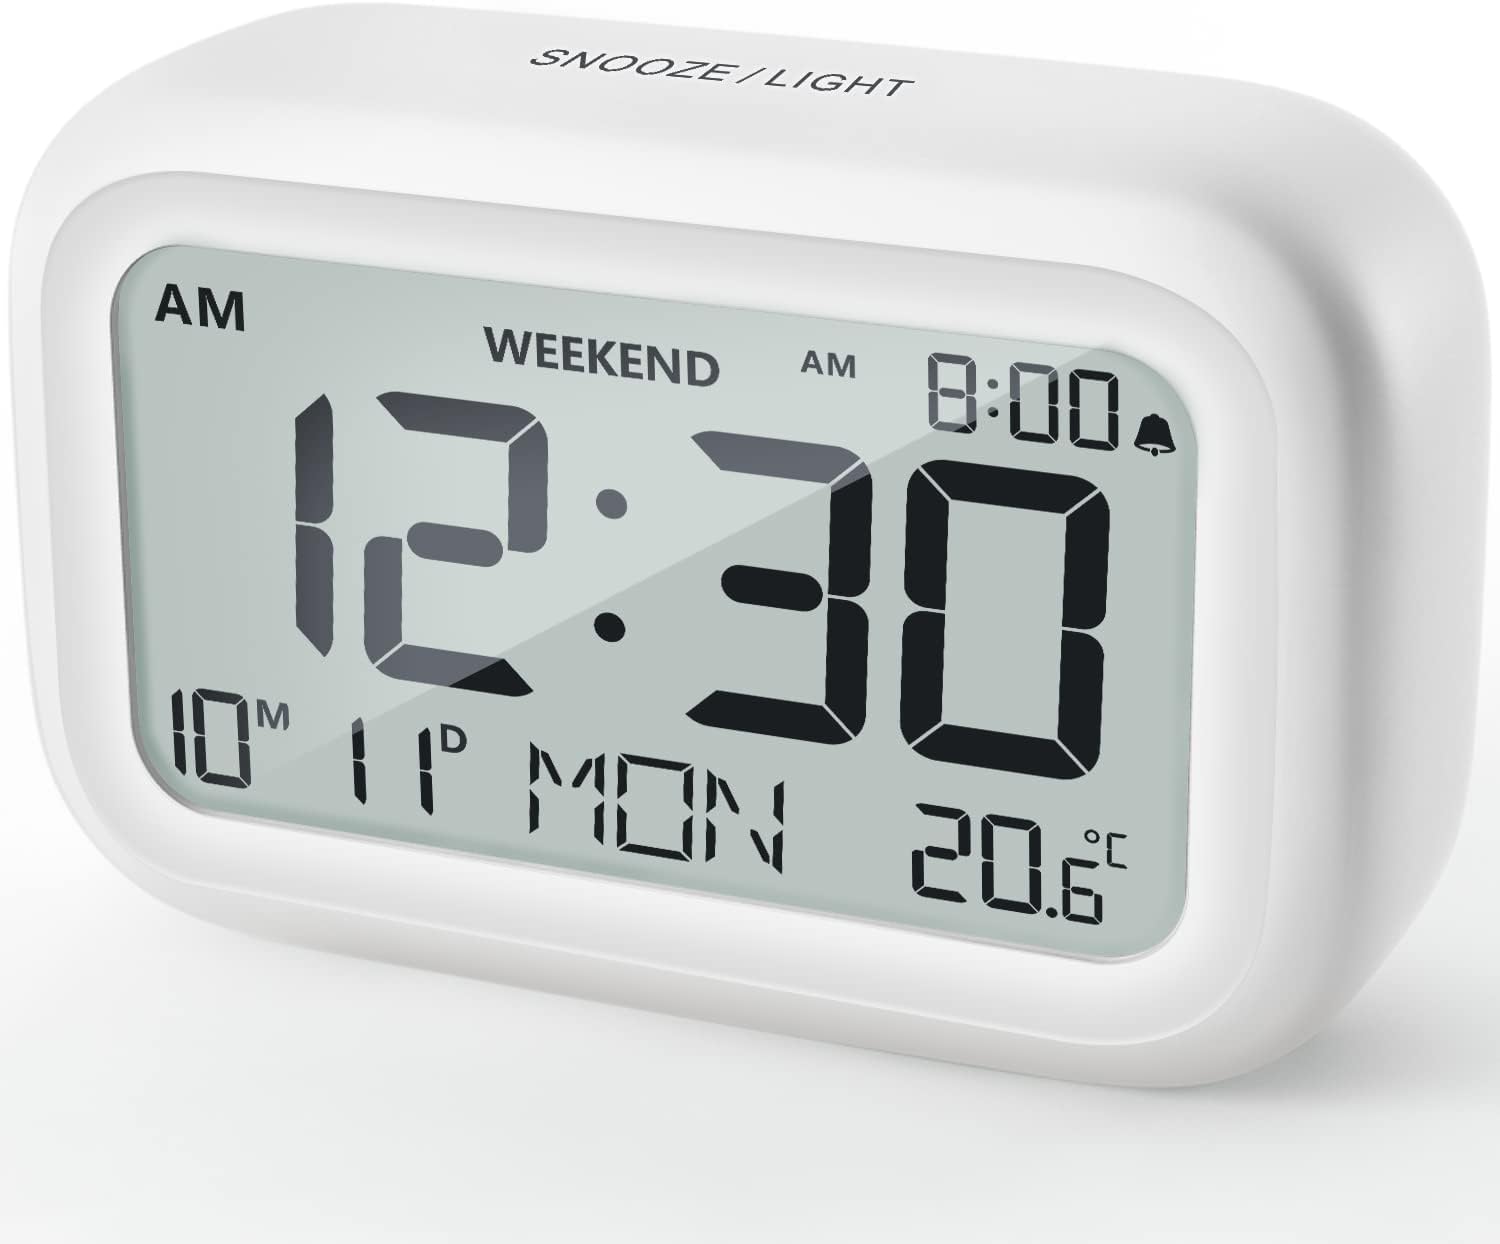
Слика 4.1: Предна страна View на будилникот
This image displays the front of the DOOMAY Digital Alarm Clock, highlighting its large, clear LCD screen. The screen shows the current time (12:30), AM indicator, day of the week (MON), date (10th month, 11th day), and indoor temperature (20.6°C). The top of the clock has a "SNOOZE/LIGHT" button.

Слика 4.2: Клучни карактеристикиview
This diagram illustrates the main functionalities of the alarm clock: 12/24H time display, calendar, alarm setting, adjustable volume, snooze function, backlight, weekend mode, and temperature display. The clock itself is shown on a wooden table, displaying 7:00 AM, Friday, and 28.8 degrees.

Figure 4.3: Back Panel Controls
This image shows the rear of the alarm clock, detailing the various control buttons and the battery compartment. Buttons are clearly labeled for: 12/24H time format, Alarm setting, Weekend mode, Date setting, Minus (-) for decreasing values, Plus (+) for increasing values, and °C/°F for temperature unit selection. The battery compartment is visible, designed for two AAA batteries.
Контроли и приказ:
- LCD дисплеј: Shows time, date, day of week, AM/PM indicator, alarm status, and temperature.
- Копче за одложување/осветлување (горе): Activates snooze function during alarm; illuminates backlight for 5 seconds.
- 12/24H Button (Back): Префрлува помеѓу 12-часовен и 24-часовен временски формат.
- ALARM Button (Back): Enters alarm setting mode.
- WEEKEND Button (Back): Activates/deactivates weekend mode.
- DATE Button (Back): Enters date setting mode.
- MINUS (-) Button (Back): Decreases values during setting; adjusts alarm volume.
- PLUS (+) Button (Back): Increases values during setting; adjusts alarm volume.
- °C/°F Button (Back): Префрлува помеѓу температурните единици Целзиус и Фаренхајт.
5. Поставување
5.1 Инсталација на батерија
- Отворете го капакот на преградата за батерии што се наоѓа на задниот дел од часовникот.
- Вметнете две (2) AAA батерии, внимавајќи на правилниот поларитет (+ и -).
- Добро затворете го капакот на преградата за батерии.
- The display will light up, and the clock will be ready for initial setup. A low battery symbol will appear when batteries need replacement. If the display shows "8888" flashing, it's also an indication to change batteries.
5.2 Почетно поставување на времето и датумот
- Поставете време:
- Притиснете го 12/24 ч button to switch between 12-hour (with AM/PM) and 24-hour formats.
- Притиснете и задржете го 12/24 ч копчето 3 секунди за да влезете во режим на поставување време. Цифрите за часови ќе трепкаат.
- Користете го + or - копчиња за прилагодување на часот.
- Притиснете го 12/24 ч button again to confirm the hour and move to minute setting. The minute digits will flash.
- Користете го + or - копчиња за прилагодување на минута.
- Притиснете го 12/24 ч button one more time to exit time setting.
- Поставете датум:
- Притиснете и задржете го ДАТУМ button for 3 seconds to enter date setting mode. The year digits will flash.
- Користете го + or - копчиња за прилагодување на годината.
- Притиснете го ДАТУМ button again to confirm the year and move to month setting.
- Adjust the month using + or -.
- Притиснете ДАТУМ again to move to day setting.
- Adjust the day using + or -.
- Притиснете ДАТУМ one more time to exit date setting. The day of the week will automatically adjust.
6. Упатства за работа
6.1 Поставување аларм
- Притиснете и задржете го АЛАРМ копчето 3 секунди. Цифрите за часот на алармот ќе трепкаат.
- Користете го + or - копчиња за да го поставите посакуваниот час за аларм.
- Притиснете го АЛАРМ button again to confirm the hour and move to minute setting. The alarm minute digits will flash.
- Користете го + or - buttons to set the desired alarm minute.
- Притиснете го АЛАРМ button one more time to exit alarm setting. The alarm icon (bell symbol) will appear on the display, indicating the alarm is active.
- To turn the alarm ON/OFF, simply press the АЛАРМ button once. The bell icon will appear/disappear.
6.2 Функција за одложување
When the alarm sounds, gently tap the large СНОЗА / СВЕТЛИНА button on the top of the clock. The alarm will pause for 9 minutes and then sound again. This can be repeated multiple times.

Figure 6.1: Activating Snooze
This image demonstrates how to activate the snooze function by touching the top of the alarm clock. The text highlights that this action provides an additional 9 minutes of sleep after the alarm sounds.
To completely turn off the alarm after it sounds (without snoozing), press any button on the back of the clock.
6.3 Режим за викенд
The weekend mode allows the alarm to sound only from Monday to Friday, preventing it from ringing on Saturday and Sunday.

Figure 6.2: Weekend Mode Activated
This image shows the alarm clock display with the "WEEKEND" indicator prominently displayed, signifying that the weekend mode is active. The accompanying text clarifies that in this mode, the alarm will only sound from Monday to Friday, ensuring undisturbed weekends.
- To activate Weekend Mode, press the ВИКЕНД button once. The "WEEKEND" indicator will appear on the display.
- To deactivate Weekend Mode, press the ВИКЕНД button again. The "WEEKEND" indicator will disappear.
6.4 Прилагодлива јачина на звук на алармот
The alarm clock offers two volume levels: Low (70 dB) and High (85 dB).

Figure 6.3: Alarm Volume Levels
This image visually represents the two available alarm volume settings: L01 (85 dB) for a louder alarm and L02 (70 dB) for a softer alarm. The alarm clock is shown in a bedroom setting, emphasizing its use as a bedside device.
- Додека сте во нормален режим на прикажување на времето, притиснете го копчето + or - buttons to cycle between the two alarm volume levels. The current volume level will be briefly displayed.
6.5 Функција за позадинско осветлување
To illuminate the display in low light conditions, simply tap the СНОЗА / СВЕТЛИНА button on the top of the clock. The backlight will activate for approximately 5 seconds, providing clear visibility of the time and other information.
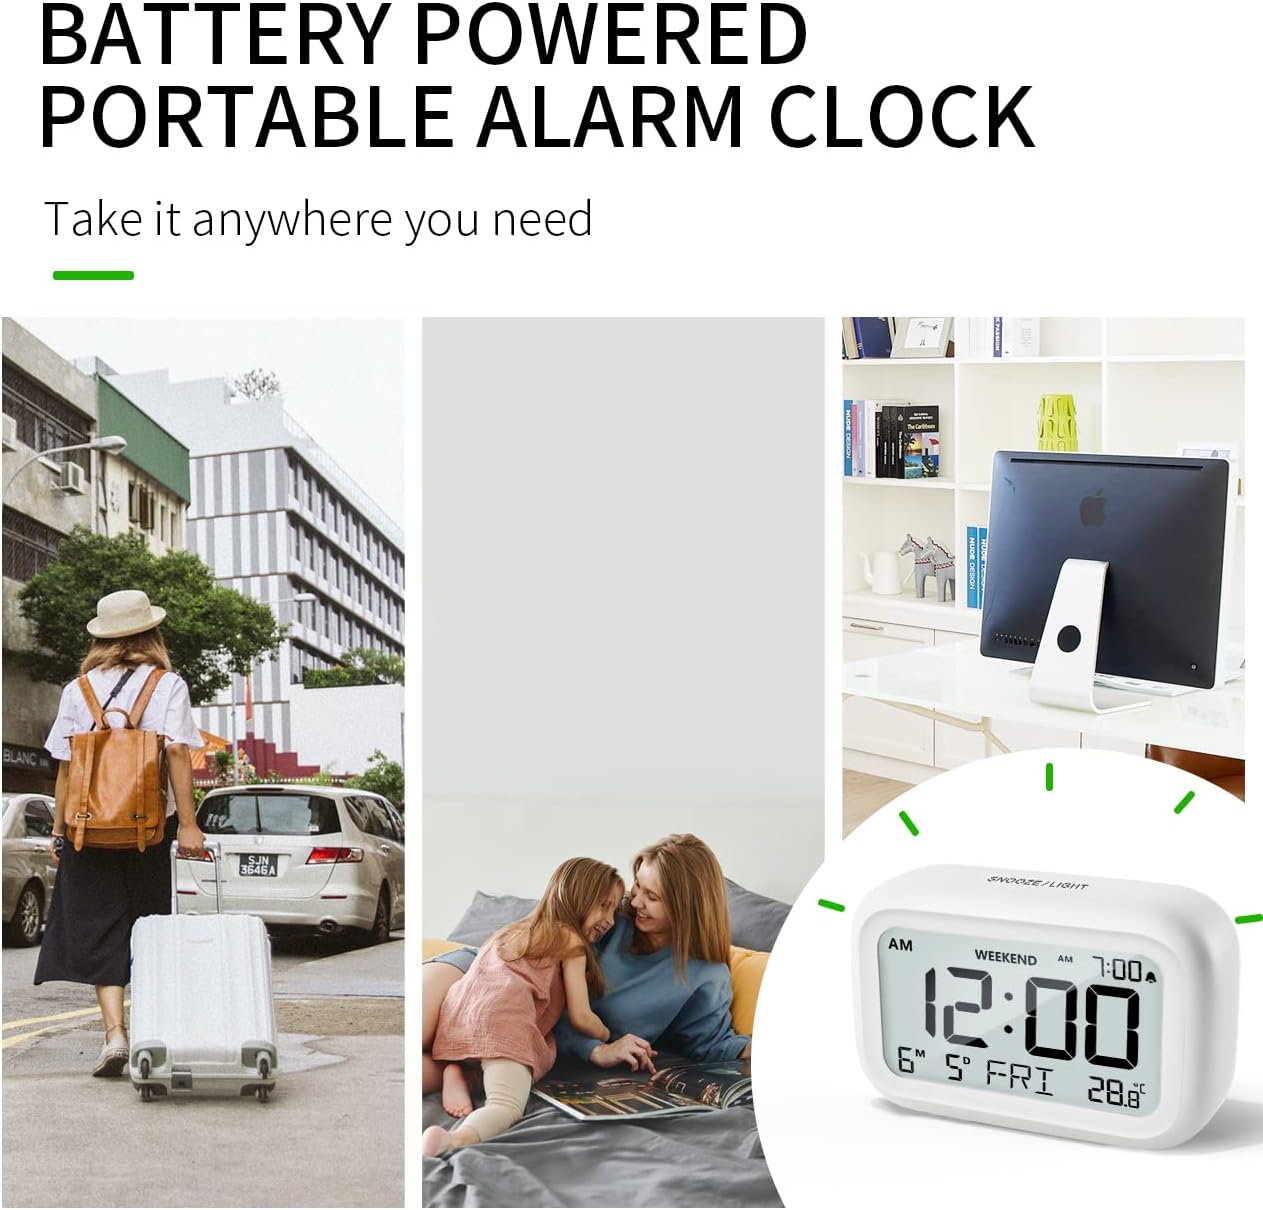
Figure 6.4: Backlight in Action
This image provides a side-by-side comparison of the alarm clock's display. On the left, the clock is shown in a well-lit environment. On the right, the same clock is shown in a dark setting with its 5-second backlight activated, demonstrating how the display becomes clearly visible at night.
6.6 Приказ на температура
The clock displays the indoor temperature. You can switch between Celsius (°C) and Fahrenheit (°F) units.
- To change the temperature unit, press the ° C / ° F копче на задниот дел од часовникот.
7. Одржување
7.1 Чистење
Избришете го часовникот со мека, сува крпа. Не користете абразивни средства за чистење или растворувачи, бидејќи тие може да ја оштетат површината.
7.2 Замена на батеријата
When the low battery indicator appears on the display, or if the display shows "8888" flashing, it is time to replace the batteries. Follow the steps in Section 5.1 Battery Installation to replace the two AAA batteries.
8 Смена на проблеми
| Проблем | Можна причина | Решение |
|---|---|---|
| Екранот е празен или затемнет. | Батериите се празни или неправилно инсталирани. | Заменете ги батериите со нови AAA батерии, внимавајќи на правилниот поларитет. |
| Алармот не се огласува. | Alarm is not activated, or Weekend Mode is ON. | Ensure the alarm icon is displayed. Check if Weekend Mode is active and deactivate if necessary. |
| Функцијата за одложување не работи. | Not tapping the SNOOZE/LIGHT button correctly. | Ensure a firm, brief tap on the top SNOOZE/LIGHT button when the alarm is sounding. |
| Времето/датумот се неточни. | Not set correctly or batteries were removed. | Refer to Section 5.2 Initial Time and Date Setting to re-set. |
9. Спецификации
| Карактеристика | Детал |
|---|---|
| Број на модел | 5293 Велика Британија |
| Бренд | КУДНИ |
| Димензии (Д x Ш x В) | 10.9 x 3.81 x 6.9 cm (4.29 x 1.5 x 2.72 инчи) |
| Тежина | 127.01 грама (0.28 lbs) |
| Материјал | Акрилонитрил бутадиен стирен (ABS) |
| Извор на енергија | 2 x AAA батерии (вклучени) |
| Тип на дисплеј | Дигитален ЛЦД |
| Alarm Volume Levels | Low (70 dB), High (85 dB) |
| Времетраење на одложување | 9 минути |
| Времетраење на задно осветлување | 5 секунди |
| Температурни единици | Целзиусови (°C) / Фаренхајти (°F) |
10. Гаранција и поддршка
DOOMAY products are designed for reliability and performance. For any questions, technical support, or warranty claims, please contact your retailer or visit the official DOOMAY webстраница за помош. Ве молиме задржете го доказот за купување за целите на гаранцијата.
For further information, you may visit the brand's Amazon store page: DOOMAY Store on Amazon


