1. Вовед
The Technaxx Full HD 1080p Projector TX-177 is a versatile multimedia device designed for high-quality visual and audio experiences. This portable projector offers native 1080P resolution, an integrated 3W speaker, and a long LED lifetime, making it suitable for various applications including home cinema, gaming, and presentations. This manual provides essential information for setting up, operating, and maintaining your projector.

Слика 1.1: напред view of the Technaxx Full HD 1080p Projector TX-177.
2. Содржина на пакетот
Ве молиме означете го полето за следните ставки:
- Technaxx FullHD 1080p Projector TX-177
- Кабел за AV сигнал
- Remote control (2x AAA batteries included)
- HDMI кабел
- Кабел за напојување
- Упатство за употреба (овој документ)

Image 2.1: All items included in the projector package.
3. Карактеристики на производот
The TX-177 projector is equipped with several features designed to enhance your viewискуство:
- Матична резолуција од 1080P: Delivers clear and sharp images for movies, games, and presentations.
- Голема проекција: Capable of projecting images from 50 inches up to 200 inches.
- Integrated 3W Speaker: Provides basic audio output without the need for external speakers.
- Рачно прилагодување на фокусот: Allows for precise image clarity.
- Long LED Lifetime: The LED light source has an estimated lifespan of 40,000 hours.
- Повеќе опции за поврзување: Includes HDMI, VGA, USB, SD card, and AV inputs for broad device compatibility.
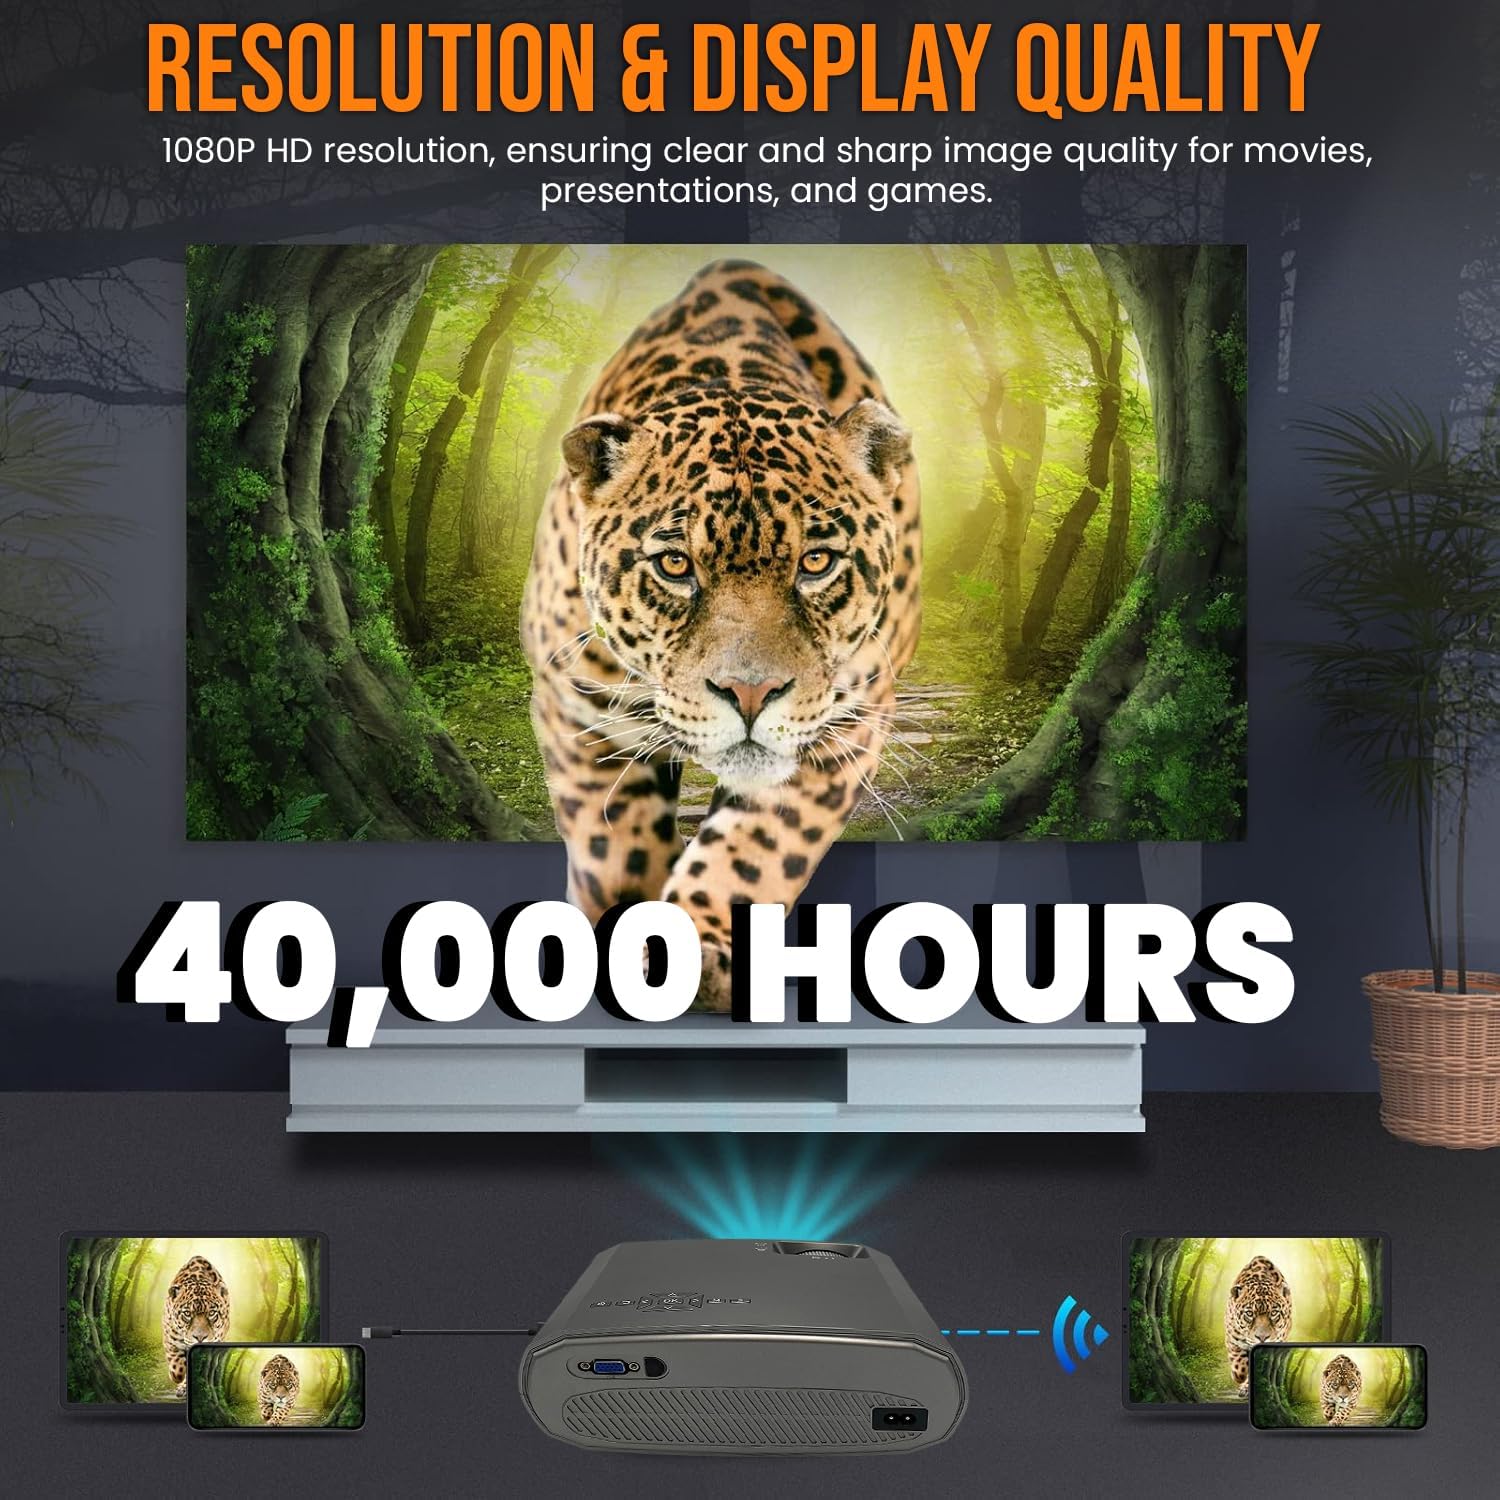
Image 3.1: Highlighting the 1080P resolution and 40,000-hour LED lifespan.

Image 3.2: The integrated 3-watt speaker provides convenient audio.

Слика 3.3: Готовоview of the projector's compatibility with various devices via multiple input ports.
4. Поставување
4.1 Поставување
Place the projector on a stable, flat surface. Ensure there is adequate ventilation around the unit to prevent overheating. Position the projector directly in front of the screen or wall for the best image quality. The projection distance will determine the image size.
4.2 Поврзување за напојување
- Поврзете го кабелот за напојување со влезниот приклучок за напојување на проекторот.
- Вклучете го другиот крај од кабелот за напојување во стандарден електричен штекер.
4.3 Поврзување на уреди
The TX-177 supports various input sources:
- HDMI: Connect Blu-ray players, game consoles, laptops, or streaming devices using an HDMI cable.
- VGA: Connect older computers or laptops using a VGA cable.
- USB: Insert USB drives for playing media fileи директно.
- SD-картичка: Insert an SD card for playing media fileи директно.
- АВ: Use the included AV signal cable to connect devices with composite video and stereo audio outputs.

Слика 4.1: Детално view of the projector's various input ports.
4.4 Фокус и прилагодување на трапезоидот
Откако ќе го вклучите, прилагодете ја сликата за јасност и облик:
- Фокус: Rotate the focus wheel near the lens until the image appears sharp and clear.
- Корекција на клучниот камен: If the image appears trapezoidal (wider at the top or bottom), use the keystone correction wheel to square the image.

Image 4.2: Focus and keystone adjustment wheels for image optimization.

Image 4.3: Labeled diagram of the projector's key adjustable components and ports.
5. Упатства за работа
5.1 Вклучување/исклучување
- За вклучување: Притиснете го копчето за вклучување на проекторот или на далечинскиот управувач. Индикаторското светло ќе се вклучи.
- За исклучување: Press the power button again. The projector will enter standby mode. Always allow the projector to cool down before unplugging it.
5.2 Избор на влезен извор
Use the 'Source' button on the remote control or the projector's control panel to cycle through available input sources (HDMI1, HDMI2, VGA, USB, SD, AV). Select the input corresponding to your connected device.
5.3 Навигација на мени
Use the arrow keys and 'OK' button on the remote control to navigate the on-screen display (OSD) menu. Here you can adjust settings such as picture mode, aspect ratio, sound settings, and more.
5.4 Аудио излез
The projector has a built-in 3W speaker. For enhanced audio, you can connect external speakers or headphones to the projector's audio output port (3.5mm jack).
6. Одржување
Правилното одржување обезбедува долготрајност и оптимални перформанси на вашиот проектор:
- Чистење на објективот: Користете мека крпа без влакненца, специјално дизајнирана за оптички леќи. Не користете абразивни средства за чистење или растворувачи.
- Чистење на Casing: Избришете ја надворешноста на проекторот со мека, сува крпа. За тврдокорни дамки, користете малку крпа.amp крпа и потоа исушете темелно.
- Вентилација: Ensure the ventilation vents are clear of dust and obstructions. Periodically clean them with a soft brush or compressed air.
- ЛЕР Л.amp Животот: LED lamp is designed for 40,000 hours of use and does not require replacement under normal operating conditions.
7 Смена на проблеми
Доколку наидете на проблеми со вашиот проектор, погледнете ги следните вообичаени проблеми и решенија:
| Проблем | Можна причина | Решение |
|---|---|---|
| Нема слика на екранот | Избран е неточен влезен извор Лабава врска со кабел Уредот не е вклучен | Изберете го точниот влезен извор Проверете ги и обезбедете ги сите врски со кабли Ensure the connected device is powered on |
| Сликата е матна | Фокусот не е прилагоден Растојанието на проекција е предалеку/блиску | Adjust the focus wheel Move the projector closer or further from the screen |
| Сликата е трапезоидна | No keystone correction Проекторот не е нормален на екранот | Adjust the keystone correction wheel Reposition the projector to be directly in front of the screen |
| Нема звук | Јачината на звукот е премногу ниска Функцијата за исклучување на звук е активна Audio cable not connected (for AV) External speakers not connected/powered | Зголемете ја јачината на звукот Deactivate mute Осигурајте се дека аудио каблите се правилно поврзани Check external speaker connection and power |
| Далечинскиот управувач не работи | Батериите се мртви или неправилно ставени Опструкција помеѓу далечинскиот управувач и проекторот | Replace batteries (2x AAA) Обезбедете јасен поглед кон IR приемникот на проекторот |
8. Спецификации
| Карактеристика | Спецификација |
|---|---|
| Број на модел | TX-177 (4971) |
| Мајчин резолуција | 1920 x 1080 пиксели (Full HD 1080p) |
| Осветленост | 15,000 lm (лумени) |
| Големина на проекција | 50" до 200" (127 см до 508 см) |
| LED животен век | 40,000 часа |
| Интегриран звучник | 3W |
| Влезни порти | 2x HDMI, VGA, USB, SD, AV |
| Димензии на производот | 9.21 x 7.36 x 3.78 инчи (23.4 x 18.7 x 9.6 см) |
| Тежина на ставката | 4.07 фунти (1.85 кг) |
| Напојување | AC 100-240V, 50/60Hz |
| Батерии (далечински управувач) | 2 AAA батерии (вклучени) |
| Производител | TECHNAXX DEUTSCHLAND GMBH |
9. Гаранција и поддршка
For warranty information and technical support, please refer to the warranty card included with your product or visit the official Technaxx webлокација. Можете исто така да контактирате со вашиот продавач за помош.


