Вовед
This manual provides detailed instructions for the setup, operation, and maintenance of your Gioteck SC3 Wireless Pro Controller. Designed for use with Nintendo Switch, PC, and mobile devices, this controller features programmable back buttons, customizable RGB lighting, and changeable magnetic thumb sticks for an enhanced gaming experience.
1. Поставување
1.1 Содржина на пакетот
- Gioteck SC3 Wireless Pro Controller
- USB кабел за полнење
- Additional Magnetic Thumb Sticks (if included)
- Упатство за употреба (овој документ)
1.2 Полнење на контролорот
Before initial use, fully charge the controller. Connect the supplied USB charging cable to the controller's charging port and the other end to a USB power source (e.g., Nintendo Switch dock, PC USB port, or USB wall adapter).
- LED индикаторот ќе го прикаже статусот на полнење.
- Целосното полнење обично трае приближно 2-3 часа.
Слика: Долу view of the Gioteck SC3 controller, highlighting the USB-C charging port located between the two textured grips.
1.3 Спарување со Nintendo Switch
- Од менито Nintendo Switch HOME, изберете Контролори, тогаш Променете го зафат/нарачка.
- On the SC3 controller, press and hold the Копче за спарување (usually a small button on the top or back) for a few seconds until the LED indicators begin to flash rapidly.
- Once the controller is recognized by the Switch, the player LED(s) on the controller will illuminate solid, indicating successful pairing.
- Притиснете го Копче да се потврди.
Note: For subsequent uses, the controller should automatically reconnect to the last paired Switch console when powered on.
1.4 Connecting to PC/Mobile (Bluetooth)
- Ensure Bluetooth is enabled on your PC or mobile device.
- On the SC3 controller, press and hold the Копче за спарување for a few seconds until the LED indicators flash rapidly.
- On your PC/mobile device, navigate to Bluetooth settings and search for new devices.
- Select "Gioteck SC3" or similar from the list of available devices to pair.
- The controller's LED will become solid upon successful connection.
1.5 Installing Magnetic Thumb Sticks
The SC3 controller features changeable magnetic thumb sticks. To replace them:
- Gently pull the existing thumb stick straight up to remove it.
- Align the desired magnetic thumb stick with the base and gently push it down until it snaps into place.

Слика: напред view of the Gioteck SC3 controller, showcasing the magnetic thumb sticks and button layout.
2. Упатства за работа
Распоред на 2.1 копчиња
The SC3 controller features a traditional button layout. Refer to the image below for button identification.

Слика: Аголна предна страна view of the Gioteck SC3 controller, displaying the full button layout including face buttons, D-pad, analog sticks, and shoulder buttons.
- Леви/десни аналогни стапчиња: За движење и контрола на камерата.
- D-Pad: Насочен влез.
- Копчиња A/B/X/Y: Копчиња за акција.
- Копчиња L/D/ZL/ZR: Копчиња за рамо и копчиња за активирање.
- +/- Копчиња: Start/Select equivalents.
- Копче за почеток: Returns to the console's home menu.
- Копче за сликање: Takes screenshots.
2.2 Programmable Back Buttons
The SC3 controller includes programmable back buttons (M1, M2, M3, M4) for custom assignments.

Слика: Заден дел view of the Gioteck SC3 controller, clearly showing the four programmable back buttons (M1, M2, M3, M4) and textured grips.
Програмски чекори:
- Притиснете и задржете го Копче за програми (refer to diagram if available, usually a small button on the back) until the LED indicator flashes.
- Притиснете го Копче за назад (M1, M2, M3, or M4) you wish to program. The LED will flash slowly.
- Притиснете го Копче за внесување (e.g., A, B, X, Y, L, R, ZL, ZR, D-pad direction) you want to assign to the back button.
- Притиснете го Копче за програми again to save the assignment. The LED will stop flashing.
- Repeat for other back buttons as desired.
To clear a programmed button, follow steps 1-2, then press the Program Button again without pressing an input button.
2.3 Прилагодување на RGB осветлувањето
The controller features customizable RGB lighting. Specific instructions for changing colors or effects are typically found in the product's quick start guide or by pressing a dedicated button combination (e.g., Function + R3).
Consult the quick start guide included with your controller for precise button combinations to adjust RGB lighting.
2.4 Контроли на движење
The SC3 controller supports motion controls, allowing for immersive gameplay in compatible Nintendo Switch titles. No special setup is usually required; motion controls activate automatically when supported by the game.
2.5 Audio Headset Jack
A 3.5mm audio headset jack is located on the controller for connecting compatible headsets. It includes dedicated mute and volume control buttons.
- Јачина на звук нагоре/намалување: Прилагодете го аудио излезот.
- Нечујно копче: Mute/unmute microphone input.

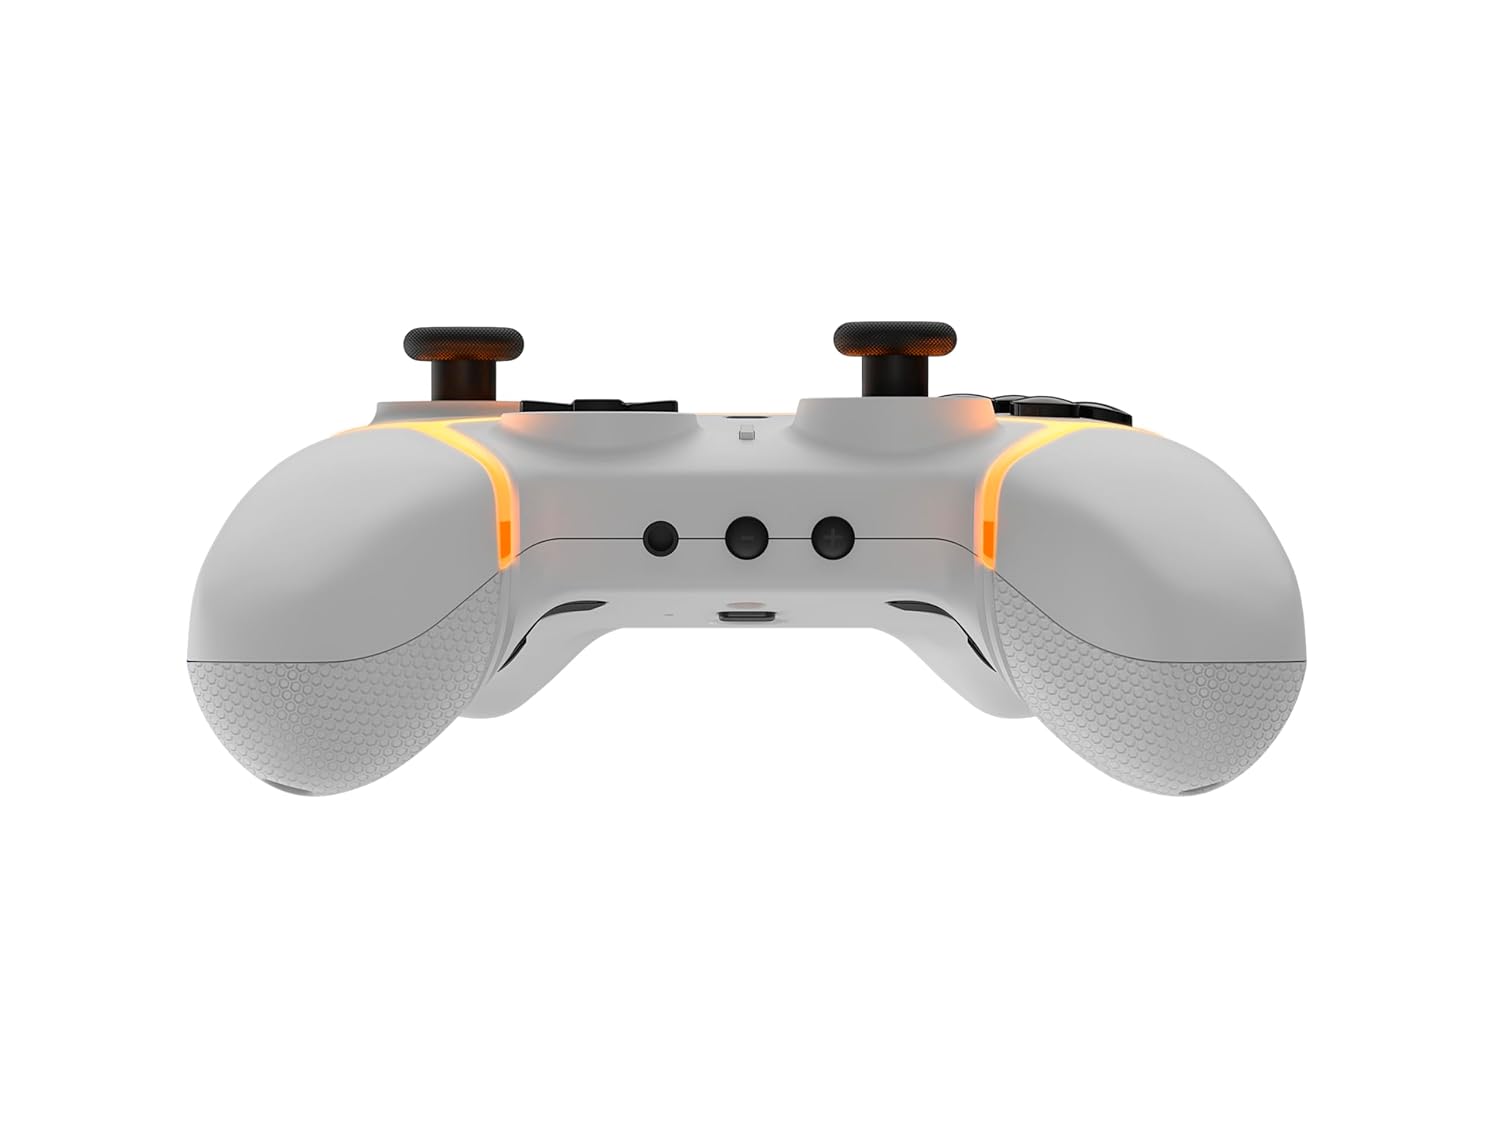
Слика: Горе view of the Gioteck SC3 controller, highlighting the 3.5mm audio jack, volume controls, and mute button.
3. Одржување
3.1 Чистење
За чистење на контролерот, користете мека, сува крпа. За тврдокорна нечистотија, малку крпаampen the cloth with water. Avoid using harsh chemicals, abrasive cleaners, or solvents, as these can damage the controller's finish and internal components.
- Do not immerse the controller in water or any other liquid.
- Ensure all ports are dry before charging or connecting devices.
3.2 Складирање
Чувајте го контролерот на ладно и суво место, подалеку од директна сончева светлина и екстремни температури. Избегнувајте поставување тешки предмети врз контролерот за да спречите оштетување.
3.3 Грижа за батерии
The controller contains a rechargeable battery. To prolong battery life:
- Избегнувајте често целосно празнење на батеријата.
- Редовно полнете го контролерот, дури и ако не го користите подолг период (на пр., еднаш на секои 3-6 месеци).
- Do not expose the controller to temperatures above 60°C (140°F).
4 Смена на проблеми
4.1 Контролерот не се поврзува/спарува
- Проверете ја батеријата: Осигурајте се дека контролерот е доволно наполнет.
- Повторно спарување: Follow the pairing instructions in Section 1.3 or 1.4.
- Пречки: Move closer to the console/device and away from potential sources of wireless interference (e.g., Wi-Fi routers, other Bluetooth devices).
- Ресетирај контролер: Locate a small reset button (often a pinhole) on the back of the controller. Use a paperclip to press and hold it for a few seconds. Then attempt to re-pair.
- Update Console/Device Software: Ensure your Nintendo Switch, PC, or mobile device's operating system is up to date.
4.2 Buttons/Sticks Not Responding
- Повторно синхронизирај: Исклучете го и повторно поврзете го контролерот.
- Чисти: Уверете се дека нема остатоци заглавени околу копчињата или стапчињата.
- Test in another game/menu: Determine if the issue is specific to a game or system-wide.
- Ресетирај контролер: Perform a hard reset as described above.
4.3 Motion Controls Not Working
- Компатибилност на играта: Verify that the game you are playing supports motion controls.
- Рекалибрирајте: On Nintendo Switch, you can recalibrate motion controls in the system settings.
- Ресетирај контролер: Направете тешко ресетирање.
5. Спецификации
| Модел: | Gioteck SC3 Wireless Pro Controller |
| Компатибилност: | Nintendo Switch (Original, Lite, OLED), PC, Mobile Devices |
| Поврзување: | Безжичен Bluetooth |
| Димензии (приближно): | 2.87 x 5.35 x 6.34 инчи (7.29 x 13.59 x 16.1 см) |
| Тежина (приближно): | 10.6 унци (300 грама) |
| Аудио Jackек: | 3.5mm with mute and volume controls |
| Посебни карактеристики: | Programmable back buttons, Magnetic thumb sticks, RGB lighting, Motion controls |
6. Информации за гаранцијата
The Gioteck SC3 Wireless Pro Controller comes with a manufacturer's warranty. For specific details regarding warranty coverage, duration, and claims process, please refer to the warranty card included with your product or visit the official Gioteck webсајт.
Ве молиме зачувајте го доказот за купување за целите на гаранцијата.
7. Поддршка за корисници
If you encounter any issues or have questions not covered in this manual, please contact Gioteck customer support. Contact information can typically be found on the product packaging or the official Gioteck webсајт.
Gioteck Official Webсајт: www.gioteck.com


