Вовед
Thank you for choosing the Sharp Digital Alarm Clock. This manual provides detailed instructions for setting up, operating, and maintaining your new alarm clock. Designed for clarity and convenience, this clock features an easy-to-read LCD display with an optional always-on backlight, dual alarm settings, and a USB charging port for your devices. Please read this manual thoroughly before use to ensure optimal performance and longevity of your product.

Предна страна view of the Sharp Digital Alarm Clock, displaying time, month, date, day, and temperature on its colorful LCD screen.
Информации за безбедност
Please observe the following safety precautions to prevent damage to the unit or personal injury:
- Не го изложувајте уредот на екстремни температури, директна сончева светлина или висока влажност.
- Избегнувајте испуштање или изложување на уредот на силни удари.
- Не мешајте стари и нови батерии или различни типови на батерии.
- Отстранете ги батериите ако уредот нема да се користи подолг период за да се спречи истекување.
- Чувајте го уредот подалеку од вода и други течности.
- Не обидувајте се сами да го расклопите или поправите уредот. За сите сервиси обратете се на квалификуван персонал.
Содржина на пакетот
Проверете дали сите артикли се присутни во пакувањето:
- Sharp Digital Alarm Clock (Model SPC5028AMZ)
- Упатство за употреба (овој документ)
Note: 3 x AAA batteries are required and not included.
Производот завршиview
Преден дисплеј

Diagram illustrating key features of the alarm clock, including atomic accuracy, 1.5-inch tall time display, on/off display nightlight, indoor temperature display, calendar display, bright color display, wall mountable or tabletop viewing, and battery operation (3x AAA batteries).
The front of the clock features a clear LCD display that shows the time, month, date, day of the week, and indoor temperature. The main time display is approximately 1.5 inches tall for easy readability.
Заден панел и контроли

Детално view of the clock's rear panel, showing the location of the battery compartment, various control buttons (Calendar, Time, Alarm, 12/24, Up, °C/°F, Down, Wave), the ON/OFF switch for the nightlight, and the backstand for tabletop viewing. Dimensions (6.45"W x 5"H) are also indicated.
- CALENDAR Set Button: Used to set the date and year.
- TIME Set Button: Used to set the time manually.
- ALARM Set & ON/OFF Button: Used to set and activate/deactivate alarms.
- Копче 12/24: Префрлува помеѓу 12-часовен и 24-часовен временски формат.
- Копче UP: Ги прилагодува поставките нагоре.
- Копче °C/°F: Го префрла прикажувањето на температурата помеѓу Целзиус и Фаренхајт.
- ДОЛЕ копче: Ги прилагодува поставките надолу.
- WAVE (Atomic Search) Button: Initiates a manual search for the atomic time signal.
- ON/OFF Switch (Nightlight): Controls the always-on backlight feature.
- Оддел за батерии: Holds 3 x AAA batteries.
- Backstand: For tabletop viewинг.
- Отвор за монтирање на ѕид: For hanging the clock on a wall.
Поставување
Инсталација на батерија
- Open the battery compartment cover on the rear of the clock.
- Вметнете 3 нови AAA батерии, внимавајќи на точниот поларитет (+ и -).
- Добро затворете го капакот на преградата за батерии.
Почетно вклучување
Upon battery installation, the clock will power on and attempt to synchronize with the atomic time signal.
Атомска синхронизација на времето (WWVB)
The Sharp Digital Alarm Clock is designed to automatically synchronize with the WWVB atomic time signal broadcast from Fort Collins, Colorado, ensuring precise timekeeping.

Map of the United States showing the WWVB radio broadcast signal originating from Fort Collins, Colorado, which the atomic clock uses for synchronization.
- The clock will automatically attempt to receive the signal daily, typically overnight when electronic interference is minimal.
- For optimal reception, place the clock near a window and orient its front or rear panel towards Fort Collins, Colorado.
- A signal strength indicator (antenna icon) on the display will show the reception status.
- За рачно да започнете со пребарување на сигнал, притиснете го копчето БРАН копче на задниот панел.

Graphic depicting a full moon, with text 'LESS ELECTRONIC INTERFERENCE AT NIGHT SET BY MORNING', indicating optimal atomic clock synchronization occurs during nighttime hours.
Поставување на временска зона
Even with atomic synchronization, you must manually select your local time zone for the correct hourly time display.
- Притиснете и задржете го ВРЕМЕ button until the time zone indicator flashes.
- Користете го UP or ДОЛУ buttons to select your desired time zone (e.g., PST, MST, CST, EST).
- Притиснете го ВРЕМЕ копчето повторно за да потврдите и да излезете.
Рачно поставување на времето и датумот
Доколку атомската синхронизација не е посакувана или достапна, можете рачно да ги поставите времето и датумот.
- За да поставите време: Притиснете и задржете го ВРЕМЕ button until the hour flashes. Use UP/ДОЛУ за да прилагодите. Притиснете ВРЕМЕ to move to minutes, then adjust. Press ВРЕМЕ повторно за да заштедите.
- За да поставите датум: Притиснете и задржете го КАЛЕНДАР button until the year flashes. Use UP/ДОЛУ за да прилагодите. Притиснете КАЛЕНДАР to move to month, then day, adjusting each. Press КАЛЕНДАР повторно за да заштедите.
- Формат 12/24 часа: Притиснете го 12/24 копче за префрлување помеѓу 12-часовен (со индикатор AM/PM) и 24-часовен формат.
Упатства за работа
Adjusting Display Brightness and Backlight
The clock features an optional always-on backlight with adjustable brightness for optimal viewпри различни услови на осветлување.
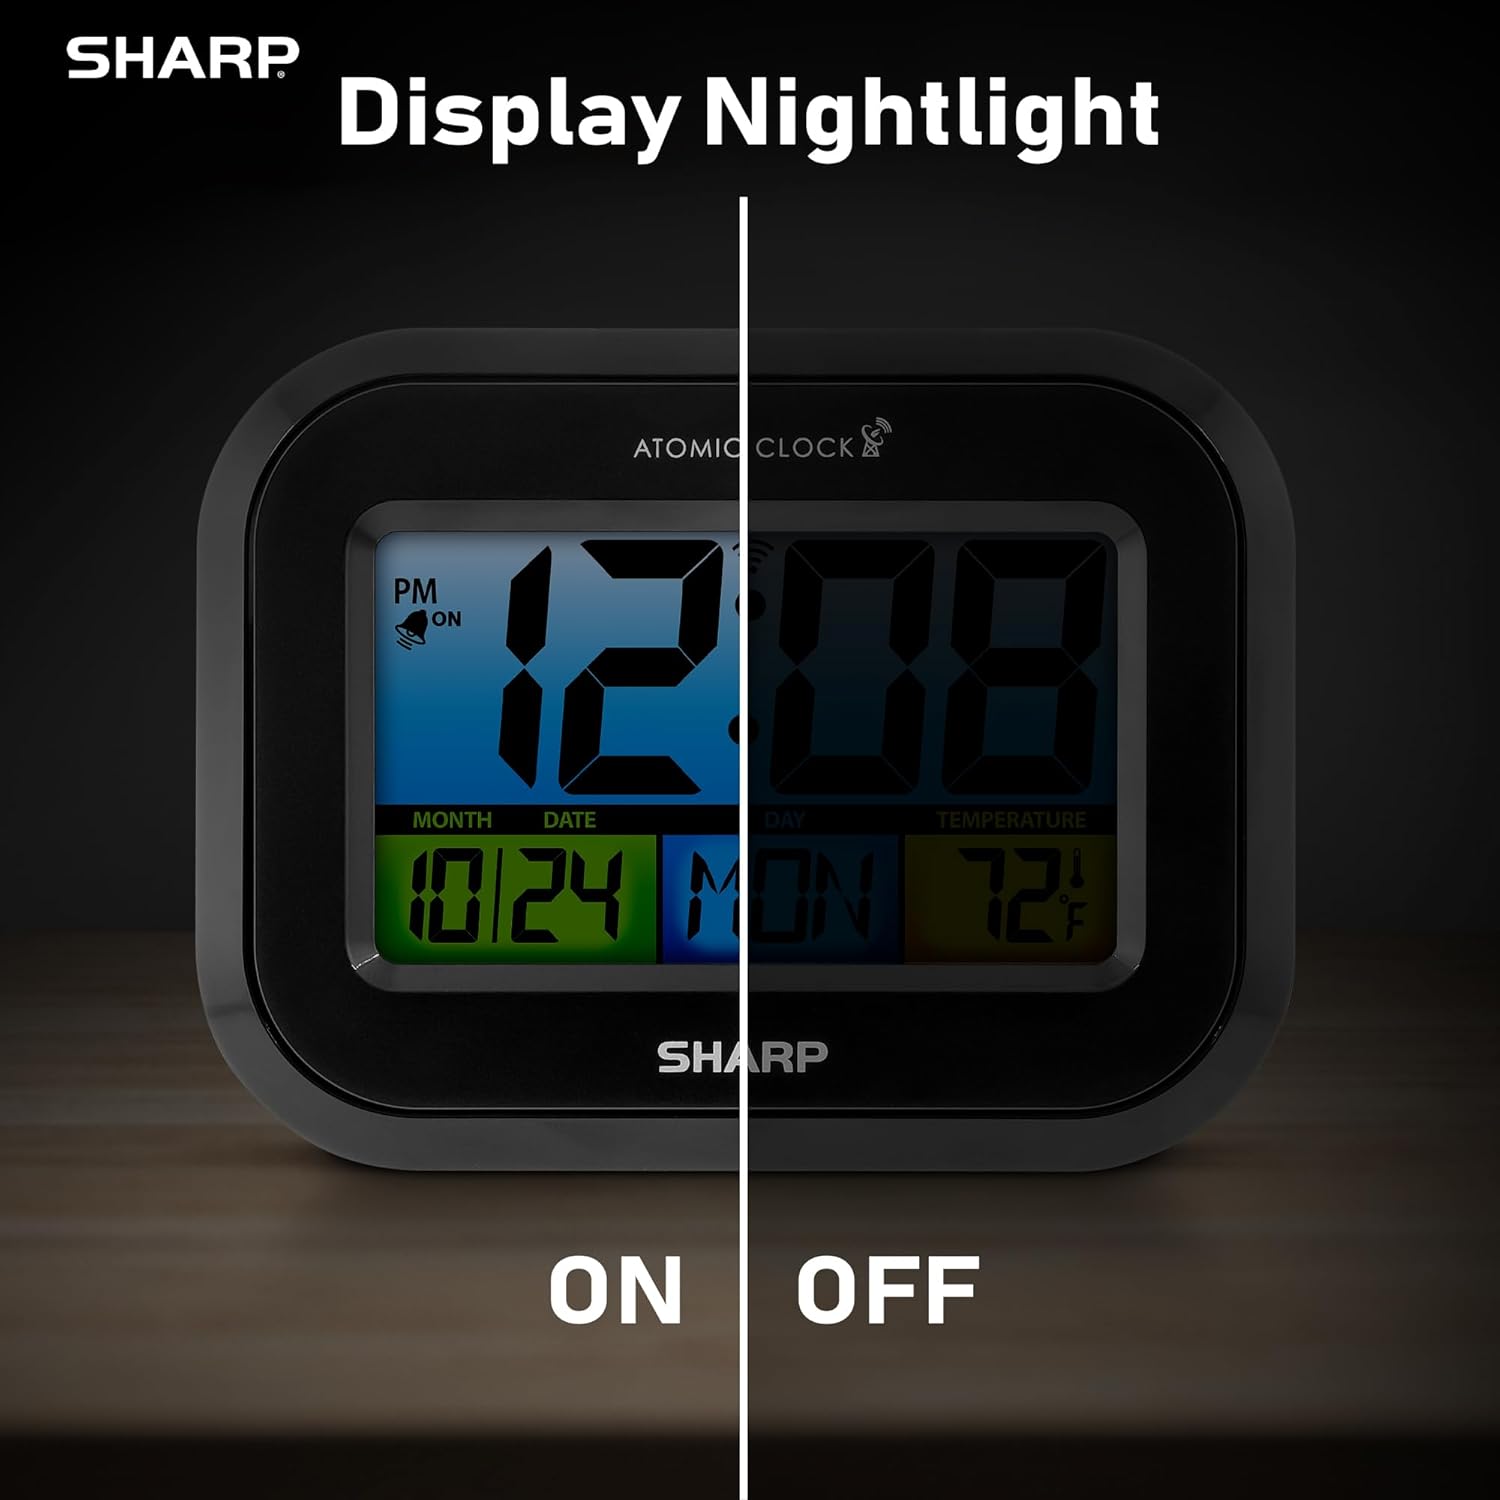
Comparison image showing the clock's display with the nightlight off (dim) and on (illuminated) in both day and night settings.
- Always-On Backlight: Користете го Прекинувач за вклучување/исклучување on the rear panel to activate or deactivate the continuous backlight. When ON, the display will have a soft glow.
- Позадинско осветлување на барање: Even if the always-on backlight is OFF, you can momentarily illuminate the display by pressing the ЗАДНО ОСВЕТЛО button (usually located on the top edge, though not explicitly labeled in the provided image, it's a common feature). This provides a brighter illumination for a few seconds.

Image highlighting the physical ON/OFF switch on the rear of the clock for controlling the display nightlight, indicating its function for soft glowing backlight in the dark.
Setting Dual Alarms
Часовникот поддржува две независни поставки за аларм.
- Притиснете го АЛАРМ button once to select Alarm 1. Press again for Alarm 2.
- Додека се прикажува времето на алармот, притиснете и држете го копчето АЛАРМ копчето додека не затрепка часот.
- Користете го UP or ДОЛУ копчиња за да го прилагодите часот. Притиснете АЛАРМ за да се префрлите на минути, потоа прилагодете.
- Притиснете АЛАРМ again to save the alarm time.
- За да активирате/деактивирате аларм, притиснете го копчето АЛАРМ button repeatedly until the alarm icon (bell) appears/disappears for the desired alarm.
Користење на USB-портата за полнење
The clock includes a USB charging port for convenient charging of small electronic devices. Locate the USB port on the side or rear of the unit (specific location not detailed in provided images, but implied by feature bullets). Connect your device's USB cable to this port to begin charging.
Temperature Display (°C/°F)
The clock displays the indoor temperature. To switch between Celsius and Fahrenheit, press the ° C / ° F копче на задниот панел.
Viewing Angle Optimization
Like most LCD screens, this display is best viewed from the front or slightly above. Visibility may appear reduced at sharp side or low angles. For the best viewing experience, use the built-in kickstand to position the clock to face you.

Illustration demonstrating the optimal viewing angle for the LCD display, showing that the clock is best viewed from above or straight on, with a built-in kickstand to position it.
Wall Mounting and Tabletop Use
The clock is designed for versatile placement. Use the integrated backstand for tabletop viewing or the wall mount hole on the rear for hanging it on a wall.

The Sharp Digital Alarm Clock displayed in a home office setting, showing its versatility for both wall mounting and tabletop placement.
Одржување
Чистење
Избришете го часовникот со мека, сува крпа. Не користете абразивни средства за чистење или растворувачи, бидејќи тие може да ја оштетат површината.
Замена на батеријата
When the display becomes dim or the clock stops functioning, it's time to replace the batteries. Follow the battery installation steps in the Setup section. It is recommended to replace all three AAA batteries at the same time with new ones.
Решавање проблеми
| Проблем | Можно решение |
|---|---|
| Екранот е затемнет или празен. | Check battery polarity and ensure batteries are fresh. Replace all 3 AAA batteries. Ensure the backlight ON/OFF switch is in the 'ON' position if continuous illumination is desired. |
| Атомското време не се синхронизира. | Ensure the clock is placed near a window and oriented towards Fort Collins, Colorado. Avoid placing near electronic devices that may cause interference. Try initiating a manual search by pressing the WAVE button. Synchronization is often best overnight. |
| Времето или датумот се неточни по промената на батеријата. | Manually set the time zone. Allow time for atomic synchronization, or manually set the time and date using the TIME and CALENDAR buttons. |
| Display is hard to read from certain angles. | This is a characteristic of LCD technology. Adjust the clock's position using the kickstand to ensure it is viewed straight-on or from slightly above eye level. |
| Алармот не се огласува. | Ensure the alarm is set and activated (bell icon visible). Check battery level. |
Спецификации
| Имотот | Вредност |
|---|---|
| Бренд | Остро |
| Број на модел | SPC5028AMZ |
| Тип на дисплеј | LCD екран |
| Боја | Црното |
| Димензии на производот | 6.45"Ш x 5"В |
| Тежина на ставката | 10.8 унци (0.31 килограми) |
| Извор на енергија | Напојува со батерии (3 x AAA, не се вклучени) |
| Режим на работа | Атомски |
| Посебни карактеристики | Cordless, Dual Alarm, USB Charging Port, Indoor Temperature Display, Always-On Backlight |
| Тип на монтирање | Носач на ѕид, на маса |
| Материјал за рамка | Пластика |
Гаранција и поддршка
Sharp products are manufactured to the highest quality standards. For warranty information or technical support, please refer to the documentation included with your purchase or visit the official Sharp webлокација. Чувајте ја сметката како доказ за купување за гаранциски побарувања.

Sharp Time Solutions