Вовед
Thank you for choosing the GAOMON SW01 Full Bed Frame. This manual provides detailed instructions for assembly, operation, maintenance, and troubleshooting to ensure safe and optimal use of your new bed frame. This bed frame features a storage headboard with a charging station, integrated LED lights, and four under-bed storage drawers.
Информации за безбедност
- Внимателно прочитајте ги сите упатства пред склопување и употреба.
- Држете ги сите мали делови и материјали за пакување подалеку од дофат на деца.
- Склопете ја рамката на креветот на мека, чиста површина за да спречите гребнатини.
- Пред употреба, проверете дали сите завртки и шрафови се добро затегнати. Периодично проверувајте и повторно затегнувајте по потреба.
- Не го надминувајте максималниот капацитет на тежина од 1000 фунти.
- Use only the recommended mattress height of 8"-12" for optimal fit and safety.
- Avoid placing heavy objects on the headboard shelf to prevent damage or injury.
- Држете ги течностите подалеку од станицата за полнење за да спречите електрични опасности.
Производот завршиview
The GAOMON SW01 Full Bed Frame is designed for comfort and functionality, offering ample storage and modern features.

Image: Detailed product dimensions of the GAOMON Full Bed Frame, showing overall length, width, and height, as well as dimensions for the headboard and drawers. The bed has a weight capacity of 1000 lbs.

Слика: Комплетна view of the GAOMON Full Bed Frame in a bedroom, showcasing its rustic brown finish, storage headboard, and under-bed drawers. The bed is made of metal and wood.
Содржина на пакетот
Please ensure all parts are present before beginning assembly. Refer to the assembly video for visual guidance on identifying parts.
Video: This video demonstrates the unboxing and layout of all components included with the GAOMON Full Bed Frame, including metal frame parts, wooden slats, headboard sections, drawers, and hardware. (0:00 - 0:09)
Инструкции за склопување
Assembly is recommended for two people and takes approximately 40 minutes. Do not fully tighten screws until all parts are connected.
- Assemble the Central Support Beam:
Connect the central support beam components (K, J, Y1, R) using the provided screws and Allen wrench. Ensure they are aligned correctly before tightening. - Assemble the Side Rails:
Connect the side rail components (L, M, Y1, R) in a similar manner to the central beam. - Connect Side Rails to Central Support:
Attach the assembled side rails to the central support structure using the designated hardware. - Attach Headboard Side Panels:
Secure the headboard side panels (A1, A2) to the main headboard section (B) using screws (T4). - Прикачете го таблата за кревет на рамката:
Connect the assembled headboard to the bed frame using screws (T5, T3). - Attach Footboard to Frame:
Secure the footboard (D) to the bed frame using screws (V2). - Attach Side Panels to Footboard:
Connect the footboard side panels (E1, E2) to the footboard using screws (T2, T1). - Инсталирајте летвички:
Place the wooden slats across the bed frame. Ensure they are evenly spaced and secured if applicable. - Инсталирајте станица за полнење:
Insert the charging station (U3) into the designated slot on the headboard and secure it with screws (V1). - Инсталирајте LED светла:
Connect the LED light strip (U2) and controller (U1) and attach them to the headboard using screws (V2).
Video: Step-by-step guide on assembling the central support beam of the bed frame. (0:10 - 0:26)
Video: Demonstrates the assembly of the bed frame's side rails. (0:27 - 0:43)
Video: Shows how to connect the side rails to the central support frame. (0:44 - 1:00)
Video: Guide for attaching the headboard side panels to the main headboard. (1:51 - 2:06)
Video: Instructions for securing the headboard to the bed frame. (2:07 - 2:21)
Video: Guide for attaching the footboard to the bed frame. (2:22 - 2:50)
Video: Instructions for attaching the side panels to the footboard. (2:51 - 3:09)
Video: Demonstrates the installation of the wooden slats onto the bed frame. (3:10 - 3:33)
Video: Shows how to install the charging station into the headboard. (3:34 - 3:43)
Video: Instructions for installing the LED light strip and controller. (3:44 - 3:52)
Упатства за работа
LED светла
- The bed frame features a built-in RGB LED light strip.
- Control the LED lights using the included remote controller or a compatible mobile application.
- Choose from 12 scene modes, 7 static colors, and 3 brightness modes.
- The LED lights can change color with the rhythm of sound and music for dynamic effects.
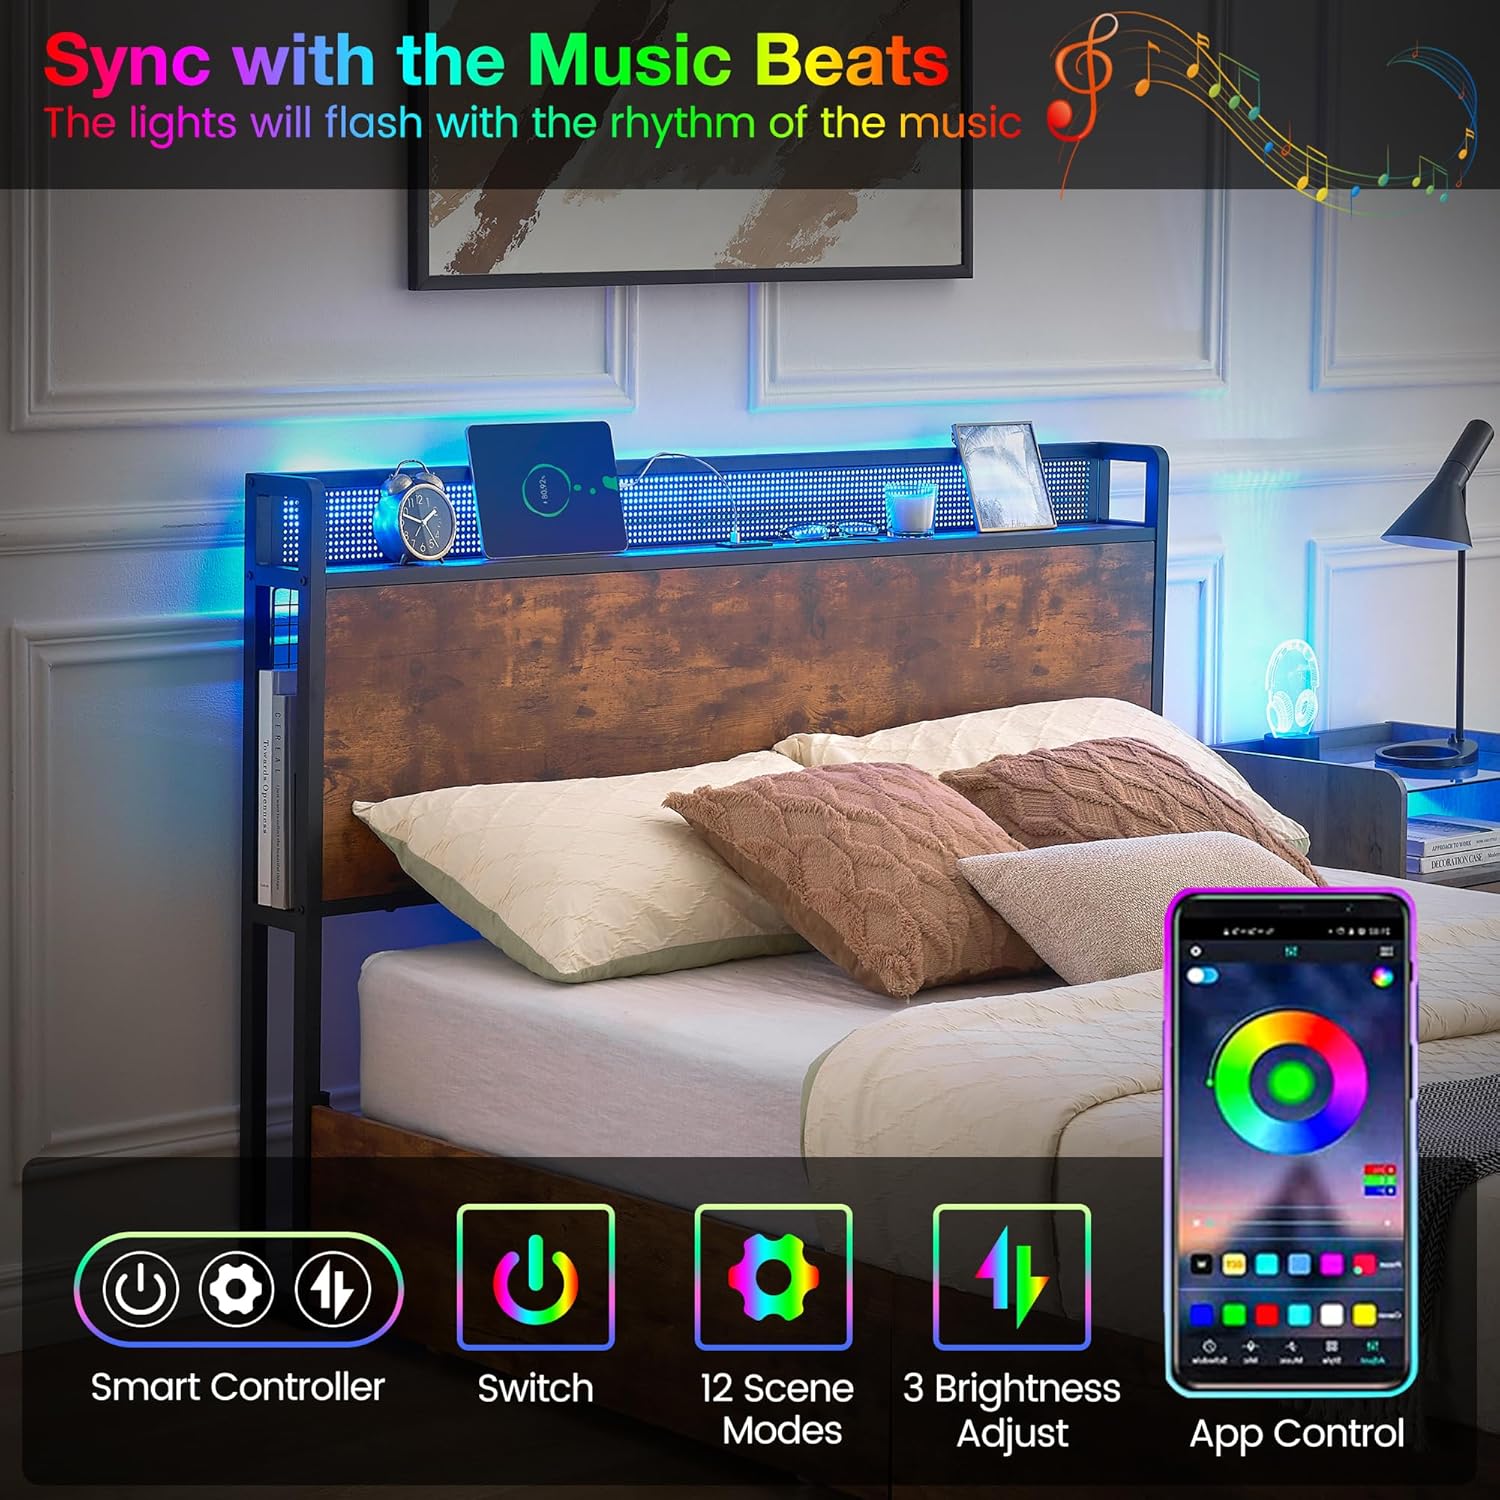
Image: The bed frame's LED lights are shown syncing with music, highlighting the smart controller, switch, 12 scene modes, 3 brightness adjustments, and app control features.
Видео: Краток прегледview of the LED bed frame with headboard and storage drawers, demonstrating the lighting features and storage options. (0:00 - 0:20)
Станица за полнење
- The headboard includes 3 USB outlets (5V/2A) and 1 Type-C charging port (20W).
- Use these ports to conveniently charge your electronic devices such as phones, tablets, and smartwatches.
- Ensure the bed frame is plugged into a power outlet for the charging station to function.

Слика: Крупен план view of the headboard's charging station, showing the USB ports, Type-C port, and power cord connection.
Storage Drawers & Mesh Baskets
- The bed frame includes 4 large storage drawers with wheels for easy access.
- Use the drawers to store clothes, bedding, or other items, maximizing space utilization.
- Iron wire mesh storage baskets are integrated on both sides of the headboard for books, magazines, or small personal items.
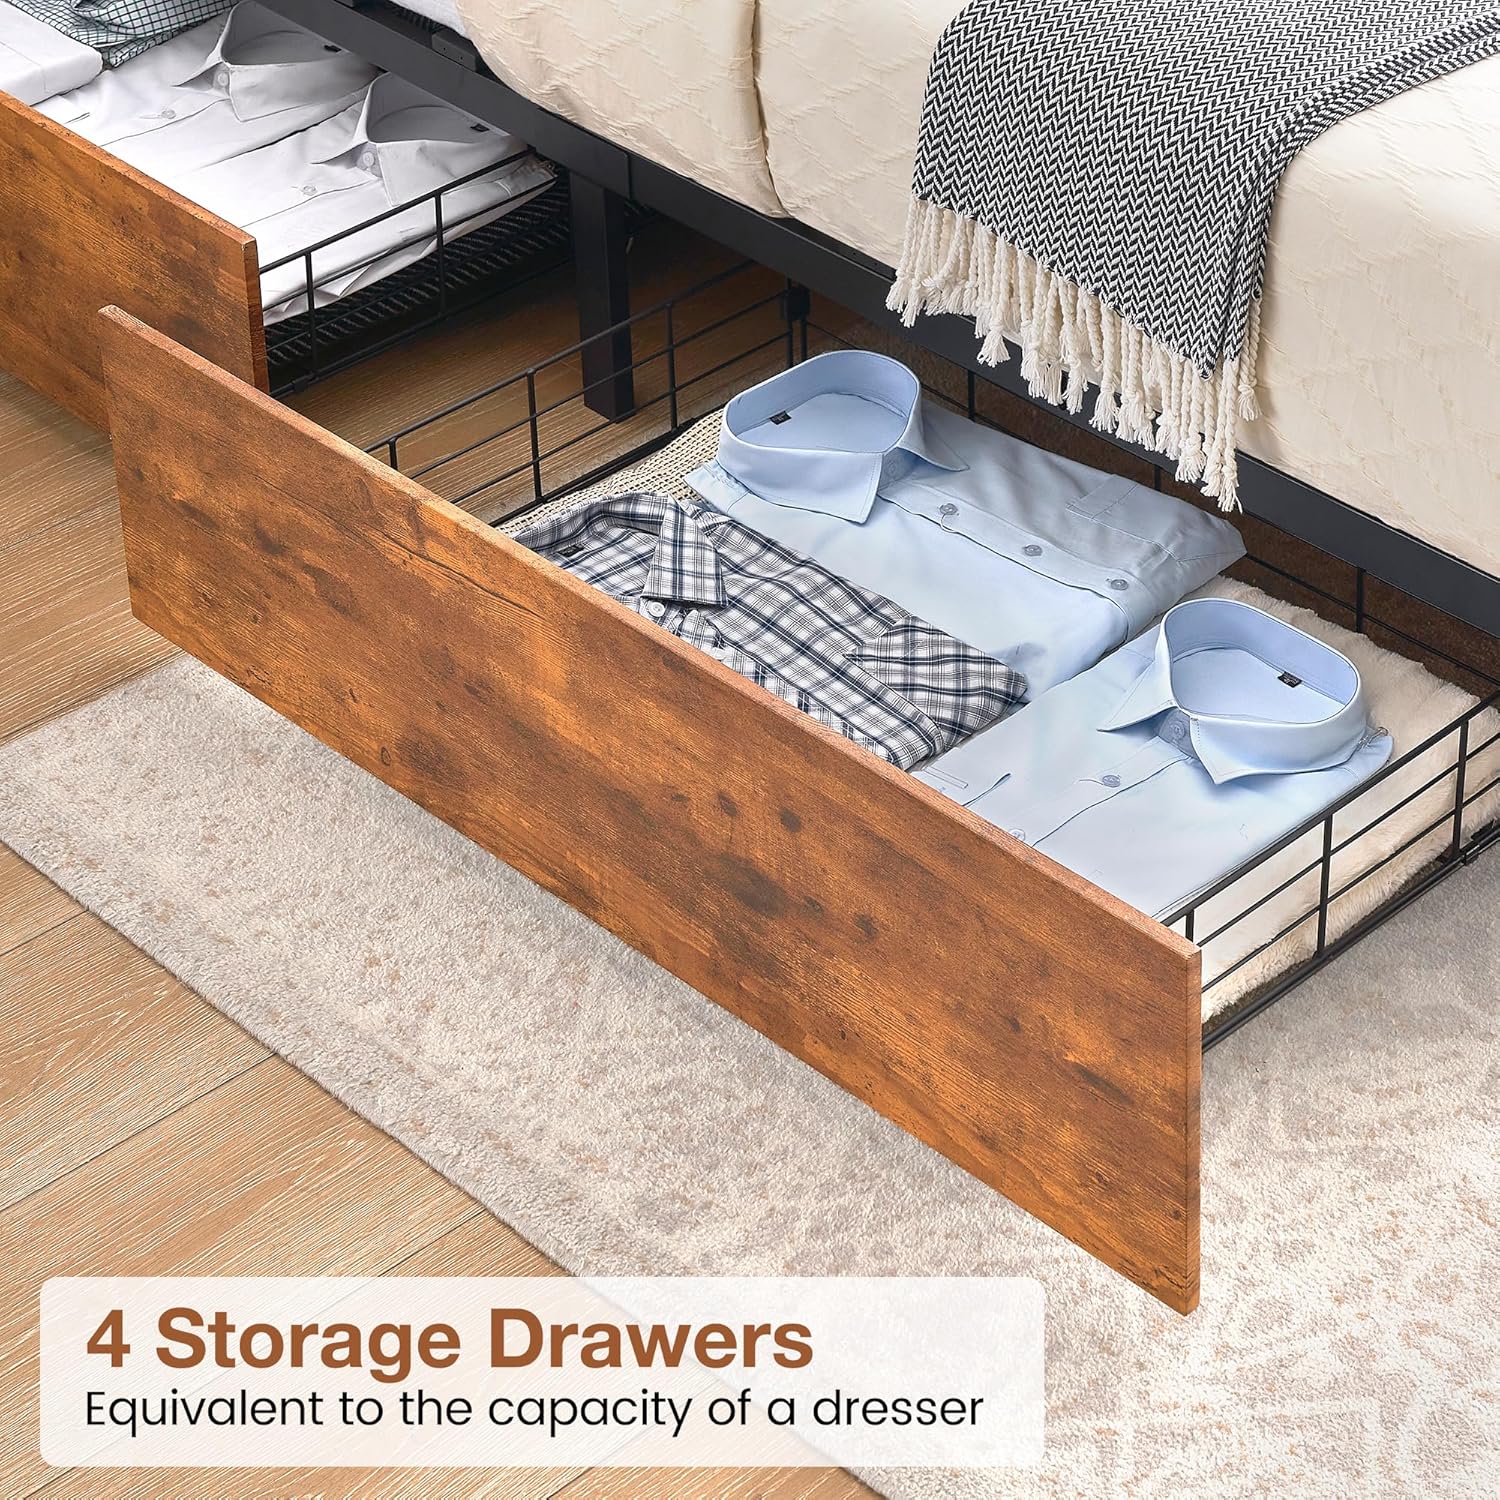
Image: Four under-bed storage drawers are shown pulled out, filled with folded shirts, demonstrating their capacity.

Слика: Страна view of the headboard, highlighting the 15.7-inch tall mesh storage basket, ideal for books and magazines.
Одржување
- Чистење: For the fabric parts of the headboard and footboard, dry clean only. For metal and wood surfaces, wipe with a soft, damp крпа. Избегнувајте груби хемикалии.
- Проверка на хардверот: Периодично проверувајте ги сите завртки и шрафови за да се осигурате дека остануваат цврсто стегнати. Повторно затегнете ги по потреба за да ја одржите стабилноста и да спречите чкрипење.
- Лајсни: Проверете дали летвите се правилно поставени и не се оштетени. Веднаш заменете ги сите скршени летвички за да ја одржите потпората на душекот.
- LED светла: If LED lights malfunction, check the power connection and controller. Do not attempt to repair electrical components yourself.
- Станица за полнење: Keep the charging ports free of dust and debris. Do not force plugs into the outlets.
Решавање проблеми
| Проблем | Можна причина | Решение |
|---|---|---|
| Рамката на креветот се ниша или чкрипи. | Лабав хардвер. | Проверете ги и затегнете ги сите завртки и шрафови. Осигурајте се дека сите врски се безбедни. |
| LED светлата не работат. | Power connection issue, faulty controller, or damaged light strip. | Ensure the power cord is securely plugged in. Check the controller for battery or damage. Contact customer support if the issue persists. |
| Станицата за полнење не обезбедува струја. | Bed frame not plugged in, power outage, or internal wiring issue. | Verify the bed frame's main power cord is plugged into a working wall outlet. Check for tripped circuit breakers. |
| Фиоките тешко се извлекуваат или туркаат внатре. | Obstruction, misaligned wheels, or uneven flooring. | Check for items blocking the drawers. Ensure the wheels are properly aligned in their tracks. Adjust the bed frame's position if flooring is uneven. |
Спецификации
- Модел: SW01
- Големина: Полна
- Димензии на производот: 80.8"Д x 52.3"Ш x 42"В
- Материјал: Метал, дрво
- Боја: Браун
- Тежински капацитет: До 1000 фунти
- Посебни карактеристики: Lighted (RGB LED), No Box Spring Needed, Squeak Resistant, 4 Storage Drawers, USB & Type-C Charging Ports
- Препорачана висина на душекот: 8"-12"
- Потребно собрание: Да
Гаранција и поддршка
For warranty information or customer support, please refer to the documentation included with your purchase or contact GAOMON customer service directly. Keep your purchase receipt for warranty claims.


