1. Вовед
This manual provides detailed instructions for the installation, operation, and maintenance of your Reobiux D20-1P 2K Outdoor Surveillance Camera. Please read this manual thoroughly before using the product to ensure proper functionality and safety.
2. Содржина на пакетот
Проверете дали сите артикли наведени подолу се вклучени во вашиот пакет. Доколку некои артикли недостасуваат или се оштетени, ве молиме контактирајте ја службата за корисници.
- 1x Reobiux D20-1P Solar PTZ Camera
- 1x Solar Collector
- 1x Упатство за употреба
- 1x Основа за монтирање
- 1x Power Supply (for initial charging)
- 1x Screws Bag (for installation)
- 1x Type-C Charging Line
3. Производот завршиview
The Reobiux D20-1P is a 2K outdoor surveillance camera designed for comprehensive home security. It features dual lenses, 360° Pan-Tilt-Zoom (PTZ) capabilities, and operates wirelessly via Wi-Fi. Key features include PIR motion detection, color night vision, two-way audio, and an IP66 weatherproof rating, powered by a solar panel and rechargeable battery.
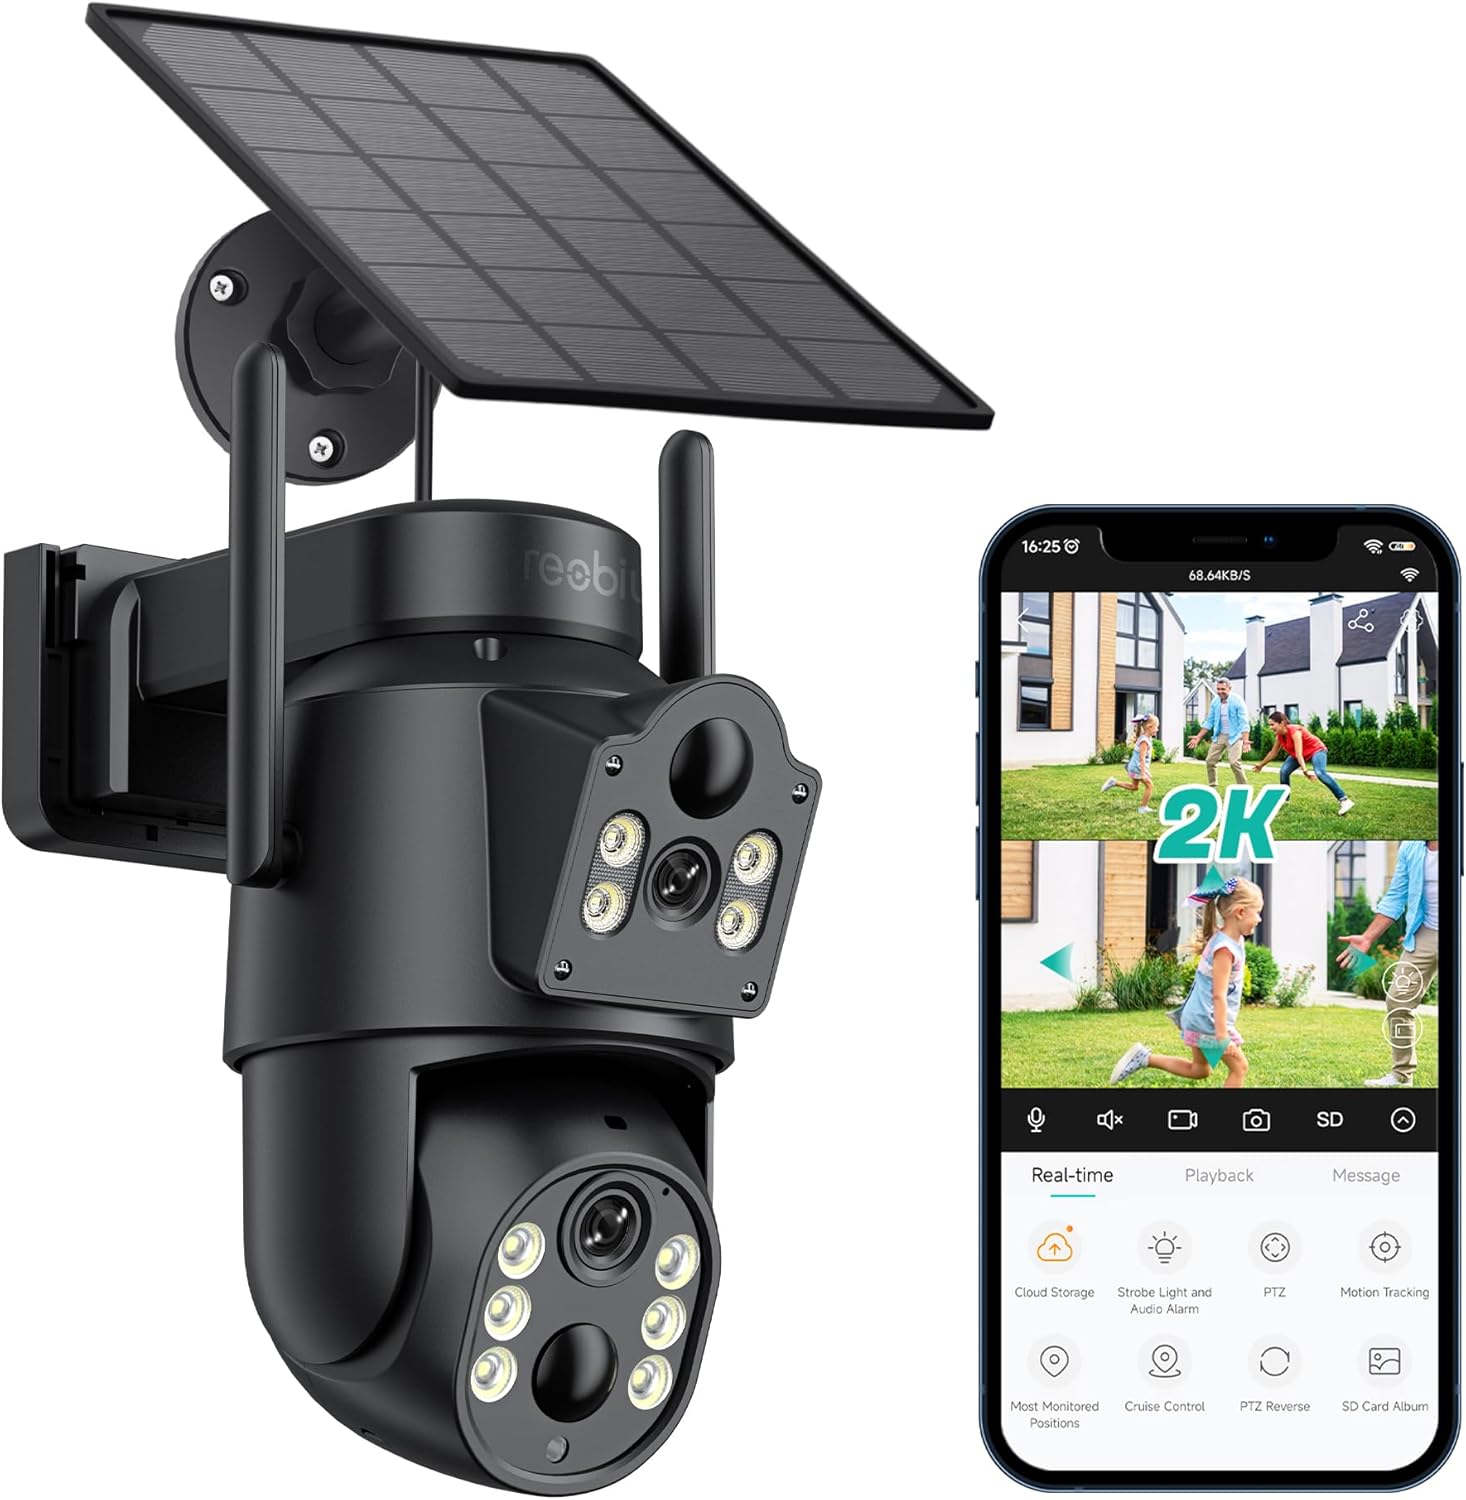
Слика 3.1: Reobiux D20-1P Solar PTZ Camera and its mobile application interface showing real-time monitoring, playback, and various control options.
Клучни карактеристики:
- 2K QHD High Resolution: Обезбедува јасна и детална видео-фудбаtage.
- Dual-Lens Design: Combines a fixed lens with a rotating lens for comprehensive coverage.
- 360° PTZ функционалност: Allows remote control of pan, tilt, and zoom for flexible viewинг агли.
- Соларна енергија со батерија што може да се полни: Ensures continuous operation with minimal manual charging.
- Откривање на движење PIR: Intelligently detects human movement to reduce false alarms.
- Ноќно гледање во боја: Offers full-color video even in low-light conditions, alongside infrared night vision.
- Двонасочно аудио: Enables communication with visitors or deterrence of intruders.
- IP66 Водоотпорност: Дизајниран да издржи различни надворешни временски услови.
- Wireless Wi-Fi Connectivity: Easy setup and remote access via smartphone.
4. Водич за поставување
4.1 Почетно полнење
Before first use, fully charge the camera's internal battery using the provided Type-C charging line and power supply. This ensures the camera has sufficient power for initial setup and operation, especially if solar charging conditions are not optimal immediately after installation.
4.2 Инсталација на апликација и креирање сметка
- Преземете го iCSee app from your smartphone's app store (iOS App Store or Google Play Store).
- Инсталирајте ја апликацијата и отворете ја.
- Follow the on-screen instructions to create a new account or log in if you already have one.
4.3 Camera Connection to Wi-Fi
- Ensure your camera is powered on.
- Во апликацијата iCSee, допрете ја иконата „+“ за да додадете нов уред.
- Select the option for "Wi-Fi Camera" or "Add Device by AP Hotspot" (refer to app for exact wording).
- Follow the app's instructions to connect the camera to your 2.4GHz Wi-Fi network. You may need to scan a QR code displayed on your phone with the camera, or listen for a sound prompt.
- Откако ќе се поврзете, можете да го именувате вашиот фотоапарат и да започнете со следење.
4.4 Монтирање на камерата
Choose a location that provides optimal surveillance coverage and receives direct sunlight for the solar panel. Ensure the camera is within range of your Wi-Fi network.
- Изберете локација: Identify a suitable wall or surface for mounting. Consider the camera's viewing angle (355° pan, 90° tilt) and the solar panel's exposure to sunlight.
- Означете ги точките за дупчење: Use the mounting base as a template to mark the screw holes on the wall.
- Дупчете дупки: Drill pilot holes at the marked positions. Insert wall anchors if necessary.
- Прикачете ја монтажната основа: Прицврстете ја монтажната основа на ѕидот со помош на приложените завртки.
- Прикачи камера: Mount the camera onto the secured base.
- Прилагодување на соларниот панел: Position the solar panel to maximize sunlight exposure throughout the day.

Слика 4.1: Illustration of the camera mounted with its solar panel, highlighting the fixed and rotating lenses and the benefit of continuous solar power.
5. Упатства за работа
5.1 Во живо View и Репродукција
Open the iCSee app and select your camera to access the live viewОд тука, можете:
- Следење во реално време: View видео пренос во живо.
- Контрола на PTZ: Use the on-screen joystick to pan (355°) and tilt (90°) the camera.
- Дигитален зум: Pinch to zoom on the live feed.
- Репродукција: Пристап до снимената хранаtage stored on the SD card or cloud storage.

Слика 5.1: Demonstrates the superior clarity of 2K QHD resolution compared to 1080P, providing more details for monitoring.
5.2 Детекција на движење и известувања
The camera utilizes PIR (Passive Infrared) intelligent detection to identify human movement, minimizing false alarms from pets or swaying branches.
- Овозможи/Оневозможи: Activate or deactivate motion detection in the app settings.
- Прилагодување на чувствителност: Adjust the PIR sensor's sensitivity to suit your environment.
- Известувања за аларм: Добивајте моментални push известувања на вашиот паметен телефон кога ќе се открие движење.
- Звучен и светлосен аларм: Configure the camera to trigger a strobe light and audible alarm upon detection.

Слика 5.2: The camera's PIR intelligent detection distinguishes human movement from other objects, reducing unnecessary alerts.

Слика 5.3: When motion is detected, the camera can send real-time push notifications and activate a sound and light alarm to deter intruders.
5.3 Режими на ноќно гледање
The camera offers two night vision modes for clear visibility in the dark:
- Spotlight Full Color Night Vision: Utilizes built-in spotlights to provide full-color video in low-light conditions.
- Spotlight Infrared Night Vision: Uses infrared LEDs for black-and-white video in complete darkness, with a range of up to 30 meters.
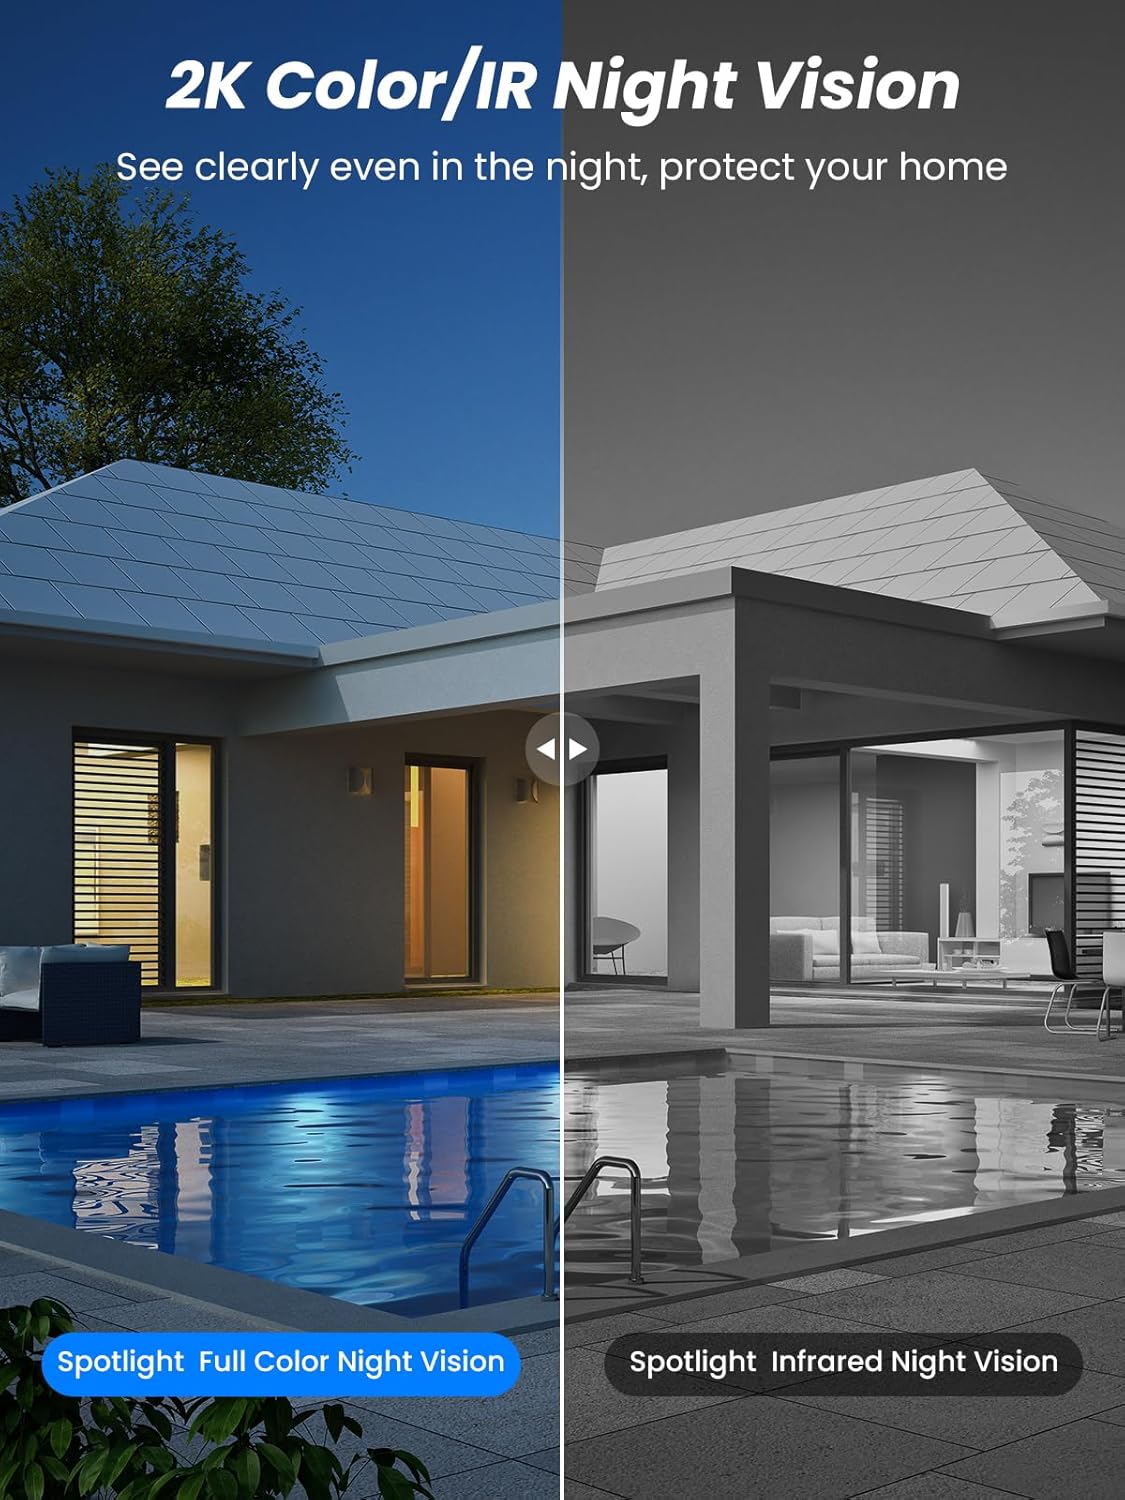
Слика 5.4: Illustrates the difference between full-color night vision, enabled by spotlights, and traditional infrared night vision.
5.4 Двонасочно аудио
The integrated microphone and speaker allow for two-way communication.
- Зборувај: Допрете ја иконата за микрофон во апликацијата за да зборувате преку звучникот на камерата.
- Слушајте: The camera's microphone captures audio from its surroundings.

Слика 5.5: The two-way audio function allows for direct communication through the camera, useful for interacting with visitors or delivery personnel.
6. Одржување
- Чистење: Периодично чистете го објективот на камерата и соларниот панел со мека, дamp cloth to ensure optimal performance and clear image quality. Avoid abrasive cleaners.
- Здравје на батеријата: While solar-powered, extreme weather or prolonged periods of low sunlight may require manual charging. Monitor battery levels via the app.
- Ажурирања на фирмверот: Check the iCSee app regularly for available firmware updates to ensure your camera has the latest features and security enhancements.
- Заштита од времето: The camera is IP66 weatherproof, designed to withstand rain, snow, and sun. However, ensure all connections are secure to maintain water resistance.

Слика 6.1: The IP66 rating ensures the camera's durability and functionality in various outdoor weather conditions, including snow, rain, and direct sunlight.
7 Смена на проблеми
- Камерата не се поврзува со Wi-Fi:
- Ensure the camera is within range of your 2.4GHz Wi-Fi network. 5GHz networks are not supported.
- Проверете дали лозинката за Wi-Fi е точна.
- Рестартирајте го рутерот и камерата.
- If issues persist, try resetting the camera (refer to app or product for reset button location).
- Battery not charging or draining quickly:
- Ensure the solar panel is clean and receives direct sunlight for several hours daily.
- Проверете ја врската помеѓу соларниот панел и камерата.
- If in a low-light environment, manually charge the camera using the Type-C cable.
- Чести настани за детекција на движење или во живо view streaming can consume battery faster. Adjust settings if needed.
- False motion detection alarms:
- Adjust the PIR motion detection sensitivity in the iCSee app.
- Осигурајте се дека камерата не е насочена кон области со постојано движење (на пр., прометни патишта, нишање на дрвја) ако не е наменета за мониторинг.
- Лош квалитет на сликата:
- Исчистете ја леќата на камерата.
- Ensure sufficient lighting for optimal image capture, especially at night.
- Проверете ја јачината на сигналот на Wi-Fi; слабиот сигнал може да влијае на квалитетот на видео стримингот.
8. Спецификации
| Карактеристика | Детал |
|---|---|
| Име на моделот | D20-1P |
| Резолуција за снимање видео | 2.5 илјади |
| Ефективна видео резолуција | 2K QHD |
| Технологија на безжична комуникација | Wi-Fi (2.4 GHz) |
| Форма фактор | Купола |
| Viewинголен агол | 355 степени (пан), 90 степени (навалување) |
| Тип на инсталација | Монтиран на ѕид |
| Опсег на ноќни визии | 30 метри |
| Стапка на слики | 25 fps |
| Материјал | Пластика |
| Voltage | 12 волти (DC) |
| Ватtage | 5 вати |
| Извор на енергија | Напојувано со батерии, напојувано со сончева енергија |
| Батерии | 3 литиум-јонски батерии (вклучени) |
| Протокол за поврзување | Wi-Fi |
| Тип на контролер | Апликација iCSee |
| Посебни карактеристики | Night Vision (Color/IR), PIR Motion Detection, Two-Way Audio, IP66 Weatherproof |
| Тежина на ставката | 1.06 кг |
| Димензии на пакетот | 21.7 x 19.5 x 13.8 cm |
9. Гаранција и поддршка
Reobiux offers a 1 година гаранција for this product. For any issues or inquiries, please do not hesitate to reach out to our customer service. We provide 20 hours of online service to assist you.
For support, please refer to the contact information provided with your purchase or within the iCSee application.


