1. Вовед
The 8BitDo 64 Bluetooth Controller is designed for enhanced gaming experiences across multiple platforms. This manual provides essential information for setting up, operating, and maintaining your controller.
Компатибилност: Analogue 3D, Switch, Switch 2, Windows, Android.
Поврзување: Bluetooth or Wired USB.
2. Содржина на пакетот
- 8BitDo 64 Bluetooth контролер
- USB-C кабел
- Упатство за употреба (овој документ)
3. Контролер надview

Слика 1: Предна страна View. This image displays the front of the 8BitDo 64 Bluetooth Controller, highlighting the classic button layout including the D-pad, analog stick, A, B, X, Y buttons, and central function buttons like Start and Select.

Слика 2: Назад View. This image shows the rear of the controller, featuring the S/D mode switch for different input modes and the product information label.

Слика 3: Врв View. This image illustrates the top edge of the controller, detailing the L/R shoulder buttons, Z-triggers, and the USB-C charging/connection port.

Figure 4: Hall Effect Joystick. Детален view of the controller's Hall Effect Joystick, known for its precision and durability.
4. Поставување
4.1 Полнење на контролорот
Connect the supplied USB-C cable to the controller's USB-C port and the other end to a USB power source (e.g., computer, USB wall adapter). The LED indicators will show charging status and turn off when fully charged.
4.2 Firmware Update (Critical)
It is highly recommended to update your controller's firmware before first use, especially for compatibility with Analogue 3D and Switch 2. Firmware updates often include critical bug fixes and performance improvements.
- Visit the official 8BitDo support webсајт.
- Download the latest firmware update tool for your operating system (Windows/macOS).
- Connect your 8BitDo 64 Bluetooth Controller to your computer using the USB-C cable.
- Follow the on-screen instructions in the update tool to complete the firmware update.
4.3 Поврзување преку Bluetooth
Ensure the controller is charged and updated before attempting Bluetooth connection.
4.3.1 Mode Selection (S/D Switch)
The switch on the back of the controller allows you to select between 'S' (Switch/Analogue 3D) and 'D' (Windows/Android) input modes. Ensure the correct mode is selected for your device.
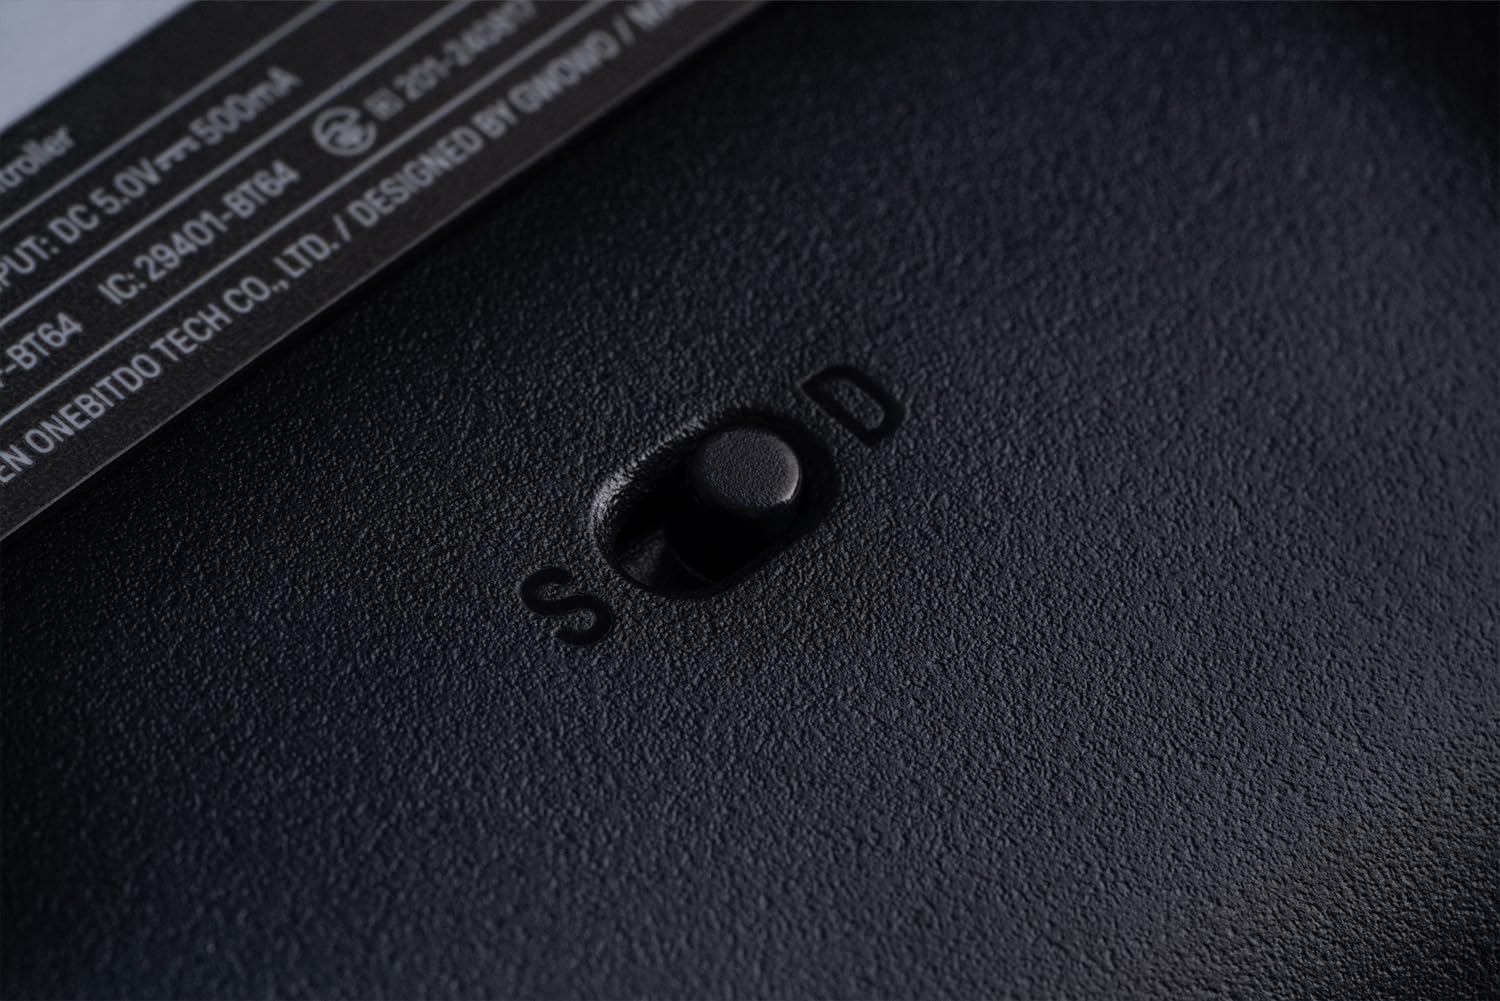
Figure 5: S/D Mode Switch. This image highlights the physical switch on the controller's rear for selecting input modes.
4.3.2 Pairing with Analogue 3D / Switch / Switch 2
- Set the mode switch on the back of the controller to 'S'.
- Press and hold the Start button on the controller for 3 seconds until the LED indicators begin to flash rapidly.
- On your Analogue 3D or Switch console, navigate to the controller pairing menu.
- Select the 8BitDo 64 Bluetooth Controller from the list of available devices.
- LED индикаторите на контролерот ќе светат постојано кога ќе се поврзат успешно.
4.3.3 Pairing with Windows / Android
- Set the mode switch on the back of the controller to 'D'.
- Press and hold the Start button on the controller for 3 seconds until the LED indicators begin to flash rapidly.
- On your Windows PC or Android device, enable Bluetooth and search for new devices.
- Select the 8BitDo 64 Bluetooth Controller from the list of available devices.
- LED индикаторите на контролерот ќе светат постојано кога ќе се поврзат успешно.
4.4 Connecting via Wired USB
For a wired connection, simply connect the 8BitDo 64 Bluetooth Controller to your device (PC, Switch dock, Analogue 3D) using the supplied USB-C cable. The controller will automatically switch to wired mode.
5. Упатства за работа
5.1 Распоред на копчиња и функции
The 8BitDo 64 Bluetooth Controller features a layout inspired by classic N64 controllers, adapted for modern gaming.
- Аналоген стап: Примарна контрола на движењето.
- D-Pad: Насочен влез.
- A/B Buttons: Main action buttons.
- C-Buttons (Triangle, Circle, Square, Cross): Context-sensitive actions, often camera control or specific game functions.
- Копче за почеток: Pause, menu access.
- Shoulder Buttons (L/R): Дополнителни копчиња за акција.
- Z-Triggers (L/R): Located on the underside of the shoulder buttons, providing quick access for specific actions like aiming or shielding.
5.2 Турбо функција
The Turbo function allows a button to be pressed repeatedly as long as it is held down. To activate/deactivate:
- Press and hold the button you wish to assign Turbo to.
- While holding the button, press the Star button (Turbo button). The LED will flash to confirm activation.
- To deactivate, repeat the process.
5.3 Функција за вибрации
Vibration is supported on Analogue 3D and Switch (Nintendo 64 Online only). The intensity of vibration is game-dependent and cannot be manually adjusted on the controller.
6. Одржување
- Keep the controller dry and away from extreme temperatures.
- Clean the controller with a soft, dry cloth. Do not use harsh chemicals or abrasive materials.
- Избегнувајте испуштање или изложување на контролерот на силни удари.
- Чувајте го контролерот на безбедно место кога не е во употреба за да спречите оштетување.
7 Смена на проблеми
- Контролерот не се поврзува: Ensure the mode switch (S/D) is set correctly for your device. Try re-pairing the controller. Ensure the controller is charged.
- Копчињата кои не реагираат: Check for any physical obstructions. Ensure the controller's firmware is up to date.
- Влезно задоцнување: Ensure you are within the optimal range for Bluetooth connectivity. Try a wired connection to rule out wireless interference.
- Проблеми со ажурирање на фирмверот: Ensure you are using the correct update tool for your operating system and controller model. Try a different USB port or cable.
8. Спецификации
| Број на модел | 6922621507161 |
| Поврзување | Bluetooth 5.0 (Support Bluetooth LE), Wired USB |
| Влез | DC 5V === 500mA |
| Батерија | 1 литиум-јонска батерија (вклучена) |
| Димензии | 15.94 x 8.07 x 12.4 инчи |
| Тежина | 7.05 унци |
9. Гаранција и поддршка
For warranty information, technical support, or further assistance, please visit the official 8BitDo webлокација или директно контактирајте ја нивната служба за корисници. Зачувајте го доказот за купување за гаранциски барања.


