1. Вовед
This manual provides essential instructions for the proper installation and use of the QSZN RP5-FT-001/FT-SS-02A Canbus Decoder and 16-pin Wiring Harness. This product is designed to facilitate the installation of an aftermarket car radio in Fiat Ducato vehicles manufactured between 2006 and 2016, ensuring proper communication and power supply.
Please read this manual thoroughly before installation to ensure correct operation and to prevent damage to your vehicle or the product.
2. Информации за безбедност
- Секогаш исклучувајте ја батеријата на возилото пред да започнете со каква било електрична инсталација за да спречите краток спој и електричен удар.
- Осигурајте се дека сите приклучоци се безбедни и правилно изолирани за да избегнете електрични опасности.
- Доколку не сте сигурни за кој било дел од процесот на инсталација, консултирајте се со квалификуван автомобилски техничар.
- Do not modify the wiring harness or Canbus decoder. Unauthorized modifications can lead to malfunction or damage.
- Verify vehicle compatibility before installation. This product is specifically for Fiat Ducato models from 2006-2016.
3. Содржина на пакетот
Проверете дали сите компоненти се присутни во пакувањето:
- 1x QSZN RP5-FT-001/FT-SS-02A Canbus Decoder Box
- 1x 16-Pin Power Wiring Harness
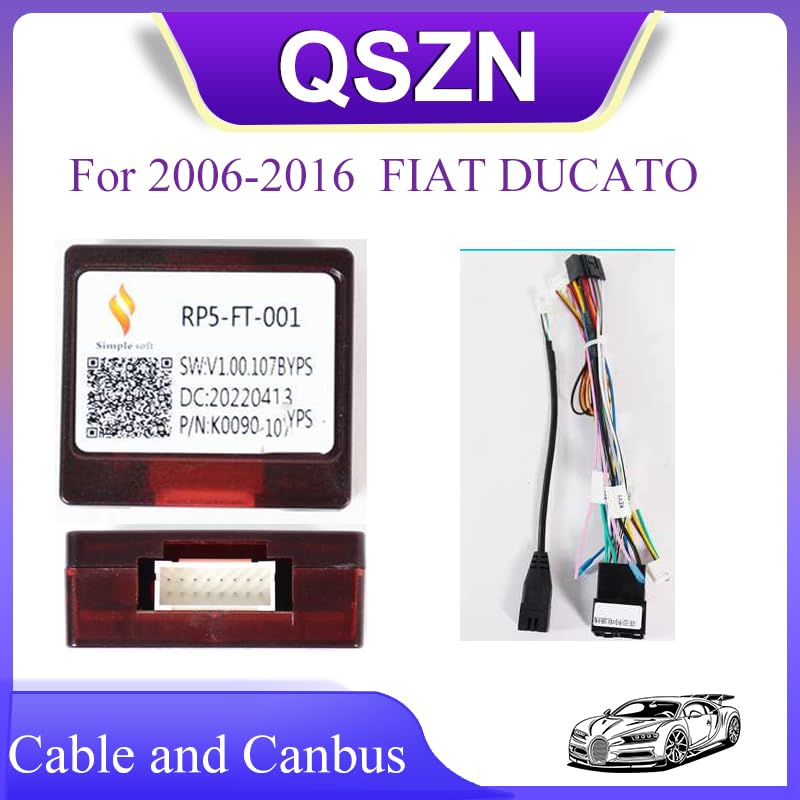
Слика 3.1: Готовоview of the QSZN Canbus Decoder (RP5-FT-001) and the accompanying 16-pin wiring harness. This image displays the main components included in the package, highlighting the decoder box and the various wires of the harness.
4. Поставување и инсталација
Следете ги овие чекори за правилна инсталација:
- Подгответе го возилото: Ensure the vehicle's ignition is off and disconnect the negative terminal of the car battery.
- Отстранете го постоечкото радио: Carefully remove the factory car radio from the dashboard. Refer to your vehicle's service manual for specific instructions on removing the radio.
- Поврзете го декодерот Canbus: Connect the Canbus decoder box (RP5-FT-001) to the designated connector on the wiring harness. Ensure it clicks securely into place.
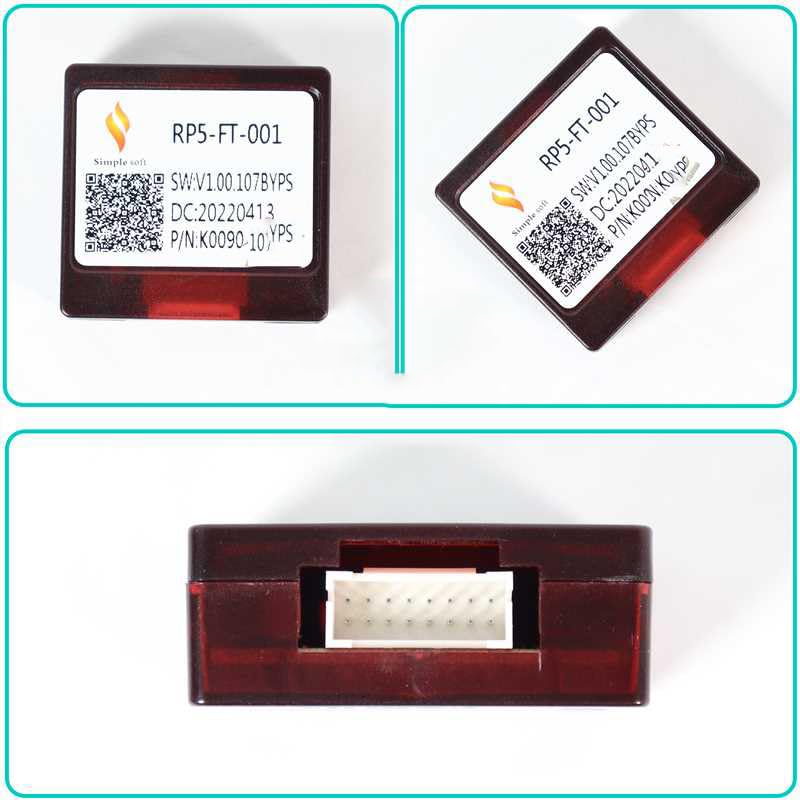
Слика 4.1: Детално view of the RP5-FT-001 Canbus Decoder box, showing its various sides and the connector port. This helps in identifying the correct orientation for connection.
- Connect Wiring Harness to Aftermarket Radio: Connect the 16-pin power wiring harness to your aftermarket car radio. Match the corresponding connectors. This harness provides power, ground, and speaker connections, as well as CANbus data signals.
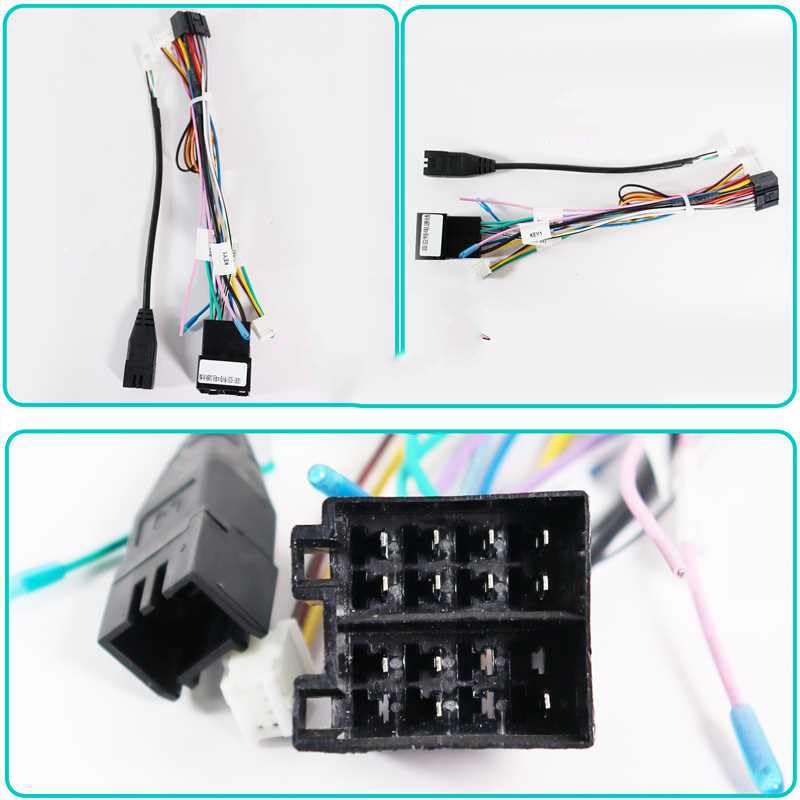
Image 4.2: Close-up of the wiring harness connectors, illustrating the various colored wires and their respective terminals. This image assists in identifying the correct connections for the aftermarket radio.
- Connect Wiring Harness to Vehicle: Connect the vehicle-specific end of the wiring harness to the factory wiring harness in your Fiat Ducato.
- Повторно поврзете ја батеријата: Once all connections are secure, reconnect the negative terminal of the car battery.
- Тест функционалност: Turn on the vehicle's ignition and test the aftermarket radio's functionality, including power, audio, steering wheel controls (if supported by the radio and vehicle), and other features that rely on CANbus data.
- Secure Radio: Carefully re-install the aftermarket radio into the dashboard, ensuring no wires are pinched.
5. Упатства за работа
The QSZN Canbus Decoder and Wiring Harness operate automatically once correctly installed. Its primary function is to translate CANbus data from your Fiat Ducato into signals compatible with your aftermarket car radio, and to provide the necessary power connections.
- Вклучување/исклучување: The aftermarket radio should power on and off with the vehicle's ignition.
- Контроли на воланот: If your aftermarket radio supports steering wheel controls and your vehicle is equipped with them, the Canbus decoder will typically enable these functions. Configuration may be required within your aftermarket radio's settings.
- Осветлување: The harness provides illumination signals to the radio, allowing it to dim with the vehicle's dashboard lights.
6. Одржување
This product requires minimal maintenance. Ensure that all connections remain secure and free from moisture or corrosion. Periodically check for any loose wires or damaged insulation, especially if you experience intermittent issues with your car radio.
Do not attempt to open or repair the Canbus decoder box. Doing so will void any potential warranty and may cause damage.
7 Смена на проблеми
| Проблем | Можна причина | Решение |
|---|---|---|
| Радиото не се вклучува. | Лабав приклучок за напојување, прегорен осигурувач, неправилно поврзување. | Check all power connections. Verify vehicle and radio fuses. Ensure the harness is correctly connected to both the radio and the vehicle. |
| Нема звук од звучниците. | Лабави врски на звучниците, неправилно поврзување на звучниците. | Check all speaker wire connections at both the radio and the vehicle harness. Ensure speaker wires are not shorting. |
| Контролите на воланот не работат. | Radio not configured for SWC, incorrect CANbus connection, radio does not support SWC. | Refer to your aftermarket radio's manual for steering wheel control setup. Verify the CANbus decoder is properly connected. Confirm your radio model supports SWC. |
| Intermittent power or functionality. | Loose connections, faulty wiring. | Inspect all connections for looseness or corrosion. Ensure wires are not damaged or pinched. |
8. Спецификации
- Модел: RP5-FT-001 / FT-SS-02A
- Компатибилност: Fiat Ducato (2006-2016)
- Влез волуменtage: 12V DC
- Тежина на ставката: Приближно 0.2 кг
- Димензии на ставката: Приближно 10 x 10 x 10 см (кутија Canbus)
- Функција: CANbus data decoding, 16-pin power and speaker wiring
9. Гаранција и поддршка
Specific warranty information for this product is not provided in the available documentation. For warranty claims or technical support, please contact the retailer or manufacturer directly with your purchase details.
Always retain your proof of purchase for any warranty or support inquiries.