1. Вовед
1.1 Производ надview
The Truman TM-I VISION PRO is a Full HD digital satellite receiver designed to provide a comprehensive entertainment experience. It features a powerful Sunplus 1506HV processor, ensuring smooth performance and high-quality video output. With multiple connectivity options including USB, HDMI, and Ethernet, it offers versatility for various home entertainment setups. The device supports Full HD resolution, multi-language interfaces, and includes parental control features for a family-friendly viewing environment. It also comes with a one-year activated IPTV service.

Слика 1.1: Предна страна view of the Truman TM-I VISION PRO Satellite Receiver, showing its compact design and front-facing USB ports.
1.2 Содржина на пакетот
Ве молиме проверете дали сите артикли наведени подолу се вклучени во вашиот пакет:
- Truman TM-I VISION PRO Satellite Receiver
- Адаптер за напојување
- Стандарден далечински управувач
- Digital LED Lens
- HDMI кабел
- Упатство за употреба

Figure 1.2: Marketing image highlighting key features such as Wi-Fi, Ultra HD support, ISO 9001 certification, and 5G compatibility.
2. Информации за безбедност
За безбедно работење и спречување на оштетување, прочитајте ги и почитувајте ги следниве безбедносни упатства:
- Не го изложувајте уредот на вода или влага.
- Avoid placing the receiver in direct sunlight or near heat sources.
- Обезбедете соодветна вентилација околу уредот за да спречите прегревање.
- Користете го само дадениот адаптер за напојување.
- Не обидувајте се сами да го отворите или поправите уредот. Обратете се кај квалификуван сервисер.
- Чувајте го уредот и додатоците подалеку од дофат на деца.
- Исклучете го приклучокот од струја за време на грмотевици или кога не се користи подолг период.
3. Поставување
3.1 Поврзување на приемникот
- Поврзете ја сателитската антена: Connect your satellite dish cable to the "LNB IN" port on the back of the receiver.
- Поврзување со телевизор (HDMI): Use the provided HDMI cable to connect the receiver's HDMI OUT port to an available HDMI IN port on your television.

Figure 3.1: The included HDMI cable for connecting the receiver to your television.
- Поврзете напојување: Connect the power adapter to the DC IN port on the receiver, then plug the adapter into a wall outlet.
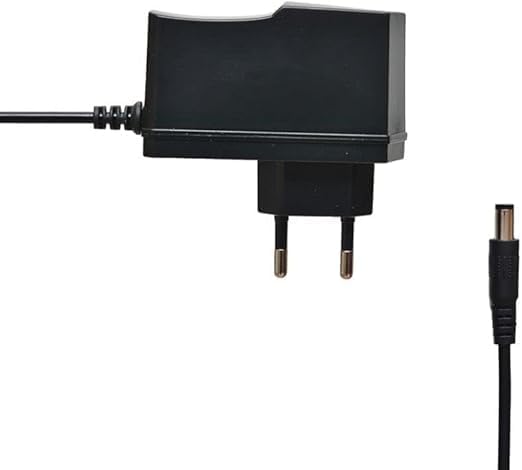
Figure 3.2: The power adapter supplied with the receiver.
- Connect Digital LED Lens: Plug the digital LED lens into its dedicated port on the receiver. This lens displays channel numbers and receives remote control signals.
- Optional: Connect Ethernet/USB: If you plan to use wired internet or external storage, connect an Ethernet cable to the LAN port or a USB drive to one of the USB ports.

Слика 3.3: Заден дел view of the receiver showing the LNB IN, HDMI OUT, USB, Ethernet, and DC IN ports.
3.2 Волшебник за почетно поставување
Upon first power-on, the receiver will guide you through an initial setup wizard:
- Избор на јазик: Изберете го претпочитаниот јазик за приказот на екранот.
- Поставување временска зона: Поставете ја точната временска зона за вашиот регион.
- Поставување антена: Select your satellite (e.g., Nilesat, Hotbird) and configure LNB settings if necessary.
- Скенирање канали: Perform an automatic or manual channel scan to find available TV and radio channels.
- Network Setup (Optional): Configure Wi-Fi or Ethernet connection for internet-based features like IPTV.
4. Упатства за работа
4.1 Основни функции
- Вклучување/исклучување: Притиснете го МОЌ копче на далечинскиот управувач.
- Навигација на каналот: Користете го CH + / CH- копчиња за секвенцијално менување на каналите или директно внесување на бројот на каналот користејќи ја нумеричката тастатура.
- Контрола на јачината на звукот: Користете го VOL + / VOL- копчиња за прилагодување на јачината на звукот.
- Исклучи звук: Притиснете го МУТИРА копче за да го замолчите звукот.
- Пристап до менито: Притиснете го МЕНИ копче за пристап до главното мени за поставки и функции.
- Добро копче: Confirms selections in menus or displays channel information during viewинг.
- Излез: Притиснете го ИЗЛЕЗ копче за да се вратите на претходниот екран или телевизија во живо.
4.2 Напредни функции
- Родителска контрола: Access the Parental Control menu to set age restrictions for channels or lock specific programs. A default PIN (usually 0000 or 1234) may be required.
- Повеќејазична поддршка: Change audio languages (if available) or subtitle languages via the audio/subtitle options in the menu.
- IPTV: The receiver includes a pre-activated IPTV service for one year. Access this feature through the main menu. Ensure your receiver is connected to the internet for IPTV functionality.
- Репродукција на медиуми преку USB: Insert a USB drive into one of the USB ports to play media files (videos, music, photos) or record TV programs.
- Ажурирање на софтверот: Regularly check for software updates via USB or network to ensure optimal performance and access to new features. (Refer to Section 5.2 for details).
5. Одржување
5.1 Чистење
To clean the receiver, disconnect it from the power supply. Use a soft, dry cloth to wipe the exterior. Do not use liquid cleaners or abrasive materials.
5.2 Ажурирања на софтверот
Keeping your receiver's software updated is crucial for performance and security. Updates can be performed via USB or over the network (if connected to the internet).
- Ажурирање преку USB: Download the latest firmware (.bin file) from the official Truman website to a USB flash drive. Insert the USB drive into the receiver and navigate to the "System Update" or "Software Upgrade" option in the menu. Follow the on-screen instructions.
- Мрежно ажурирање: If your receiver is connected to the internet, navigate to the "Network Upgrade" or "Online Update" option in the system settings. The receiver will check for available updates and prompt you to install them.
Внимание: Do not power off the receiver during a software update, as this may cause permanent damage.
6 Смена на проблеми
If you encounter issues with your Truman TM-I VISION PRO, refer to the following common problems and solutions:
| Проблем | Можна причина | Решение |
|---|---|---|
| Нема моќ | Адаптерот за напојување не е поврзан; Приклучокот е неисправен. | Ensure power adapter is securely connected to the receiver and a working power outlet. |
| Нема сигнал / Црн екран | Antenna cable loose; Incorrect satellite selected; TV input not set to HDMI. | Check antenna cable connection. Verify satellite settings in menu. Ensure TV input is set to the correct HDMI port. |
| Далечинскиот управувач не работи | Batteries low/dead; Obstruction between remote and receiver's LED lens. | Replace remote control batteries. Ensure clear line of sight to the digital LED lens. |
| Frozen Picture / Lagging | Weak signal; Overheating; Software issue. | Check signal strength in menu. Ensure proper ventilation. Try a software update or factory reset (last resort). |
| IPTV Not Working | No internet connection; IPTV service expired. | Verify internet connection (Ethernet or Wi-Fi). Contact support if service is within the one-year period and still not working. |
7. Спецификации
| Карактеристика | Детал |
|---|---|
| Модел | TM-I VISION PRO |
| Процесор | Sunplus 1506HV |
| Тип на кутија | Full HD Digital |
| Флеш меморија | 4 MB (SPI SOP8/SOIC8) |
| Видео излез | HDMI (Full HD Resolution Support) |
| Режим за излез на звук | Stereo (Dolby Digital, DTS, PCM supported) |
| Поврзување | USB, HDMI, етернет |
| Компатибилни уреди | Телевизија, персонален компјутер |
| Посебни карактеристики | User-friendly display, Remote Control, Multi-language support, Parental Control, 1-year IPTV activation. |
| Тежина на ставката | 10 грама |
| Производител | Труман |
8. Гаранција и поддршка
For warranty information, please refer to the warranty card included with your product or contact your point of purchase. The receiver includes a 1-year activated IPTV service.
For technical support or further assistance, please contact Truman customer service or visit their official website. Contact details are typically provided in the product packaging or on the manufacturer's webсајт.


