Вовед
Thank you for choosing the suptek Single Monitor Wall Mount. This manual provides detailed instructions for the safe and efficient installation, operation, and maintenance of your new monitor arm. Please read this manual thoroughly before installation and keep it for future reference.
This wall mount is designed to securely hold a single monitor, freeing up desk space and allowing for ergonomic adjustments to enhance your viewзголемување на удобноста и продуктивноста.
Информации за безбедност
ПРЕДУПРЕДУВАЊЕ: Improper installation may result in property damage or personal injury. If you do not understand these instructions, or have doubts about the safety of the installation, please contact a qualified installer.
- Не го надминувајте максималниот капацитет на оптоварување од 19.8 lbs (9 kg).
- Ensure the mounting surface (wall) can safely support the combined weight of the mount and the monitor.
- Always use a stud finder to locate wood studs for secure mounting. For concrete or brick walls, use appropriate anchors (included). Do not mount into drywall alone.
- Држете ги децата подалеку од подвижните делови.
- Редовно проверувајте ги сите врски за да бидете сигурни дека се безбедни.
- Овој производ е наменет само за внатрешна употреба.
Содржина на пакетот
Please verify that all components are present and undamaged before installation. If any parts are missing or defective, contact customer support.
- Склоп на рачката на мониторот
- Ѕидна плоча
- Плоча ВЕСА
- Hardware Kit (screws, washers, spacers, wall anchors)
- Шестоаголни клучеви
- Упатство за употреба
Спецификации
| Карактеристика | Детал |
|---|---|
| Бренд | суптек |
| Модел | B0FHVH6PLY |
| Компатибилна големина на екран | 17 до 32 инчи |
| Тежински капацитет | 4.4 - 19.8 фунти (2 - 9 кг) |
| Компатибилност со VESA | 75х75мм, 100х100мм |
| Агол на навалување | ±80° |
| Агол на вртење | ±90° |
| Ротација | 360° |
| Максимално проширување | 20.47 инчи (52 см) |
| Опсег за прилагодување на висината | 12.59 инчи (32 см) |
| Материјал | Легуриран челик |
| Боја | Бело |

Image: Compatibility details including VESA 75x75mm and 100x100mm, max load 19.8 lbs, monitor size 13-32 inches, and compatible wall types (Wood Stud, Concrete Wall, Brick Wall).
Поставување и инсталација
Follow these steps carefully to install your monitor wall mount.
Step 1: Choose Mounting Location and Wall Type
Select a location on your wall that is structurally sound and can support the weight of the mount and your monitor. Use a stud finder to locate a wood stud for optimal security. For concrete or brick walls, ensure you use the appropriate wall anchors provided.

Image: Wall mount installation compatibility with Wood Stud (requires specific method), Concrete Wall, and Brick Wall.
Чекор 2: Прикачете VESA плоча на мониторот
- Внимателно поставете го мониторот со лицето надолу на мека, чиста површина за да спречите гребнатини.
- Идентификувајте ги VESA отворите за монтирање на задната страна од мониторот (75x75 mm или 100x100 mm).
- Select the correct screws (M4 or M5) and washers from the hardware kit that fit your monitor's VESA holes. If the screws are too long, use the provided spacers.
- Attach the VESA plate to the back of your monitor using the selected screws and washers. Do not overtighten.
Чекор 3: Монтирајте ја ѕидната плоча на ѕидот
- Hold the wall plate against the wall at your desired mounting height. Use a level to ensure it is straight.
- Mark the drilling locations through the holes on the wall plate.
- За дрвени столпчиња: Drill pilot holes (recommended size in manual) into the center of the stud. Secure the wall plate using the lag bolts provided.
- За бетонски/тулени ѕидови: Drill pilot holes (recommended size in manual) and insert the plastic wall anchors. Then secure the wall plate using the lag bolts.
- Ensure the wall plate is firmly and securely attached to the wall.
Step 4: Attach Monitor Arm to Wall Plate
Slide the monitor arm assembly onto the wall plate. Ensure it clicks securely into place. There may be a locking screw or mechanism to further secure it; refer to the detailed diagram in the included printed manual.
Чекор 5: Прикачете го мониторот на рачката
Carefully slide the monitor (with the attached VESA plate) onto the VESA head of the monitor arm. Secure it with the locking screw or mechanism, typically located on the top or side of the VESA head.
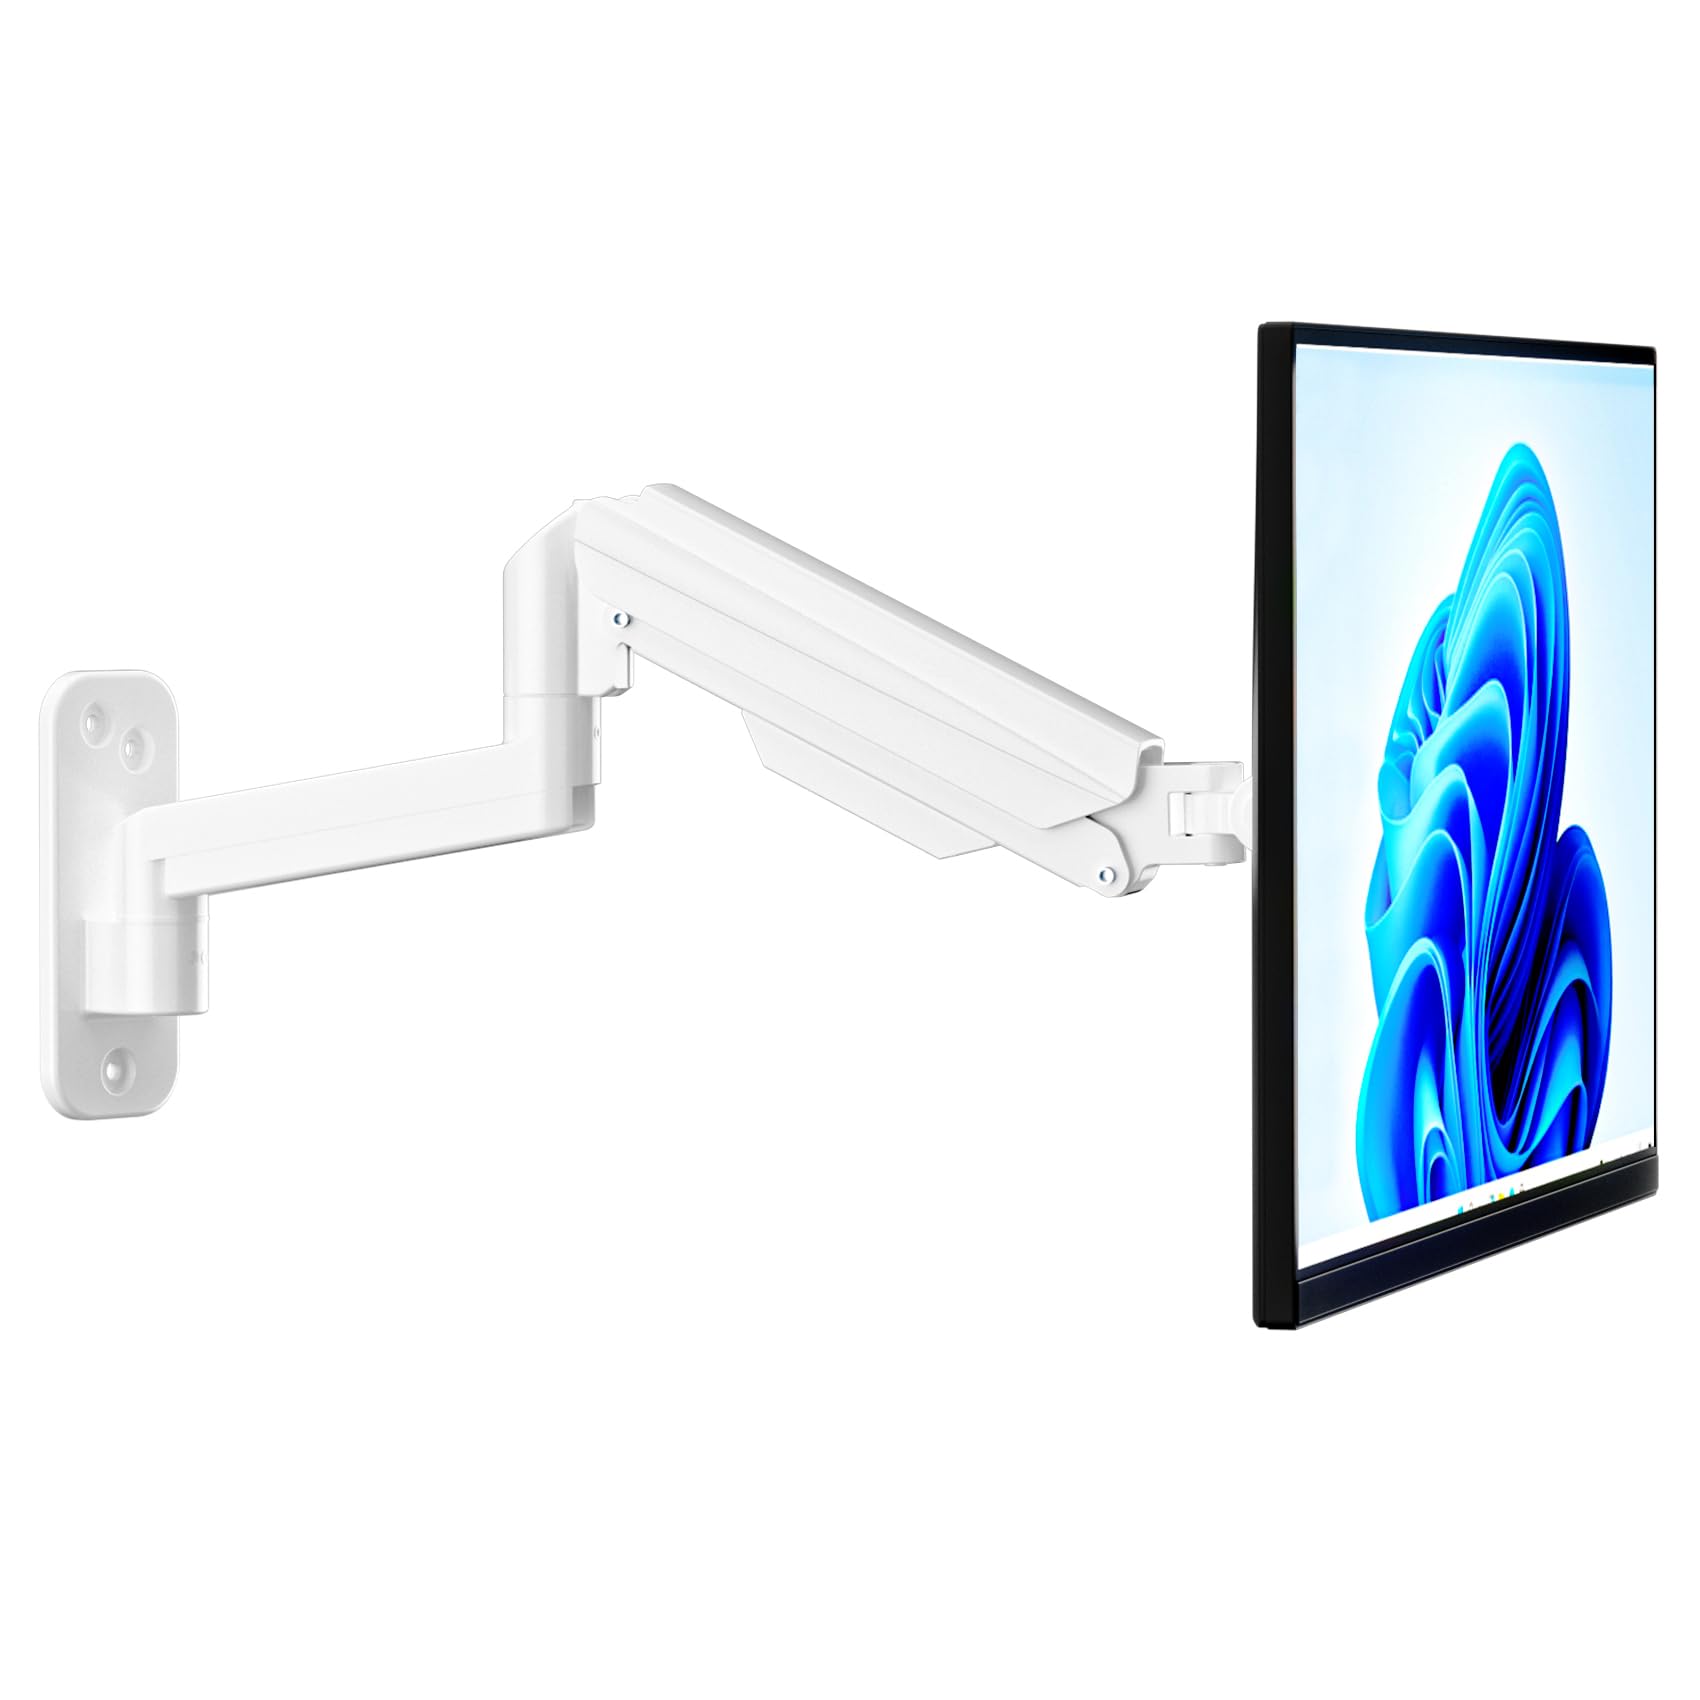
Image: Fully installed suptek Single Monitor Wall Mount with a monitor attached.
Упатства за работа
Прилагодување на затегнатоста на гасната пружина
The gas spring mechanism allows for smooth height adjustment. The tension needs to be adjusted to match your monitor's weight for optimal performance. Use the provided hex key to adjust the tension screw located on the arm.
- Turn Clockwise (+): For lighter monitors, to increase tension and prevent the monitor from dropping.
- Turn Counter-Clockwise (-): For heavier monitors, to decrease tension and allow the monitor to move down easily.
Adjust until the monitor stays at any desired height when released.

Image: Gas spring tension adjustment points and directions for lighter/heavier monitors.
Full Motion Adjustments
The monitor arm offers a wide range of motion for ergonomic positioning:
- Навалување: Adjust the monitor screen ±80° up or down to reduce glare and optimize viewинг агли.
- Завртување: Rotate the monitor ±90° left or right to share your screen or change viewнасока.
- Ротација: Ротирајте го мониторот за 360° од пејзажна во портретна ориентација.
- Продолжување/Повлекување: The arm extends up to 20.47 inches (52 cm) and retracts to save space.
- Прилагодување на висината: The gas spring allows for smooth vertical movement within a 12.59-inch (32 cm) range.
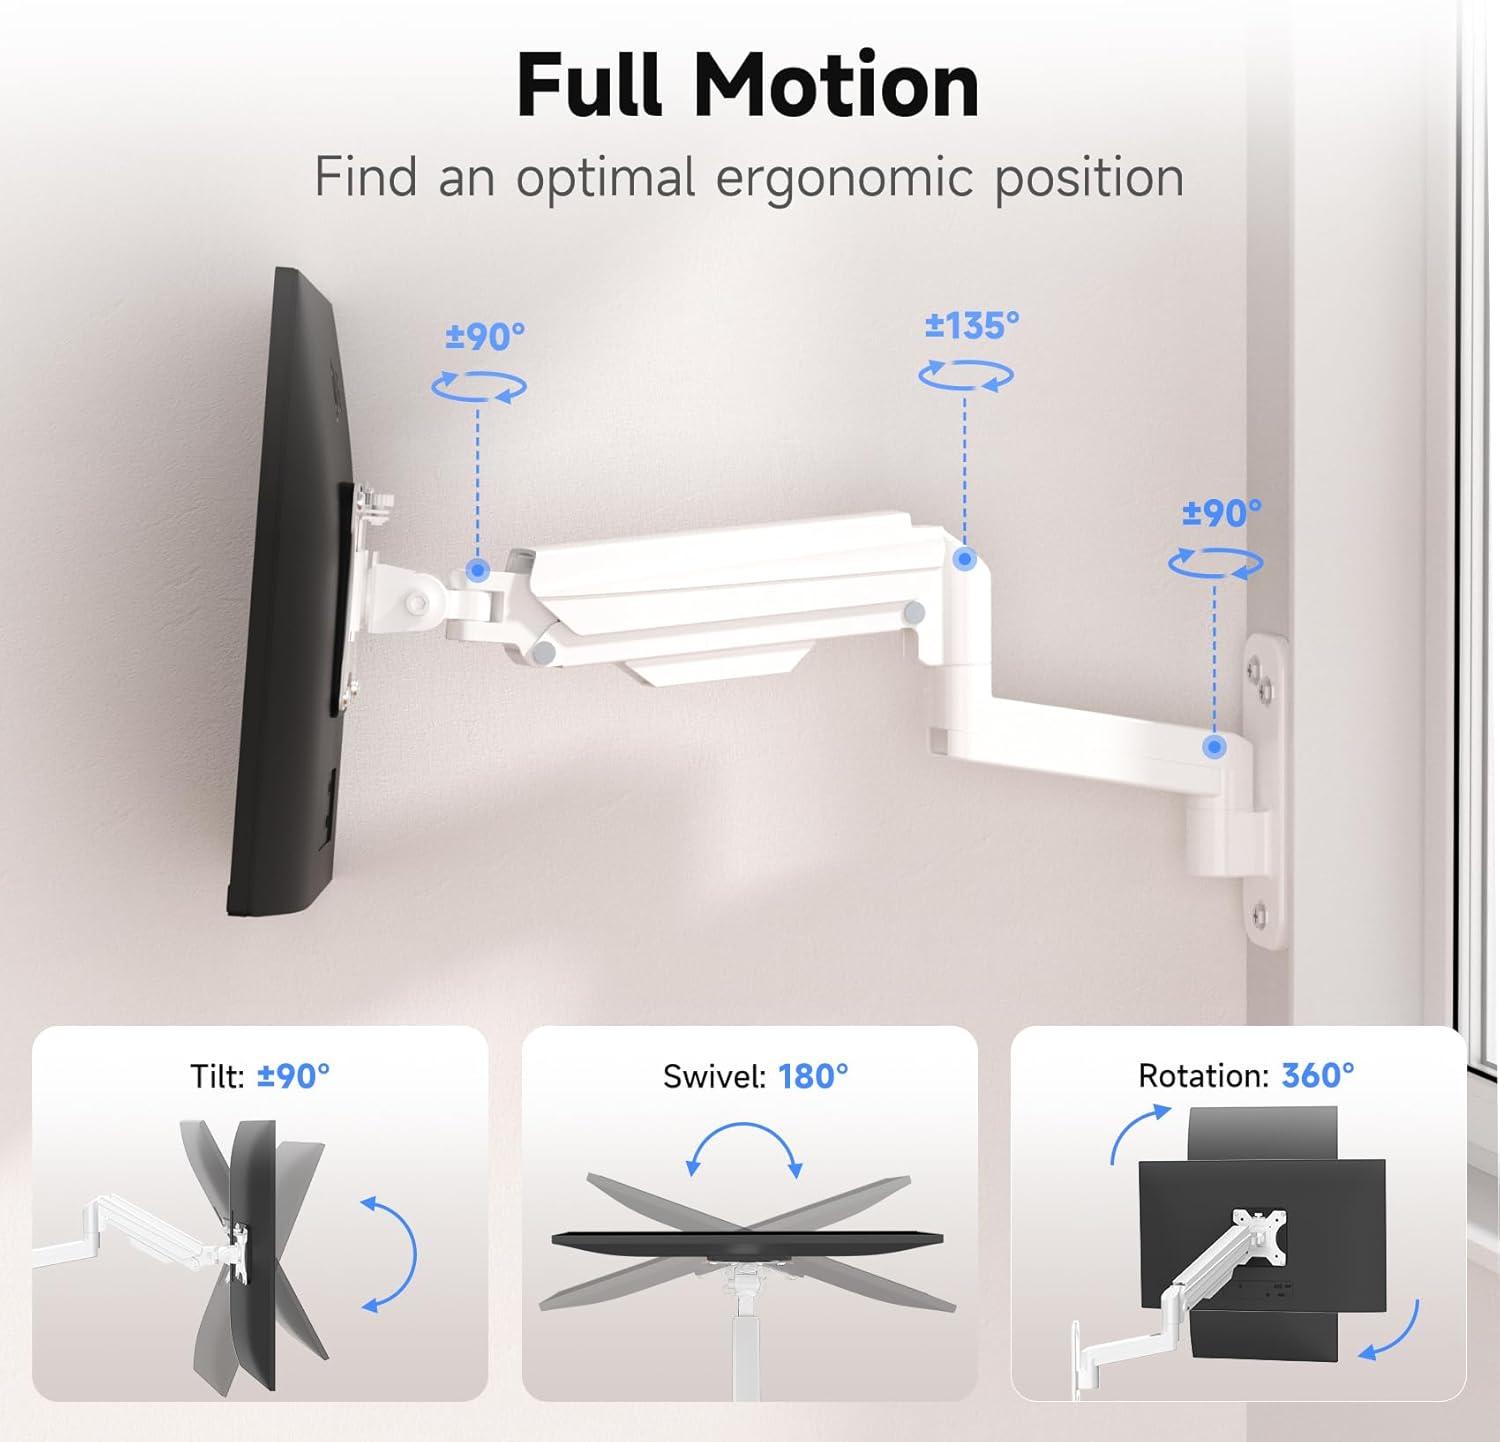
Image: Full motion capabilities including tilt, swivel, and 360° rotation.
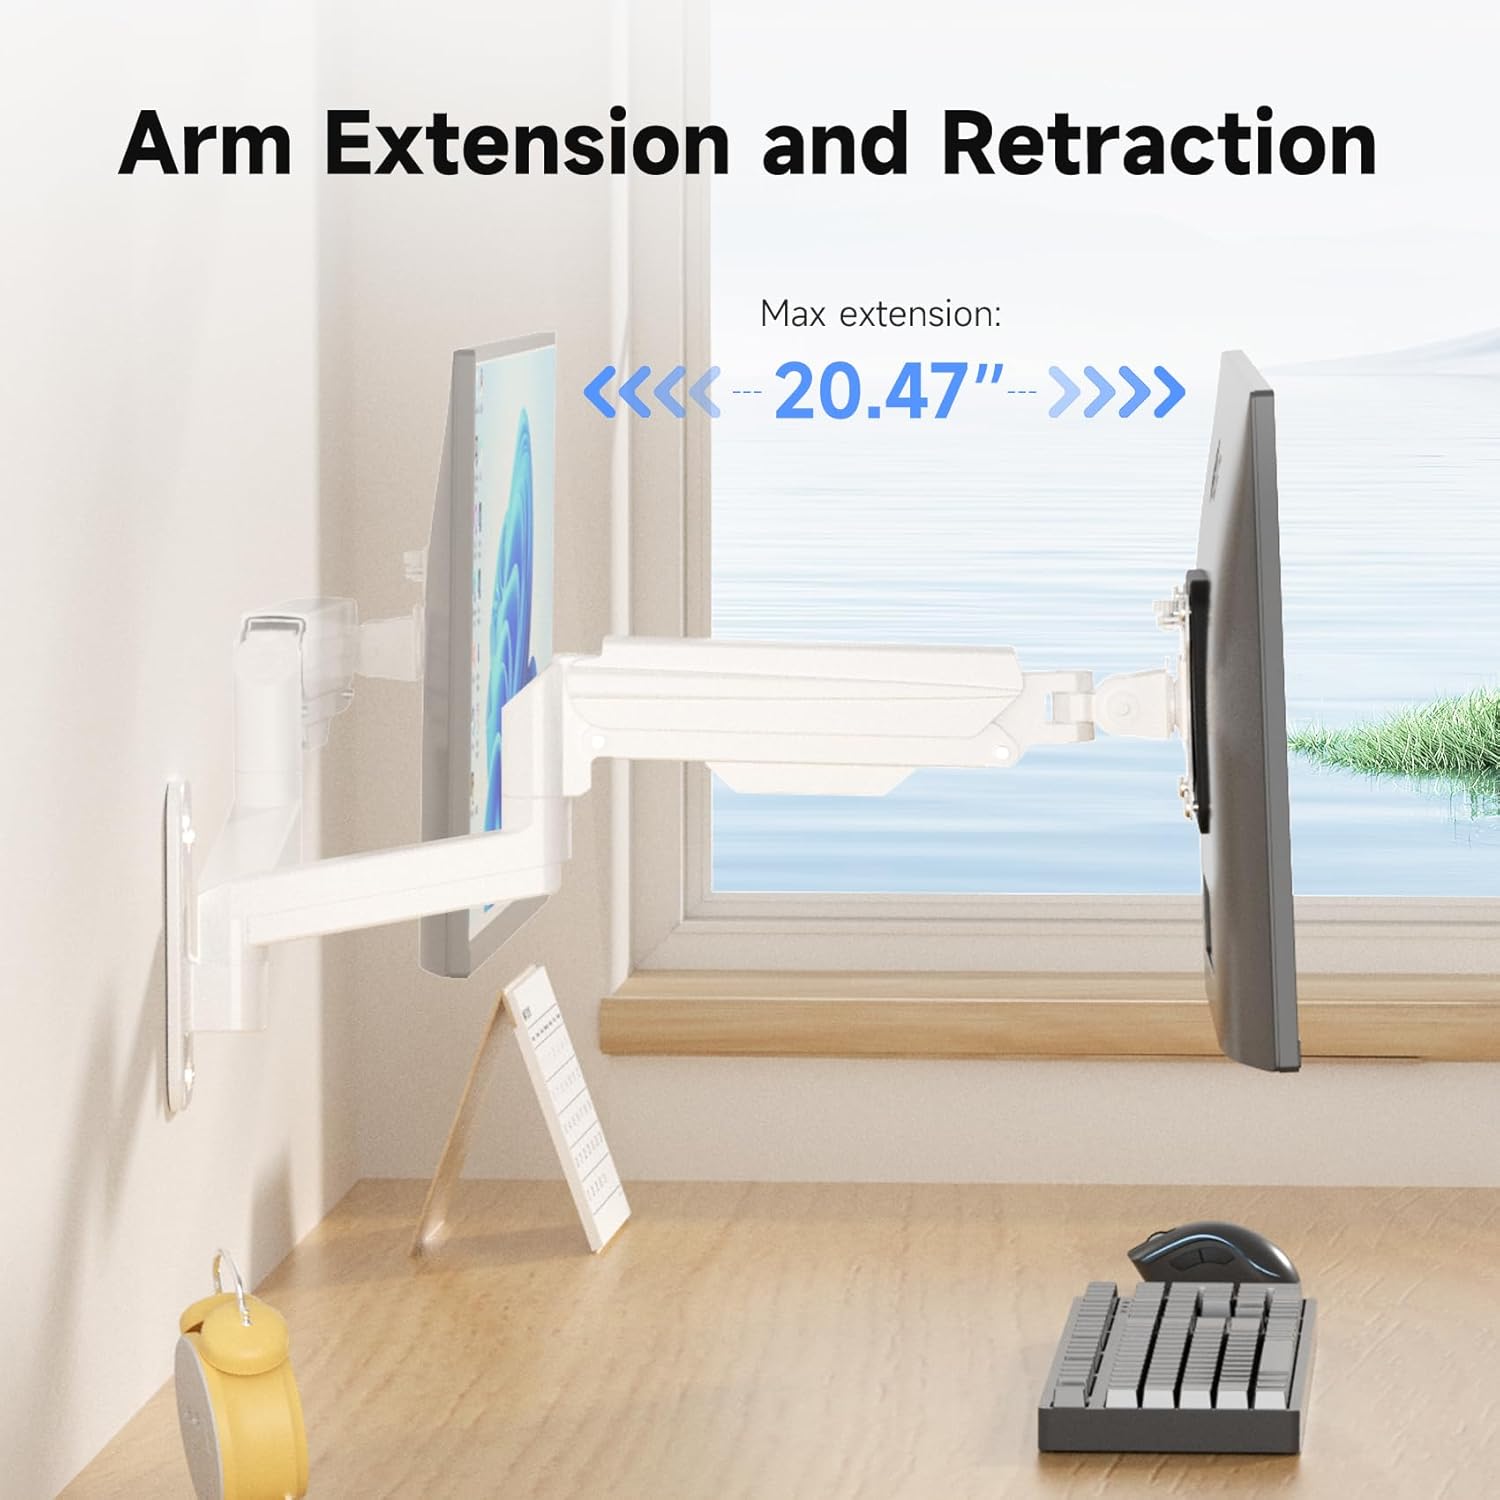
Image: Arm extension and retraction, showing a maximum extension of 20.47 inches.

Image: Height adjustment range of 12.59 inches for eye-level comfort.
Управување со кабли
The monitor arm features integrated cable management clips or channels to keep your cables organized and out of sight. Route your monitor's power and video cables through these channels for a clean and tidy workspace.
Одржување
- Периодично проверувајте ги сите завртки и врски за да се осигурате дека се цврсто и безбедно прицврстени.
- Исчистете го држачот со мека, дamp крпа. Избегнувајте абразивни средства за чистење или растворувачи.
- Do not attempt to disassemble the gas spring mechanism.
Решавање проблеми
| Проблем | Можна причина | Решение |
|---|---|---|
| Следете ги паѓањата или спуштањата | Затегнатоста на гасната пружина е прениска за тежината на мониторот. | Increase gas spring tension by turning the adjustment screw clockwise. |
| Monitor is difficult to push down or stays too high | Затегнатоста на гасната пружина е превисока за тежината на мониторот. | Намалете ја затегнатоста на гасната пружина со вртење на завртката за прилагодување спротивно од стрелките на часовникот. |
| Монтажата се чувствува нестабилна | Wall plate not securely fastened; screws loose. | Re-check all mounting screws on the wall plate and tighten them. Ensure proper wall type and anchors were used. |
| Monitor does not fit VESA plate | Incorrect VESA pattern or screw size. | Verify your monitor's VESA pattern (75x75mm or 100x100mm). Ensure you are using the correct M4 or M5 screws and spacers. |
Гаранција и поддршка
For warranty information or technical support, please refer to the warranty card included with your product or visit the official suptek website. If you have any questions or require assistance, do not hesitate to contact suptek customer service.
Контакт информации: Please refer to the packaging or suptek's official webстраница за најактуелните контакт информации.


