1. Производот завршиview
This manual provides instructions for the xmartO WiFi 6 Long Range Wire-Free Solar Home Security Camera System. This system includes a WNP810-W6 10-channel WiFi 6 NVR and 10 solar WiFi cameras, designed for comprehensive indoor and outdoor surveillance.
Главните карактеристики вклучуваат:
- 10-Camera Bundle: Monitor up to 10 areas simultaneously with the included cameras.
- Long-lasting Solar Power: Cameras are equipped with automotive-grade rechargeable batteries and solar panels for continuous power.
- Extended WiFi 6 Coverage: Cameras operate up to 1300ft from the NVR in line of sight, ensuring flexible placement.
- PIR Thermal & Humanoid Detection: Advanced detection minimizes false alerts, sending notifications for people, animals, or vehicles.
- Standalone NVR with Dual-WiFi: The NVR features two WiFi modules, one for camera connections and another for internet access, preventing network lag.
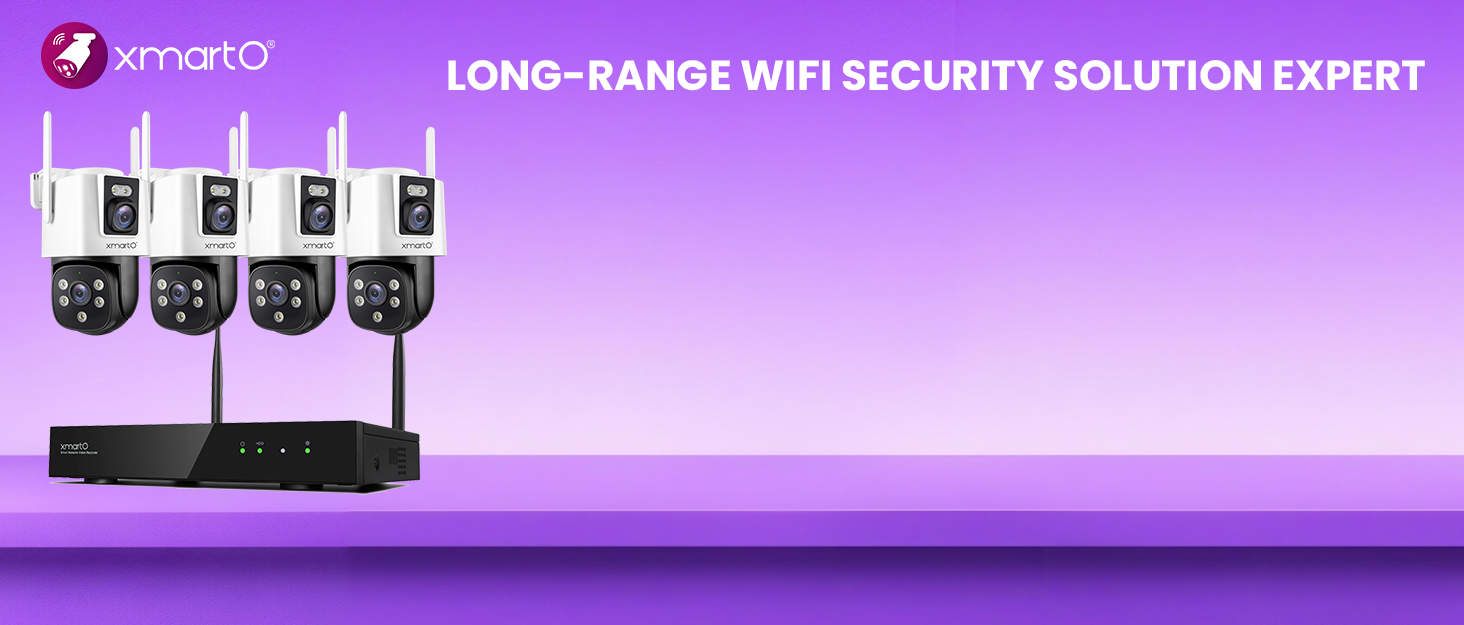
Слика 1.1: Готовоview of the xmartO WiFi 6 Solar Security Camera System with NVR and cameras.
2. Упатства за поставување
2.1 Распакување и првична инспекција
Carefully unpack all components. Verify that all items listed in the packaging contents are present and undamaged. Contact customer support immediately if any items are missing or damaged.
2.2 NVR поврзување
Connect the NVR to a monitor using an HDMI or VGA cable. Connect the power adapter to the NVR and plug it into an electrical outlet. The NVR will power on automatically. For internet access, connect the NVR to your router via an Ethernet cable or configure its internal WiFi connection.

Image 2.1: NVR ports and indicators for connection.
2.3 Camera Installation and Pairing
The cameras are designed for wire-free installation. Mount the solar panel in a location that receives ample direct sunlight throughout the day to ensure optimal charging. Position the camera to cover the desired surveillance area.

Слика 2.2: На пр.ample of wire-free camera installation with solar panel.
Почетно полнење на батеријата: Before first use, fully charge the camera batteries to 100% using a standard 5V USB charger. This ensures maximum battery life and performance.
Спарување: Follow the on-screen instructions on the NVR monitor to pair the 10 cameras with the NVR. The system is designed for easy plug-and-play setup.
Image 2.3: Illustration of the long-range WiFi capability.
3. Упатства за работа
3.1 Далечински управувач ViewИНГ и репродукција
Access your camera feeds and recorded footage from anywhere using the dedicated mobile application or through the NVR connected to a monitor. The system supports live viewing and playback of recorded events.

Слика 3.1: Далечински управувач viewing on mobile and desktop devices.

Image 3.2: Mobile app interface showing live view and recording options.
3.2 Детекција на движење и известувања
The cameras utilize PIR thermal sensors and humanoid detection to accurately identify motion from people, animals, and vehicles, reducing false alarms. When motion is detected, the system can send instant alerts to your mobile app or email.

Image 3.3: Motion detection in action with app notification.
3.3 Режими на снимање
The system offers flexible recording options:
- Снимање активирано со движење: When powered by solar and battery, cameras record only when motion is detected to conserve power.
- 24/7 континуирано снимање: If the camera is connected to a 5V phone charger (plugged in), it can record continuously.

Image 3.4: Comparison of motion-activated and 24/7 recording modes.
3.4 Automatic Warning Lights and Siren
Upon detecting an intruder, the cameras can automatically activate warning lights and a siren to deter unwanted visitors and alert you.

Image 3.5: Automatic warning lights and siren in action.
4. Одржување
4.1 Solar Panel and Battery Care
Ensure the solar panels are kept clean and free from obstructions (e.g., leaves, dirt, snow) to maximize sunlight absorption. The solar panel is designed to replenish the camera's automotive-grade rechargeable batteries daily, reducing the need for manual recharging after the initial full charge.

Image 4.1: Solar panel and battery features, highlighting all-weather charging.
Image 4.2: Cameras are designed to operate in various weather conditions.
4.2 Ажурирања на фирмверот
Periodically check for firmware updates for both the NVR and cameras through the mobile app or NVR interface. Updates can improve performance, add new features, and enhance security.
5 Смена на проблеми
5.1 Нема напојување на камерата
- Проверете ја моќноста: Ensure the camera battery is charged and the solar panel is receiving sunlight.
- WiFi сигнал: Verify the camera is within the NVR's WiFi range. Relocate the camera or NVR if the signal is weak.
- Повторно спарување на камерата: If necessary, try re-pairing the camera with the NVR following the setup instructions.
5.2 Frequent False Alerts
- Прилагодете ја чувствителноста: Reduce the motion detection sensitivity settings in the camera's configuration.
- Зони за откривање: Configure specific detection zones to exclude areas with frequent irrelevant motion (e.g., moving trees, busy roads).
- PIR Placement: Ensure the PIR sensor is not directly facing heat sources or areas with rapid temperature changes.
5.3 NVR Not Connecting to Internet
- Етернет кабел: If using a wired connection, ensure the Ethernet cable is securely connected to both the NVR and your router.
- WiFi конфигурација: If using WiFi, check the NVR's network settings and ensure it's connected to the correct network with a strong signal.
- Статус на рутерот: Verify your home router is functioning correctly and has internet access.
6. Спецификации
| Карактеристика | Детал |
|---|---|
| Модел | WNP810-W6 |
| Резолуција на камерата | 4MP QHD |
| NVR канали | 10-Channel (Expandable) |
| Стандард за WiFi | WiFi 6 |
| Опсег | До 1300 стапки (линија на видување) |
| Моќност на камерата | Wire-Free, Solar Powered with 9000mAh Rechargeable Batteries |
| Тип на откривање | PIR Thermal Sensors, Humanoid Detection |
| NVR Connectivity | Dual-WiFi Modules (for cameras & internet), Ethernet, HDMI, VGA, USB |
| Опции за снимање | SD Card (camera), NVR (HDD), Cloud Storage |
| Оперативна средина | Suitable for Indoors/Outdoors (All-Weather Charge) |
| Прво достапен датум | 19 септември 2024 година |
7. Гаранција и поддршка
7.1 Информации за гаранцијата
This xmartO product is covered by a 1-годишна Ограничена гаранција од датумот на купување. Оваа гаранција ги покрива производствените дефекти и гарантира дека производот функционира како што е предвидено при нормална употреба.
7.2 Политика за враќање
A 30-дневна гаранција за враќање на парите and free return policy are offered for this product. Please refer to your purchase platform's return guidelines for detailed instructions.
7.3 Поддршка за корисници
For technical assistance, troubleshooting, or any product-related inquiries, xmartO provides 24/7 онлајн поддршка. Please visit the official xmartO website or refer to the contact information provided with your product packaging for support options.
Слика 7.1: Готовоview of after-sales support.


